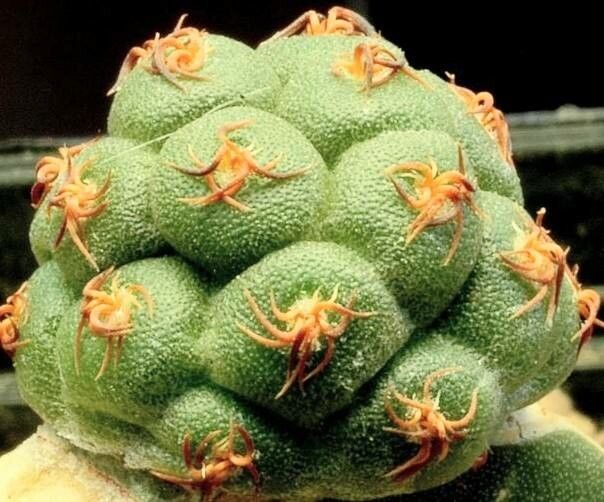
Hello, fellow plant lovers! I’m so excited to chat with you today about a truly special succulent: Tephrocactus bonnieae. You know, the one with those wonderfully strange, segmented stems that look like little prickly caterpillars or tiny alien fingers? It’s a real showstopper in any collection, and honestly, propagating them is one of those deeply satisfying gardening wins. Now, I won’t lie, Tephrocactus bonnieae can be a tad particular, so while not difficult for a complete beginner, it’s a wonderful plant to tackle once you’ve got a little experience under your belt. But trust me, the reward of watching those little bits of magic take root is absolutely worth it!
The Best Time to Start
For the highest success rate with Tephrocactus bonnieae, spring is your absolute best friend. This is when the plant is actively growing and has the most energy to put into developing roots. You’re looking for healthy, mature stems to work with. Avoid taking cuttings from any part of the plant that looks stressed or hasn’t been growing vigorously. Think of it as catching your plant at its peak vitality!
Supplies You’ll Need
Gathering your supplies ahead of time makes the whole process so much smoother. Here’s what I always have on hand:
- Well-Draining Potting Mix: A cactus and succulent blend is essential. I often add extra perlite or pumice to ensure it drains like a sieve.
- Sharp, Clean Pruning Shears or a Craft Knife: Sterilize these with rubbing alcohol to prevent any disease transfer.
- Rooting Hormone (Optional but Recommended): This can give your cuttings a little boost. Look for one specifically for cuttings.
- Terra Cotta Pots or Pots with Drainage Holes: Terra cotta breathes well, which is great for succulents.
- Gloves (Optional): Those spines can be surprisingly pokey!
- A Spray Bottle: For gentle misting when needed.
- A Sunny, Well-Lit Spot: This is crucial!
Propagation Methods
The most straightforward and successful way to propagate Tephrocactus bonnieae is through stem cuttings. It’s remarkably effective!
- Select Your Cutting: Look for a healthy segment or two from your established plant. Gently twist or cut it off at a joint.
- Callus Over: This is a critical step for succulents. Place your cutting on a dry paper towel in a bright, indirect light spot for 3-7 days. You want the cut end to dry and form a protective callus. This prevents rot.
- Prepare the Pot: Fill your chosen pot with your well-draining soil mix.
- Apply Rooting Hormone (if using): Dip the callused end of the cutting into the rooting hormone powder, tapping off any excess.
- Plant the Cutting: Make a small hole in the soil with your finger or a pencil. Gently insert the callused end of the cutting into the hole. You want it to stand upright, so position it so that about a quarter to a third of it is buried in the soil. Firm the soil gently around the base.
- Resist Watering Immediately: I know it’s tempting, but for the first few days, do not water. Let the plant settle in.
Water Propagation Note: While some succulents do well in water, I find that with Tephrocactus bonnieae, it’s best to stick to the soil method. The delicate segments can rot quite easily if they stay waterlogged.
The “Secret Sauce” (Pro Tips)
Here are a few little tricks I’ve learned over the years that really make a difference:
- Gentle Air Circulation is Key: Once you’ve planted your cuttings, avoid crowding them. Good airflow helps prevent fungal issues and encourages faster rooting. I often position them near a window where there’s a gentle breeze.
- Bottom Heat is Your Friend: If you can, placing your pots on a seedling heat mat set to a low temperature (around 70-75°F) can significantly speed up the rooting process. It mimics the warmth of spring soil.
- Don’t Over-Mist: When you do start watering, be very conservative. A light misting of the soil surface every week or two is usually enough, only when the soil is completely dry. Too much moisture, especially from above, is the fastest way to invite rot.
Aftercare & Troubleshooting
Once your cuttings have been in their pots for a few weeks, you can gently tug on one. If you feel resistance, congratulations! You likely have roots. Now, you can start watering a bit more deeply, but still only when the soil is bone dry. Allow the soil to dry out completely between waterings.
The most common sign of failure is rot. If you see your cutting becoming mushy, turning black, or developing soft spots, it’s usually a sign of too much moisture. In this case, sadly, it’s best to discard it. If you catch it early, you might be able to salvage a healthy segment and start again, ensuring it calluses properly this time.
Happy Propagating!
Growing new plants is such a rewarding journey, isn’t it? It’s a testament to nature’s resilience and your own nurturing touch. Be patient with your Tephrocactus bonnieae cuttings. Some may take longer than others to root, and that’s perfectly okay! Enjoy the process, celebrate each little success, and soon you’ll have a whole new family of these fascinating plants to admire. Happy gardening!
Resource: