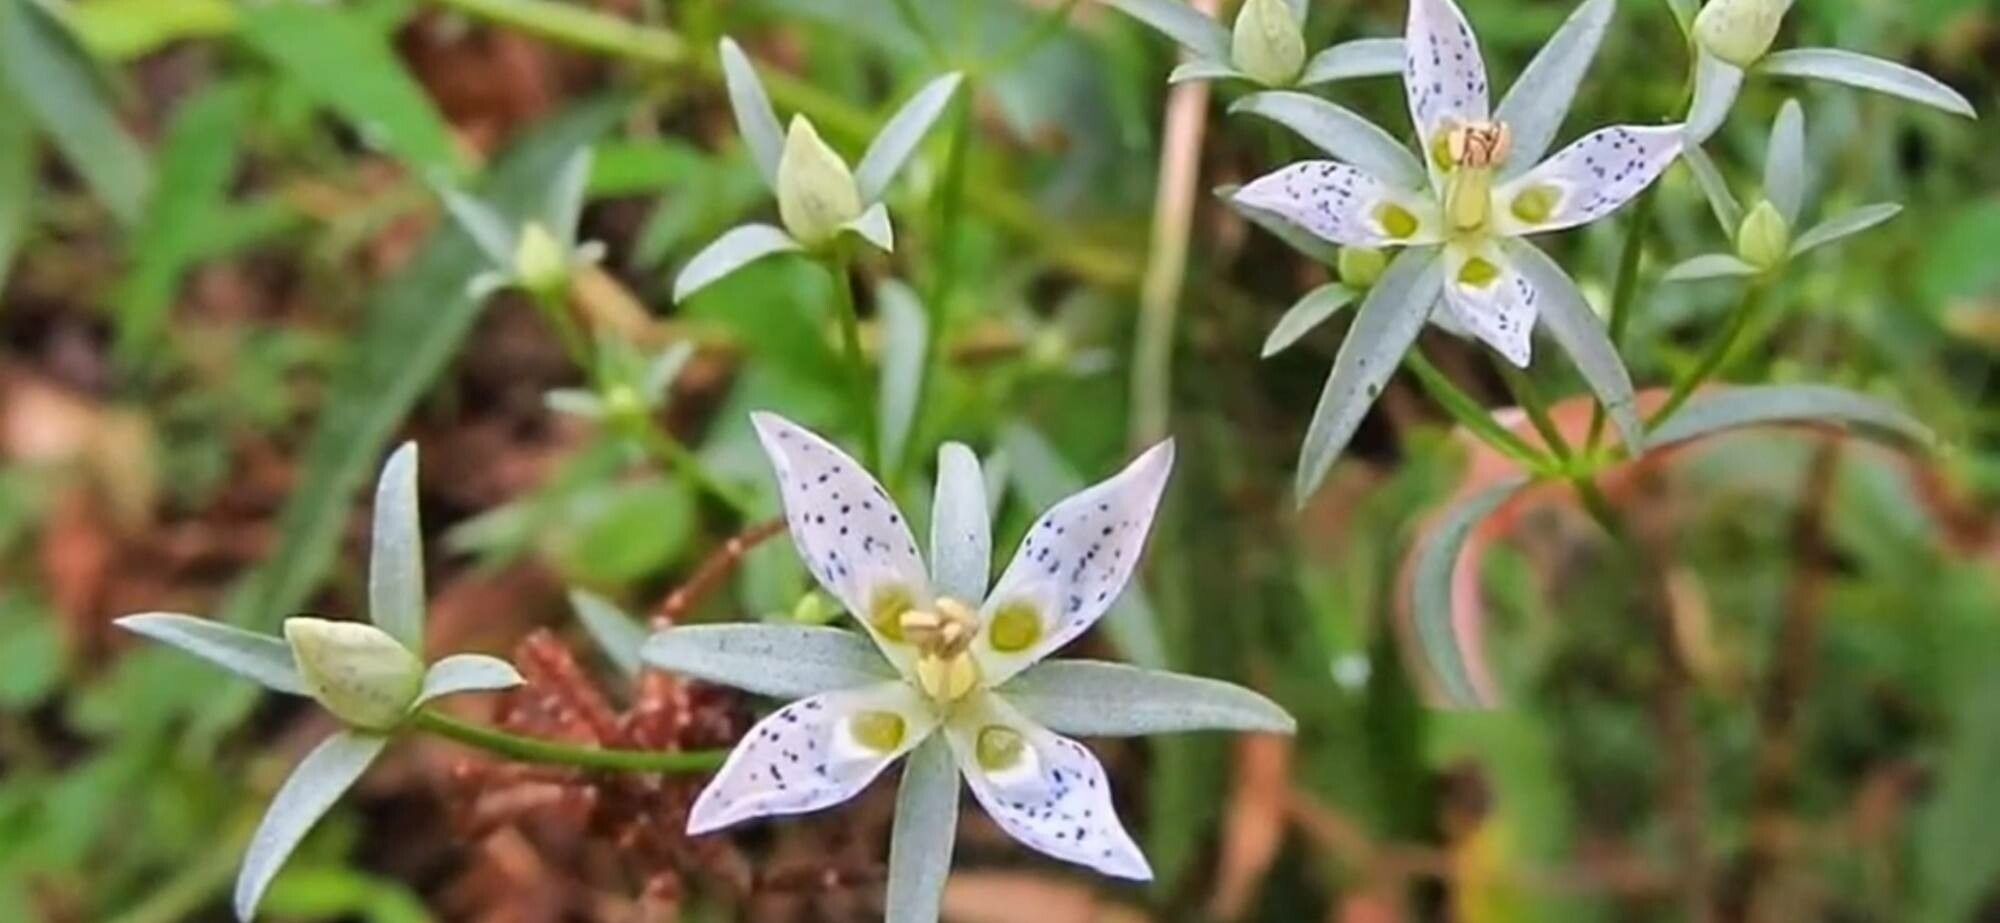
Hello, fellow garden enthusiasts! I’m so excited to chat with you today about a truly special plant: Swertia angustifolia, often called the Himalayan Gentian or sometimes just a beautiful blue wildflower. If you’ve ever seen its striking, star-shaped blue flowers gracing a sunny meadow or a well-tended rock garden, you’ll understand its appeal. There’s just something incredibly satisfying about nurturing a new plant from scratch, and with Swertia angustifolia, that feeling is amplified by the sheer beauty of its blooms. Now, is it a walk in the park for absolute beginners? I’d say it leans a little more towards the “challenging but very rewarding” side. With a bit of attention and understanding, though, you’ll be celebrating your own little blue wonders in no time.
The Best Time to Start
For Swertia angustifolia, I’ve found that early spring, just as new growth is really beginning to emerge, is your golden ticket for the highest success rates. You want to catch the plant when it’s actively growing and full of energy. Alternatively, late summer after the main flowering flush can also work for certain methods, but spring propagation generally gives those young plants a full growing season to establish themselves.
Supplies You’ll Need
Here’s what I always have on hand when I’m propagating:
- Sharp, clean pruning shears or a razor blade: For making clean cuts. Sterilize them with rubbing alcohol!
- Well-draining potting mix: A blend of equal parts peat moss, perlite, and coarse sand is ideal. Or, a good quality seed-starting mix will work.
- Perlite or vermiculite: To help with aeration and drainage.
- Small pots or seed trays: With drainage holes, of course!
- Rooting hormone (optional but recommended): A powdered form works best for cuttings.
- Plastic bags or a propagator: To create a humid environment.
- Watering can with a fine rose: For gentle watering.
- Labels: Essential for keeping track of what you’ve planted!
Propagation Methods
Swertia angustifolia can be propagated through a couple of methods. While seed germination can be a bit finicky, I’ve had the most luck with stem cuttings and division.
Stem Cuttings
This is often my go-to method for many perennials.
- Take Cuttings: In early spring, using your sharp, sterilized shears, take 4-6 inch stem cuttings from healthy, non-flowering shoots. Make sure each cutting has at least two sets of leaves. Cut just below a leaf node (where a leaf attaches to the stem).
- Prepare the Cuttings: Gently remove the lower leaves from the bottom half of the cutting. This exposes the nodes where roots will form.
- Apply Rooting Hormone: Dip the wounded end of the cutting into your rooting hormone, tapping off any excess.
- Plant the Cuttings: Fill your small pots with your well-draining potting mix. Make a small hole with a pencil or your finger and gently insert the cutting. Firm the soil gently around the base of the stem.
- Water Gently: Water thoroughly but gently. You don’t want to dislodge the cutting.
- Create Humidity: Cover the pot with a clear plastic bag, securing it with a rubber band. This creates a mini-greenhouse effect. You can also use a propagator. Ensure the leaves aren’t touching the plastic sides if possible.
Division
If you have an established clump of Swertia angustifolia, division is a wonderful way to get more plants and invigorate the parent plant.
- Dig with Care: In early spring, carefully dig up the entire plant. Loosen the soil around the base.
- Separate the Roots: Gently pull the clumps apart. You’re looking for sections that have both roots and some healthy shoots.
- Replant Immediately: Replant the divisions into well-prepared soil, spacing them appropriately. Water them in well.
The “Secret Sauce” (Pro Tips)
Here are a few little tricks I’ve learned over the years that can make a big difference:
- Bottom Heat is Your Friend: For stem cuttings, placing the pots on a gentle heating mat can significantly speed up root development. Aim for around 70-75°F (21-24°C).
- Don’t Overwater the Cuttings: This is crucial! While they need moisture, soggy conditions are a fast track to rot. My mantra is: keep it moist, but never waterlogged. I often mist the leaves daily in addition to watering the soil.
- Patience with Division: When dividing, don’t be afraid to gently tease apart the roots. If you have a really stubborn clump, you might need to use a clean knife to help separate it, but always aim for sections with healthy root systems.
Aftercare & Troubleshooting
Once your cuttings have started to root – you’ll often see new leaf growth appearing – it’s time to transition them.
- Acclimatize Gradually: If you used a plastic bag, start to open it up a little each day for a week to let the cuttings get used to the drier air.
- Watering: Continue to water when the top inch of soil feels dry.
- Transplanting: Once the new plants have developed a good root system (you can gently tug on them, and they’ll resist slightly, or you might see roots emerging from the drainage holes), they’re ready to be transplanted into their own individual pots or their final garden spot.
Now, what if things don’t go as planned? The most common culprit for cuttings that fail is rot. This usually means too much moisture and not enough air circulation. If you see mushy stems or blackening at the base, unfortunately, those have likely been lost. It’s always best to start with more cuttings than you think you’ll need because not every single one will make it. For divisions, lack of establishment usually means the parent plant wasn’t healthy to begin with, or the weather was too harsh when you divided. Don’t get discouraged!
A Little Encouraging Closing
Propagating Swertia angustifolia is a labor of love, and it definitely requires a bit more finesse than, say, a zombie-proof succulent. But oh, the satisfaction when you see those first tiny roots emerge, or when your division bursts into bloom! Be patient with yourself and with the plants. Every gardener has learned through trial and error – myself included! So, gather your supplies, get your hands dirty, and enjoy the wonderful process of bringing more of these beautiful blue blooms into your garden. Happy propagating!
Resource: