Hello, fellow garden lovers!
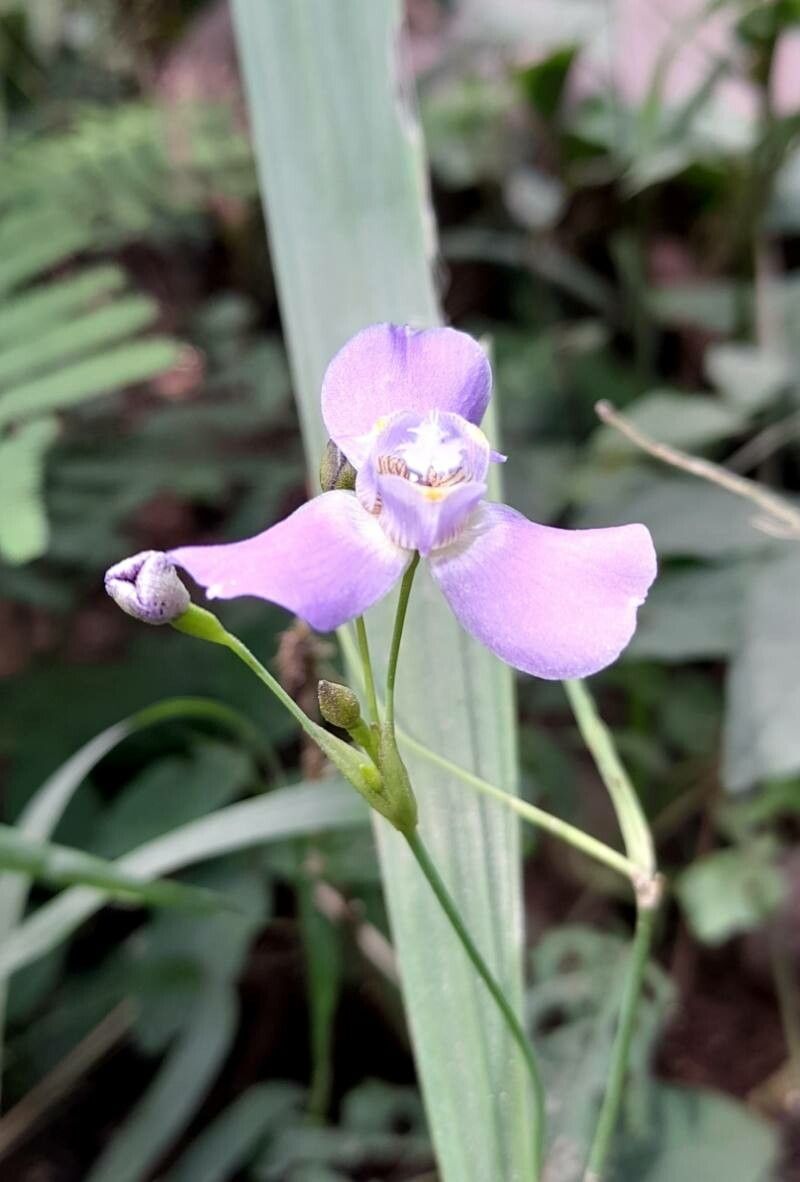
Sometimes, a plant just captures your heart. For me, that’s Ennealophus euryandrus. Its delicate, orchid-like blooms, often with a captivating fragrance, bring such a touch of elegance to any space. If you’ve fallen for this beauty, you’re in for a treat. Propagating your own Ennealophus euryandrus is incredibly rewarding, letting you expand your collection or share these treasures with friends. Now, I’ll be honest, it’s not the absolute easiest plant to propagate for total beginners, but with a little patience and these tips, you’ll be well on your way to success.
The Best Time to Start
Generally, spring is your best bet for Ennealophus euryandrus. This is when the plant is actively growing after its winter rest, meaning it has plenty of energy to put into forming new roots. Look for new growth shoots that are a few inches long and still somewhat pliable. Avoid taking cuttings from flowering stems, as the plant’s energy will be focused there.
Supplies You’ll Need
Here’s what you’ll want to have on hand:
- Sharp, clean pruning shears or a sharp knife: Hygiene is key to preventing disease.
- Rooting hormone (optional, but recommended): This can significantly boost your success rate. Look for one specifically for stem cuttings.
- Well-draining potting mix: A mix of equal parts peat moss or coco coir, perlite, and a bit of orchid bark usually works wonders. You want something airy that won’t hold too much moisture.
- Small pots or propagation trays: These should have drainage holes.
- Clear plastic bags or a propagation dome: To create a humid environment.
- Water: For watering and, if you choose, for water propagation.
- Labels: To keep track of your cuttings and dates.
Propagation Methods
For Ennealophus euryandrus, stem cuttings are generally the most successful method. It’s a straightforward process that gives you a good chance of striking roots.
Stem Cuttings:
- Select Your Cuttings: Using your clean shears, take healthy stem cuttings that are about 4-6 inches long. Crucially, make your cut just below a leaf node. This is where new roots are most likely to form. Remove the lower leaves, leaving only the top two or three.
- Apply Rooting Hormone: Dip the cut end of the stem into your rooting hormone. Tap off any excess.
- Plant Your Cuttings: Fill your small pots with your prepared potting mix. Make a small hole in the center of each pot with your finger or a pencil. Gently insert the cuttings into the holes, ensuring the nodes where you removed the leaves are below the soil surface. Firm the soil gently around the base of each cutting.
- Water Lightly: Water the soil thoroughly until you see water draining from the bottom. Allow excess water to drain away.
- Create Humidity: Place the pots inside a clear plastic bag, sealing it loosely around the rim, or cover them with a propagation dome. This creates a miniature greenhouse effect, keeping the humidity high, which is vital for preventing the cuttings from drying out.
- Provide Bright, Indirect Light: Place your propagated cuttings in a warm spot with bright, indirect light. Avoid direct sunlight, which can scorch the delicate new leaves and overheat the enclosed environment.
- Be Patient! It can take anywhere from 4 to 8 weeks, sometimes even longer, for you to see signs of rooting. You’ll know they’ve rooted when you gently tug on a cutting and feel resistance, or if you start to see new leaf growth.
Water Propagation (An Alternative):
If you prefer, you can also try water propagation. It’s a bit more visual, but you need to be extra careful about rot.
- Prepare the Cuttings: Follow steps 1 from the stem cutting method (select cuttings, remove lower leaves).
- Place in Water: Fill a clean glass or jar with room-temperature water. Place the cuttings in the water, ensuring that no leaves are submerged below the water line. Leaves in the water will quickly rot and can kill the cutting.
- Location and Water Changes: Place the jar in bright, indirect light. Change the water every 2-3 days to keep it fresh and oxygenated.
- Root Development: You should start to see small white roots developing within a few weeks. Once the roots are about an inch long, it’s time to transplant them into your well-draining potting mix using the steps outlined for stem cuttings.
The “Secret Sauce” (Pro Tips)
Alright, here are a couple of things I’ve learned over the years that can really make a difference:
- Bottom Heat is Your Friend: While not strictly essential, placing your pots on a gentle seedling heat mat can significantly speed up root development. The warmth encourages the roots to form more readily. Just make sure it’s not too hot – you want gentle warmth, not cooking!
- The “Scratch Test” for Rooting Hormone: Some people worry about how much rooting hormone to use. A neat trick is to take a clean razor blade and lightly scrape off a tiny sliver of the outer skin from the very bottom tip of the cutting. This exposes the inner tissue, making it more receptive to the rooting hormone’s magic. Then, you dip this scraped area into the powder.
Aftercare & Troubleshooting
Once your cuttings have developed a good root system (you’ll see new growth or feel resistance when gently tugging), it’s time to move them into their own little homes. Gently transplant them into individual pots filled with your well-draining mix. Water them in and continue to keep them in bright, indirect light. You can gradually remove the humidity dome or plastic bag over the next week or two to acclimate them to normal room humidity.
Now, what if things go wrong? The most common culprit is rot. If your cuttings look mushy, brown, or have blackening stems, it’s usually a sign of overwatering or poor drainage. Sad to say, these are usually lost causes. Always err on the side of slightly underwatering rather than overwatering, especially when they’re just starting out. If you see wilting, it could be that the cutting is drying out too quickly before it has roots, or the soil is bone dry.
A Gentle Closing
Propagating plants is a journey of both science and patience. Don’t get discouraged if your first attempt isn’t perfect. Every cutting you take, every root you nurture, is a step forward. Enjoy the process, celebrate the successes, and soon you’ll have a whole troop of Ennealophus euryandrus to admire. Happy gardening!
Resource: