Hey there, fellow plant lovers!
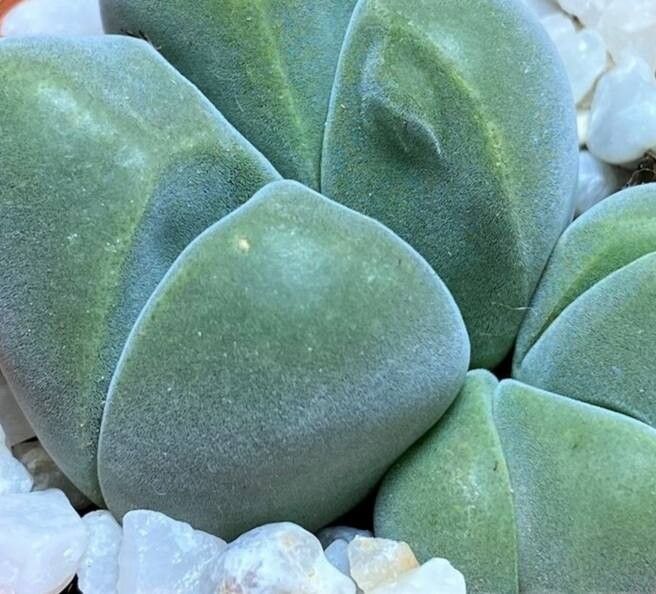
If you’ve ever spotted a Vanheerdea divergens and thought, “Wow, what IS that?” you’re not alone. These fascinating succulents, with their plump, elongated leaves that often have a lovely dusky hue, have a quiet charm that can really draw you in. And the best part? Sharing that charm by propagating them is incredibly rewarding. It’s like creating little green ambassadors of your own beautiful plant!
Now, let’s talk beginners. Is Vanheerdea divergens a good one to start with? Honestly, I’d say it’s moderately easy. It doesn’t throw a massive tantrum if you miss a watering, but it does appreciate a bit of attention to detail. Stick with me, and we’ll get you plenty of new little aloes to love.
The Best Time to Start
For most succulents, including our Vanheerdea divergens, the spring and summer months are your golden ticket. This is when the plant is actively growing and has the most energy to put into developing new roots. Aim for when you see new leaves pushing out or the plant looking robust and healthy. Avoid propagating when the plant is stressed, like during a heatwave or if it’s been overwatered.
Supplies You’ll Need
Gathering your tools beforehand makes the whole process smoother. Here’s what I usually have on hand:
- Sharp, clean pruning shears or a sharp knife: Essential for making clean cuts.
- Well-draining succulent or cactus potting mix: You can buy this, or I like to mix my own with equal parts potting soil, coarse sand, and perlite.
- Small pots or trays: For housing your new cuttings. Make sure they have drainage holes!
- Rooting hormone (optional but recommended): This can give your cuttings a nice boost.
- Watering can with a fine rose or a spray bottle: For gentle watering.
- Labels and a marker: To keep track of what you’ve propagated and when.
Propagation Methods
Vanheerdea divergens is a pretty forgiving plant when it comes to propagation. Here are a couple of methods that work wonderfully:
1. Stem Cuttings: This is my go-to method for Vanheerdea divergens.
- Step 1: Take the Cuttings. Using your clean shears or knife, carefully cut off a healthy stem that’s at least 3-4 inches long. Look for stems with a few sets of leaves.
- Step 2: Let it Callus. This is crucial! Lay the cuttings on a dry surface in a well-lit spot, away from direct sun, for 3-7 days. You want the cut end to dry out and form a protective callous. This prevents rot when you pot them up.
- Step 3: Potting Up. Once calloused, dip the cut end in rooting hormone if you’re using it. Then, insert the cut end into your prepared succulent potting mix. Don’t bury it too deep, just enough to stand upright.
- Step 4: Initial Watering. Water very lightly, maybe just a gentle misting. The soil should be barely moist.
2. Division: If your plant is getting a bit crowded and has multiple rosettes or offsets, division is a great way to go.
- Step 1: Gently Remove from Pot. Carefully take your Vanheerdea divergens out of its pot.
- Step 2: Separate the Offsets. Gently pull apart the offsets (baby plants) from the main plant. If they’re stubborn, you might need to use your clean knife to gently sever the connection, being sure to get some roots attached to the offset if possible.
- Step 3: Pot the Divisions. Plant each division in its own small pot filled with the succulent mix, just as you would a cutting. Again, aim for soil that’s barely moist.
The “Secret Sauce” (Pro Tips)
Here are a few little tricks I’ve picked up over the years that really help:
- Don’t Rush the Callousing: I know it feels odd to leave a cutting out to dry, but that protective layer is your best defense against fungal issues down the line. Be patient!
- Bottom Heat is Your Friend: If you can, place your pots on a seedling heat mat set to a low temperature (around 70-75°F or 21-24°C). This gentle warmth encourages root development from below, speeding things up considerably.
- Avoid Overwatering New Cuttings: This is probably the most common mistake. New cuttings simply don’t have roots to absorb much water. Keep the soil on the drier side and only water when the soil feels completely dry. A misting is often enough for the first few weeks.
Aftercare & Troubleshooting
Once your cuttings or divisions have rooted (this can take anywhere from a few weeks to a couple of months), you can start treating them like established plants.
- Watering: Water thoroughly when the soil is completely dry. Stick your finger in about an inch – if it’s dry, it’s time.
- Light: Place them in a bright spot, but avoid intense, direct midday sun, especially when they are young and still developing. Filtered light or morning sun is ideal.
- Troubleshooting: The biggest issue you’ll face is rot. If your cutting looks mushy, black, or slimy at the base, it’s likely rotted. This is usually due to too much moisture or insufficient callousing. If you catch it early, you can try to cut away the rotted part and re-callus, but often, it’s too far gone. Yellowing leaves on a cutting can sometimes mean it needs a bit more light, but always prioritize avoiding rot.
A Little Encouragement
Watching a tiny cutting transform into a beautiful new plant is one of life’s simple gardening joys. Don’t get discouraged if your first few attempts aren’t perfect. Every gardener has had failures! Be patient with your Vanheerdea divergens, give them the right conditions, and most importantly, enjoy the process of nurturing new life. Happy propagating!
Resource: