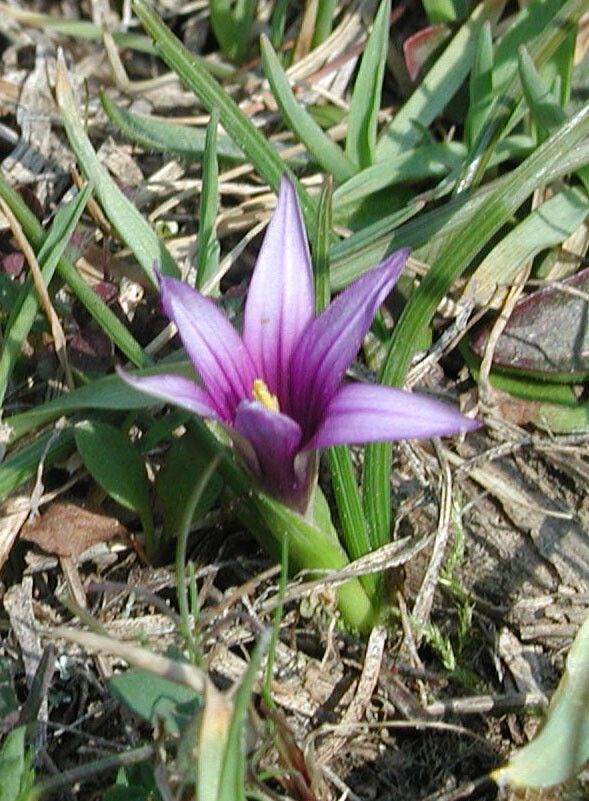
Ah, Romulea linaresii! It’s such a charming little bloom, isn’t it? Those delicate, star-shaped flowers popping up with such cheer. I’ve spent many a happy hour admiring them in my own garden, and let me tell you, propagating them is a truly satisfying endeavor. It’s like creating your own little army of these beauties. Now, for beginners, I’d say Romulea linaresii is moderately easy to propagate. It definitely rewards a little attention and care, but you’ll likely have success without too much fuss.
The Best Time to Start
For Romulea linaresii, the sweet spot for propagation is usually after flowering, in late spring or early summer. This is when the plant has finished putting on its show and is preparing for its resting period. You’ll often find it’s easier to divide the corms or manage any seed collection around this time.
Supplies You’ll Need
Getting your little workspace ready is half the fun! Here’s what I usually gather:
- Well-draining potting mix: This is crucial! I often use a mix of coarse sand, perlite, and a good quality potting compost. About 50% sand/perlite to 50% compost works wonders for me.
- Small pots or seed trays: Clean, of course!
- A sharp knife or trowel: For dividing corms. Make sure it’s clean to prevent disease.
- Watering can with a fine rose: For gentle watering.
- Labels and a pen: To keep track of what you’ve planted and when!
- (Optional) Rooting hormone: While not strictly necessary for Romulea, it can give cuttings a little boost if you’re trying that method (though division is more common).
Propagation Methods
Romulea linaresii is most commonly propagated through division of its corms. Think of them as tiny underground bulbs.
- Gently excavate: After flowering, and once the foliage starts to yellow and die back, carefully dig up your Romulea plants. You can do this with a trowel or even just your hands, being mindful not to damage the corms.
- Identify the corms: You’ll see the small, rounded corms nestled together. They might have little offsets attached to the main corm.
- Separate the corms: Using your clean knife or trowel, carefully break apart the corms. Try to get at least one good bud or growing point on each new corm. Don’t worry if they look a bit dry; that’s normal.
- Pot them up: Fill your small pots with your well-draining mix. Plant each separated corm about 1-2 cm deep, with the pointed end (where the shoot will emerge) facing upwards.
- Water gently: Water the pots lightly to settle the soil around the corms.
- Provide resting conditions: Place the pots in a cool, dry, and well-ventilated spot. This is their dormancy period. Think of it as a good nap! They don’t need light at this stage.
The “Secret Sauce”
Here are a couple of little tricks I’ve learned over the years that have helped me out:
- Don’t overwater during dormancy: This is probably the biggest culprit for failure with cormous plants. Resist the urge to water them constantly while they’re resting. A very light sprinkle every month or so might be all they need if your resting spot is very dry, but often, they’re fine with just the moisture already in the soil.
- Let the soil tell you when it’s time: When you’re ready to wake them up in the autumn, I like to give the pots a light watering and then wait for signs of new growth. Often, you’ll see a tiny shoot emerge before you even notice any other change. That’s your cue they’re ready to start growing again.
Aftercare & Troubleshooting
Once you see those first brave little shoots emerging in autumn, it’s time to give them a bit more attention.
Move the pots to a bright, cool spot. Think of a sunny windowsill that doesn’t get baking hot. Water them more regularly, but always let the top inch of soil dry out between waterings. You want them to be moist, not soggy. As they grow, you can eventually transplant them into larger containers or their garden spot.
The most common issue you might encounter is rot. This usually happens from overwatering, especially during their dormant phase. If you suspect a corm has rotted, you’ll likely see a mushy, discolored mess. Unfortunately, there’s no coming back from that, so it’s best to discard it and learn from the experience. Other signs of trouble could be a lack of growth when you expect it, which might indicate the corm is still too dry or not viable.
A World of Blooms Awaits
So there you have it! Propagating Romulea linaresii is a wonderful way to expand your collection and share these delightful flowers. Be patient with them; they march to their own rhythm. Enjoy the process of nurturing these little corms, and you’ll soon be rewarded with a carpet of cheerful blooms. Happy gardening!
Resource:
https://identify.plantnet.org/k-world-flora/species/Romulea%20linaresii%20Parl./data