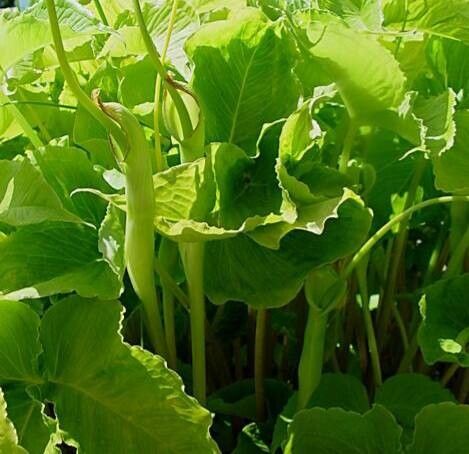
Oh, hello there! Come on in, grab a mug. I’m so glad you’re curious about Pinellia ternata. It’s one of those plants that, once you get it, you just want more of. Its lovely, delicate foliage and, for those who are adventurous, its intriguing medicinal properties make it quite special. And propagating it? Well, it’s a truly rewarding little journey. For beginners, it’s a moderately easy plant to propagate, which is fantastic news! You’ll get the hang of it in no time.
The Best Time to Start
Honestly, the sweet spot for propagating Pinellia ternata is when the plant is actively growing. I find the late spring to early summer to be ideal. You want to catch it when it’s full of life and energy, just bursting from its dormant period or well into its vegetative stage. The warmer temperatures and longer days really give those new cuttings the boost they need to get established.
Supplies You’ll Need
Gathering your supplies beforehand makes the whole process so much smoother. Here’s what I usually have on hand:
- Sharp Pruning Shears or a Clean Knife: Essential for making clean cuts.
- A Well-Draining Potting Mix: I prefer a blend of equal parts potting soil, perlite, and a bit of horticultural charcoal. This helps prevent soggy roots.
- Small Pots or Seed Trays: Whatever you have that can hold your cuttings. Make sure they have drainage holes!
- Rooting Hormone (Optional but Recommended): A little boost can speed things up. Look for one with IBA.
- Watering Can with a Fine Rose: For gentle watering.
- Plastic Bags or a Clear Dome: To create a humid environment if needed.
- Labels: So you don’t forget what you planted where!
Propagation Methods
Pinellia ternata is quite adaptable, and I’ve had success with a couple of common methods.
Division
This is my go-to method for Pinellia ternata. It’s practically like giving your existing plant a haircut and getting a bonus plant out of it!
- Gently Excavate: When the plant is dormant or just starting to wake up (think early spring), carefully lift the entire plant from its pot or the ground.
- Clean the Roots: Gently brush away as much of the old soil as you can. You want to see the root system clearly.
- Locate the Divisions: Look for natural breaks in the root system where new plantlets or clumps are forming. You’ll usually see distinct crowns.
- Make the Cut: Using your clean shears or knife, carefully separate the divisions. Make sure each division has at least a few healthy roots and a shoot or bud.
- Pot Them Up: Plant each division into its own pot with your prepared potting mix. Water gently.
Stem Cuttings (Less Common, but Possible!)
While division is king for Pinellia ternata, you can also try taking stem cuttings, though it’s a bit more finicky.
- Select a Healthy Stem: Look for a new, non-flowering stem that is about 4-6 inches long.
- Make the Cut: Using your sharp tool, take a cutting just below a leaf node. A leaf node is where a leaf attaches to the stem.
- Prepare the Cutting: Remove the lower leaves, leaving just a few at the top. If the leaf is very large, you can cut it in half to reduce water loss.
- Apply Rooting Hormone: Dip the cut end into your rooting hormone. Tap off any excess.
- Plant the Cutting: Insert the cut end into a pot filled with your well-draining mix. Make a small hole with a pencil or dowel first to avoid rubbing off the hormone.
- Provide Humidity: Water gently and cover the pot with a plastic bag or a clear dome to create a mini-greenhouse. Keep it in bright, indirect light.
The “Secret Sauce” (Pro Tips)
- Don’t Crowd Your Cuttings: Whether you’re dividing or taking cuttings, give each new plant a bit of space. Overcrowding can lead to competition for resources and increase the risk of disease.
- Bottom Heat is Your Friend: For stem cuttings especially, a little warmth from below can work wonders. A seedling heat mat can really speed up root development. Just be sure the heat isn’t too intense, or you’ll cook those delicate roots!
- Patience with Dormancy: If you’re trying to propagate divisions, and the plant looks a bit too dormant, it’s okay. Sometimes those seemingly dead-looking bits are just waiting for the right moment. Don’t discard them too quickly!
Aftercare & Troubleshooting
Once your divisions or cuttings have started to show signs of life – new growth, or you gently tugging on a cutting and feeling resistance (a sign of roots!) – it’s time for a little more focused care.
- Gradual Acclimation: If you’ve used a humidity dome or plastic bag, gradually remove it over a few days. Let your new plant get used to the regular air.
- Light and Water: Continue to provide bright, indirect light. Water when the top inch of soil feels dry. Avoid overwatering at all costs. This is the most common culprit for failure. Soggy soil can lead to root rot, which looks like mushy, black roots and wilting leaves even when the soil is wet. If you spot this, it’s usually game over, unfortunately.
- Fertilizer is Later: Don’t fertilize immediately. Wait until you see good, established new growth. Then, a dilute liquid fertilizer every few weeks during the growing season is plenty.
A Little Encouragement to Finish
Propagating plants is one of my favorite ways to connect with nature. It’s a process that teaches you patience and observation. Don’t be discouraged if your first attempt isn’t perfect. Every gardener has had their share of “oops” moments! Just keep at it, learn from each experience, and most importantly, enjoy the magic of watching something new grow right before your eyes. Happy propagating!
Resource:
https://identify.plantnet.org/k-world-flora/species/Pinellia%20ternata%20(Thunb.)%20Makino/data