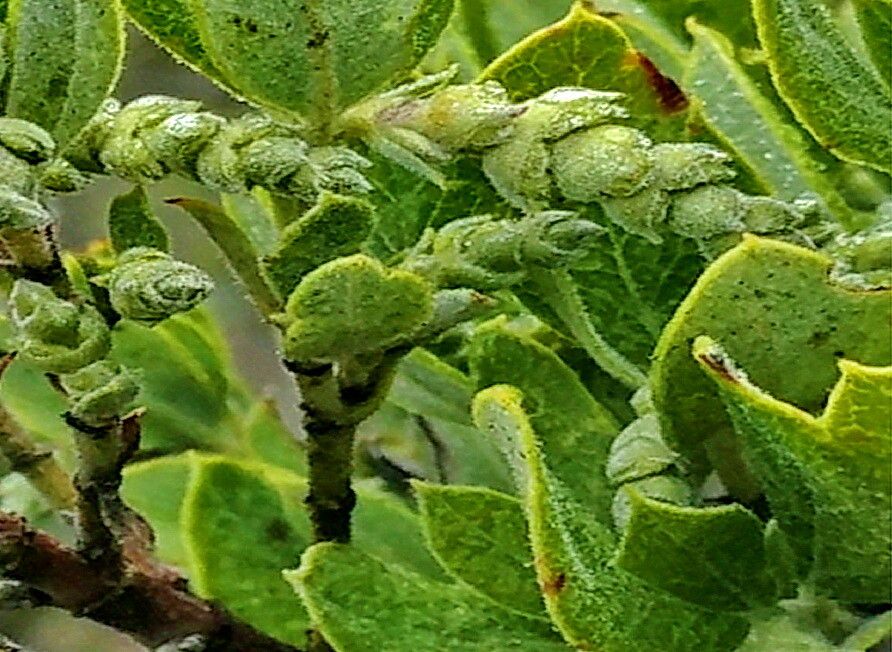
Hey there, fellow garden enthusiasts! I’m so excited to chat with you today about a plant that’s been a quiet star in my garden for years: Garrya veatchii, or Coast Silktassel. If you haven’t met it yet, picture this: graceful, arching branches adorned with beautiful, pendulous catkins that shimmer like silver in the winter sun. It brings a touch of refined elegance to any landscape, and honestly, its subtle beauty has a way of growing on you.
Propagating Garrya veatchii might sound a bit advanced, but I promise, it’s a wonderfully rewarding project. While it’s not quite as foolproof as a succulent cutting, I’d put it in the “moderately easy” category. With a little patience and a few key techniques, you’ll be well on your way to filling your garden or sharing these beauties with friends.
The Best Time to Start
For the highest success rate with Garrya veatchii cuttings, I’ve found that late spring to early summer is your sweet spot. This is when the plant is actively growing, and the new shoots are semi-hardwood. They have enough flexibility to root, but they’re not so soft that they’ll easily rot. Waiting until the current season’s growth has just started to firm up a bit is key.
Supplies You’ll Need
Before we get our hands dirty, let’s gather our trusty gardening sidekicks:
- Sharp Pruning Shears or a Knife: Clean cuts are essential for healthy rooting.
- Small Pots or Containers: About 4-6 inches deep are perfect. Make sure they have drainage holes!
- Rooting Hormone: A powder or gel form works well. It gives your cuttings a helpful boost.
- Potting Mix: A good blend of perlite and peat moss or coco coir is ideal for drainage and aeration. About a 50/50 mix works wonders.
- Plastic Bags or Propagation Dome: To create a humid environment.
- Watering Can or Mister: Gentle watering is a must.
- Labels: Don’t forget to label your cuttings! Trust me, you’ll thank yourself later.
- (Optional but Recommended) Heating Mat: For consistent, bottom warmth, which really speeds things up.
Propagation Methods: Stem Cuttings
This is my go-to method for Garrya veatchii. It’s reliable and you can get quite a few new plants from a single parent.
- Take Your Cuttings: On a cool, overcast morning, select healthy, non-flowering stems from your parent plant. Look for stems that are about 4-6 inches long and have just started to firm up – you’ll know they’re ready when they snap rather than bend. Make your cut just below a leaf node (the spot where a leaf attaches to the stem).
- Prepare the Cuttings: Gently remove the lower leaves from the bottom 2-3 inches of the cutting. This area will be going into the soil. If there are any flower buds, pinch them off as they can drain energy from root development.
- Apply Rooting Hormone: Dip the cut end of each stem into your rooting hormone, tapping off any excess. This helps stimulate root growth.
- Planting: Fill your pots with your prepared potting mix. Make a hole in the center with your finger or a pencil. Carefully insert the cutting into the hole, ensuring the stripped part is below the surface, and firm the soil gently around it. You can fit a few cuttings in one pot, spaced a couple of inches apart.
- Water Gently: Water thoroughly but gently to settle the soil around the cuttings. You don’t want to wash them out.
- Create Humidity: This is where your plastic bag or propagation dome comes in. Cover the pot loosely with a clear plastic bag, or place it under a propagation dome. If using a bag, you can support it with stakes so it doesn’t touch the leaves. This traps moisture, creating a crucial humid environment.
The “Secret Sauce” (Pro Tips)
Now, for a few insider tricks that have made all the difference for me:
- Don’t Let the Leaves Touch the Water (if using water propagation): While this guide focuses on cuttings in soil, if you ever try water propagation for other plants, remember this crucial point. Any leaves submerged will rot and potentially kill your cutting. For Garrya, soil is generally more successful.
- Use Bottom Heat: I can’t stress this enough! Placing your pots on a heating mat set to around 70-75°F (21-24°C) makes a massive difference in rooting speed. The warmth encourages root formation from the bottom up.
- Choose the Right Parent Plant: Seriously, start with a healthy, vigorous specimen. If the parent plant is struggling, so will your cuttings. Select stems that look strong and have good color.
Aftercare & Troubleshooting
Keeping an eye on your little charges is part of the fun!
Once your cuttings are potted and covered, place them in a bright, indirect light location. Avoid direct sun, which can scorch the tender new growth. Check the moisture levels regularly – the soil should always be lightly moist, never soggy or bone dry. If using a plastic bag, open it for about 15-30 minutes each day to allow for air circulation and prevent fungal issues.
You’ll know your cuttings are rooting when you see new leaf growth or feel a slight resistance when you gently tug on a cutting. This can take anywhere from 4-8 weeks, or sometimes longer. Don’t be discouraged if it takes time!
The most common problem you might encounter is rot. This usually happens from overwatering or poor air circulation. If you see a cutting turning black and mushy, it’s best to discard it to prevent it from spreading. If the leaves start to yellow and drop but the stem stays firm, it might just be a sign they’re struggling to root and adapting. Keep waiting!
A Encouraging Closing
Gardening is a journey, isn’t it? Propagating Garrya veatchii is a wonderful way to connect with nature and expand your plant collection without breaking the bank. Be patient, trust the process, and above all, enjoy the satisfaction of nurturing life from a simple cutting. Happy gardening, my friends!
Resource:
https://identify.plantnet.org/k-world-flora/species/Garrya%20veatchii%20Kellogg/data