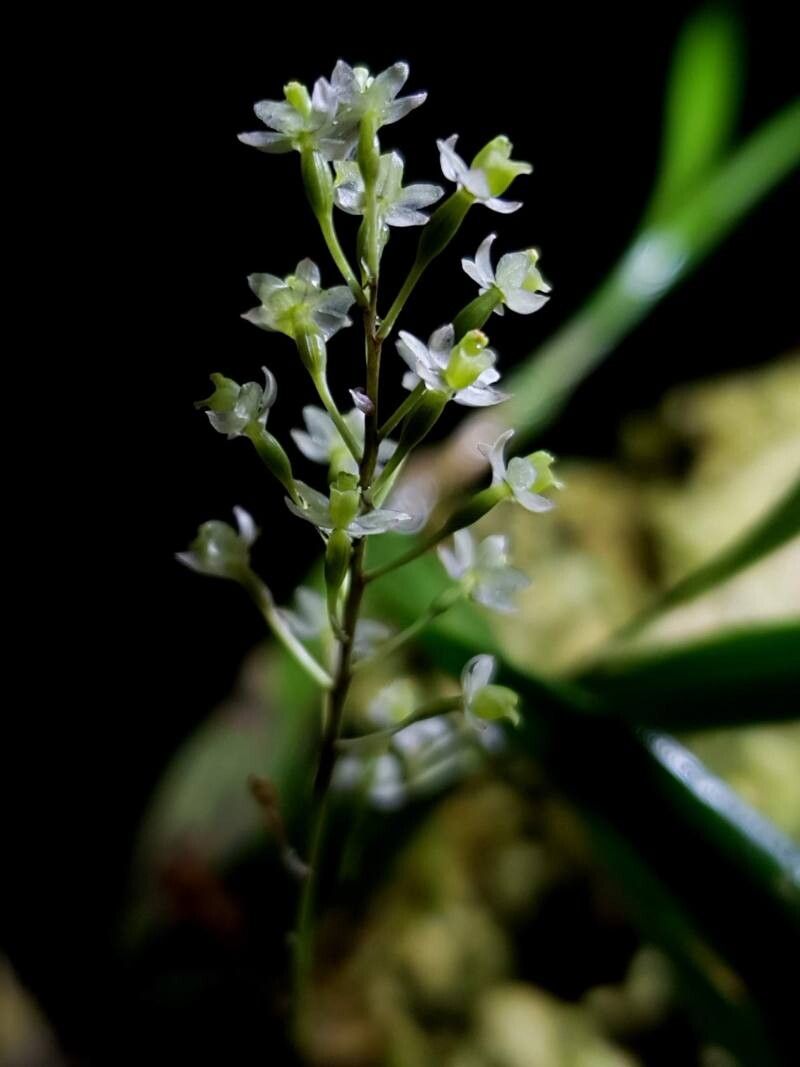
Hey there, fellow plant lovers! Today, we’re diving into the wonderful world of Scaphyglottis micrantha, a charming little orchid that brings such a delightful splash of color and delicate beauty to any space. If you’ve ever admired its tiny, prolific blooms and thought, “I wish I had more of those!”, you’re in luck. Propagating this gem is a surprisingly rewarding experience, and I’m here to walk you through it.
Now, I know the word “orchid” can sometimes send a shiver of intimidation down your spine, but with Scaphyglottis micrantha, you might find it’s more accessible than you think. While not as foolproof as, say, a pothos cutting, it’s definitely a project that’s well within reach for the determined beginner. The joy of seeing these little guys sprout up from a little piece of momma plant is just chef’s kiss!
The Best Time to Start
Generally, the best time to get your propagation party started is when your Scaphyglottis micrantha is actively growing. Think late spring through summer. This is when the plant has plenty of energy reserves and is naturally putting out new shoots and roots. Trying to propagate during its dormant period (usually in winter) is like asking someone to run a marathon without any training – they’re just not going to have the stamina! Look for healthy, vigorous growth to give yourself the best shot.
Supplies You’ll Need
Before we get our hands dirty (or, you know, our fingers delightfully twiggy), let’s gather our troops:
- Clean, sharp pruning shears or a sterile knife: Essential for making clean cuts. We don’t want any ragged edges inviting trouble.
- Orchid bark mix (fine grade): This is crucial. Orchids need excellent drainage and airflow. A standard potting soil just won’t cut it. I like a mix that includes small bark chunks and maybe a bit of perlite.
- Small pots or containers: Think seedling pots, small plastic containers with drainage holes, or even recycled yogurt cups (just poke some holes!).
- Rooting hormone (optional, but helpful): A little boost can encourage root development. Look for one specifically for woody cuttings or orchids.
- Spray bottle with fresh water: For misting.
- Clear plastic bags or a propagation dome: To create a humid environment.
- Labels and a marker: So you don’t forget what you planted where!
Propagation Methods
Scaphyglottis micrantha is wonderfully amenable to a few different propagation techniques. I find division to be the most straightforward for this particular orchid, but stem cuttings can also work beautifully.
Method 1: Division (My Go-To!)
This is like giving your plant a haircut and getting new plants out of the deal!
- Gently remove the mother plant from its pot. You might need to coax it out with a little wiggle or by gently squeezing the pot.
- Inspect the root system. Look for natural breaks where multiple pseudobulbs (those swollen stem bases) are clustered together. You want to divide the plant into sections that have at least two or three pseudobulbs and some healthy roots.
- Carefully separate the divisions. You can use your fingers to gently tease them apart, or use your clean shears/knife to make a precise cut if the roots are really tangled. Try to minimize damage to the roots.
- Pot up your new divisions. Fill your small pots with the orchid bark mix. Make a little well in the center and place the division in, spreading out the roots a bit. Bury the roots and the bottom of the pseudobulbs, but don’t cover the top growth.
- Water gently. Water thoroughly to settle the mix around the roots.
Method 2: Stem Cuttings
This is a bit more advanced but can be very successful.
- Identify a healthy stem that has at least two or three pseudobulbs and some new leaf growth.
- Using your sterilized shears, make a clean cut just below a pseudobulb. You want a cutting that’s at least a few inches long.
- Optional: Dip the cut end in rooting hormone. This can encourage faster root development.
- Pot up your cutting. Fill a small pot with your orchid bark mix. Plant the cutting so that the lowest pseudobulb is just sitting on the surface of the bark or slightly covered.
- Create a humid environment. This is key for stem cuttings. Water the bark thoroughly, then place the pot inside a clear plastic bag, sealing it loosely, or cover it with a propagation dome. You want to create a mini-greenhouse effect.
The “Secret Sauce” (Pro Tips!)
Alright, here are a couple of things I’ve learned over the years that can really make a difference:
- Humidity is King (Especially for Cuttings!): Orchids, particularly new propagations, crave high humidity. If you’re doing stem cuttings, that plastic bag or dome is your best friend. I like to gently mist the inside of the bag every few days, just to keep things steamy.
- Don’t Let the Leaves Drown: When watering your potted divisions, avoid getting water sitting in the crown of the pseudobulbs for extended periods. This can lead to rot. It’s best to water the bark mix directly. For stem cuttings, ensure the leaves themselves aren’t constantly submerged in water if you opt for a water propagation method (which I generally avoid for this orchid as bark is better).
- Bottom Heat is a Game Changer: If you can, placing your pots on a seedling heat mat can significantly speed up root development. Orchids are tropical plants, and a little warmth from below mimics their natural environment and encourages those roots to get going.
Aftercare & Troubleshooting
Once your new little Scaphyglottis micrantha babies are potted, treat them with gentle care.
- Light: Place them in bright, indirect light. Avoid direct sun, which can scorch young leaves.
- Watering: Water whenever the bark mix feels dry to the touch. Don’t let it sit constantly waterlogged, but also don’t let it dry out completely. Misting can be helpful between waterings if the humidity drops.
- Patience: This is probably the most important part of aftercare! It can take several weeks, sometimes even a couple of months, for new roots to establish, especially with stem cuttings.
- Signs of Trouble: The biggest culprit is rot. If you see mushy, black stems or pseudobulbs, it’s usually a sign of too much moisture and not enough airflow. If you catch it early, you might be able to salvage a healthier portion. Another sign of stress is wilting leaves, which can indicate insufficient watering or root damage.
A Little Bit of Green Magic
Propagating is such a rewarding part of this wonderful hobby. It’s a chance to multiply your joy and share these beautiful plants with others. Don’t get discouraged if your first attempt isn’t an instant success. Gardening is all about learning and growing, just like our plants. So, grab your shears, get a little soil on your hands, and enjoy the process of coaxing new life from your beloved Scaphyglottis micrantha. Happy growing!
Resource: