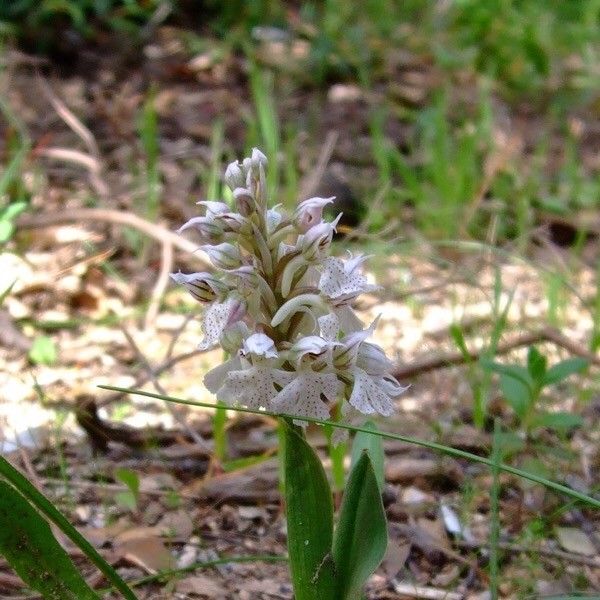
Hello there, fellow plant lovers! Today, I want to chat about a gem that has brought so much delicate beauty to my garden: Neotinea lactea. If you’ve ever seen its elegant, pale blooms standing tall, you’ll understand the appeal. There’s something incredibly satisfying about coaxing a new life from an existing plant, and Neotinea lactea offers just that kind of rewarding journey.
Now, to be upfront, Neotinea lactea isn’t exactly a “throw it in the dirt and forget it” kind of plant. It requires a bit of attention and understanding. For absolute beginners, it might feel a touch challenging. But don’t let that deter you! With a little guidance and patience, you’ll be celebrating your own Neotinea lactea successes.
The Best Time to Start
The absolute best time to think about propagating Neotinea lactea is in the early spring, right as new growth begins to emerge. You’re looking for those tender shoots that signal the plant is waking up from its winter rest and has plenty of energy to dedicate to new development. This timing also means they’ll have the whole growing season to establish themselves before the next cold snap.
Supplies You’ll Need
Here’s what you should gather before you dive in:
- Sharp Pruning Shears or a Craft Knife: Cleanliness is key to prevent disease.
- Sterile Potting Mix: A mix formulated for orchids or delicate seedlings is ideal. I often use a blend of peat moss, perlite, and a bit of orchid bark.
- Small Pots or Propagation Trays: Don’t start too big; a slightly snug pot encourages root development.
- Rooting Hormone (Optional but Recommended): A good quality rooting powder can give your cuttings a head start.
- Clear Plastic Bag or Dome: To create a humid environment.
- Watering Can with a Fine Rose or Small Spray Bottle: For gentle watering.
- Labels and a Marker: Trust me, you’ll thank yourself later!
Propagation Methods
For Neotinea lactea, the most reliable method I’ve found is division. While stem cuttings can work for some orchids, Neotinea lactea is a bit more particular, and division is like giving it a gentle nudge to start anew.
- Gently Excavate: When your Neotinea lactea is actively growing in early spring, carefully dig around the base of the plant. The goal is to lift the entire root ball with as much soil intact as possible.
- Identify Divisions: You’re looking for sections of the plant that have their own healthy roots and at least one or two new shoots or buds. Sometimes, it’s as simple as gently teasing apart sections that have naturally separated. If it’s a bit stubborn, grab your clean shears or knife.
- Separate with Care: Make a clean cut through any connecting rhizomes or roots. If you’re using a division tool or knife, ensure it’s sterilized between cuts if you’re dividing multiple plants.
- Pot Up Your New Babies: Fill your small pots with your chosen sterile potting mix. Make a small hole in the center and carefully place each division in, ensuring the roots are spread out a bit. The top of the rhizome or the base of the new shoots should be just at or slightly above the soil line.
- Water Lightly: Give each pot a gentle watering. You want the soil to be moist, but not waterlogged.
The “Secret Sauce”
Here are a couple of tricks I’ve learned over the years that make a difference:
- Don’t Drown the Roots: After watering, empty any excess water from the saucer or tray. Neotinea lactea hates sitting in soggy conditions, as this is a fast track to root rot.
- Mimic the Tropics (Humidity is Key): Once potted, cover each pot with a clear plastic bag or a propagation dome. This creates a wonderfully humid environment that helps the plant conserve moisture while it’s establishing new roots. If you’re using a bag, poke a few small holes in it to allow for some air circulation and prevent fungal issues.
Aftercare & Troubleshooting
Once your divisions are potted up and tucked into their humid little homes, place them in a bright spot out of direct sunlight. Too much sun can scorch those delicate new shoots.
Keep the soil consistently lightly moist. Don’t let it dry out completely, but also avoid sogginess. You can gently mist the leaves occasionally to boost humidity, especially if you notice them looking a bit limp.
Signs of success include new leaf growth and the development of a firm root system that you might be able to see through the drainage holes.
Troubleshooting: The most common problem you’ll encounter is rot. If you see leaves turning yellow and mushy, or the base of the stem going soft and brown, it’s usually a sign of overwatering. In this case, try to gently remove the rotted parts, repot in fresh, dry mix, and hold back on watering until the soil starts to feel dry to the touch.
Your Green Thumb Awaits!
Propagating Neotinea lactea is a journey that teaches you about observation and gentle care. It won’t happen overnight, and there might be a bit of a learning curve, but the reward of seeing these beautiful plants multiply is truly special. Be patient with your new charges, trust your instincts, and enjoy the magic of growth! Happy gardening!
Resource: