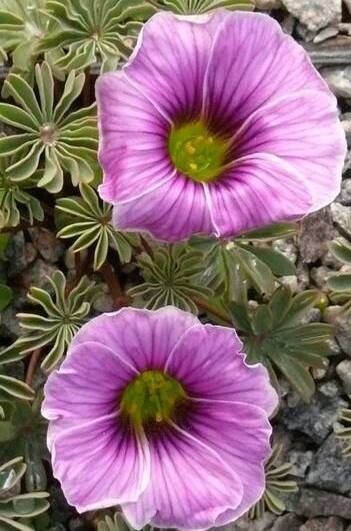
Oh, hello there! Grab a mug, because we’re about to dive into the wonderful world of propagating Oxalis enneaphylla. I’ve been fussing over these delightful little plants for two decades now, and let me tell you, growing more of them from your existing beauties is just incredibly satisfying. Oxalis enneaphylla, with its delicate, clover-like leaves and often charming little blooms, is a real charmer. And the best part? You can absolutely bring more of that charm into your garden or home.
Now, are they a breeze for absolute beginners? I’d say they lean towards the “rewarding for the patient beginner” category. They’re not notoriously difficult, but like anything worthwhile in the garden, a little understanding and care go a long way.
The Best Time to Start
For Oxalis enneaphylla, I find the spring, just as new growth is really kicking off, is your golden ticket. You want to catch the plant when it’s actively growing and full of vigor. This energy translates beautifully into successful propagation. Avoid trying to propagate when the plant is dormant or stressed during extreme heat or cold.
Supplies You’ll Need
Here’s what you’ll want to have on hand:
- Clean, sharp pruning shears or a small knife: For making precise cuts.
- A well-draining potting mix: I like to use a blend of regular potting soil with perlite or coarse sand. A good seed starting mix can also work wonders.
- Small pots or trays: Clean ones are key to preventing disease!
- Rooting hormone (optional but helpful): A powder or gel can give your cuttings a little boost.
- A spray bottle: For gentle misting.
- Plastic wrap or a clear plastic bag: To create a humid environment.
- A pencil or popsicle stick: For gently handling cuttings and firming soil.
- A sunny windowsill or a grow light: For providing adequate light.
Propagation Methods
The most reliable way I’ve found to multiply my Oxalis enneaphylla is through division. These plants naturally form little clumps and offsets, making them perfect for this method.
Division:
- Gently remove the plant from its pot. Turn the pot sideways and carefully ease the root ball out. If it’s stuck, a gentle tap on the bottom should loosen it.
- Loosen the soil around the roots. You can use your fingers or a small trowel to carefully work away some of the excess soil.
- Identify natural divisions. Look for sections of the plant that have their own roots already attached. You can often see where one plant ends and another begins.
- Gently pull or cut the divisions apart. Ideally, you want each division to have at least a few healthy roots and some foliage. If a division doesn’t have many roots, that’s okay, but it might take a little longer to establish.
- Pot up the new divisions. Plant each division in its own small pot filled with your prepared potting mix. Make sure the base of the plant is at soil level. Firm the soil gently around the roots.
- Water gently. Give each new pot a good, gentle watering.
While division is my go-to, you might have some success with stem cuttings, though it’s less common for this particular species. If you try it:
- Take a cutting: Select a healthy stem with a few leaves. Make a clean cut just below a leaf node.
- Remove lower leaves: Strip off any leaves that would be below the soil line.
- Apply rooting hormone (optional).
- Insert into moist potting mix. Make a small hole with your pencil and gently insert the cutting. Firm the soil.
- Create humidity: Water thoroughly, then cover the pot with a plastic bag or dome.
The “Secret Sauce” (Pro Tips)
Here are a few little tricks I’ve picked up over the years:
- Don’t overwater divisions initially. While they need moisture, they shouldn’t sit in soggy soil, especially right after division when they don’t have established roots to handle excess water. Let the top layer of soil dry out slightly between waterings.
- Bottom heat can be a game-changer. If you’re attempting cuttings or find your divisions are slow to root, placing them on a seedling heat mat can really encourage root development. It mimics the warmth of spring soil.
- Observe, don’t just water. Get to know your new cuttings or divisions. Look at the leaves for signs of stress (wilting can mean underwatering, but limp, yellowing leaves can mean overwatering). Adjust your watering based on what you see.
Aftercare & Troubleshooting
Once your divisions or cuttings start showing signs of new growth, it’s a good indicator that roots are forming! Don’t rush to repot them. Let them establish themselves in their initial pots for several weeks. Keep them in bright, indirect light.
The most common sign of trouble is rot. This usually happens from too much moisture and poor drainage. If you see mushy stems or leaves that are yellowing and dying off, it’s often a sign of overwatering. If rot sets in, it’s hard to save, but if caught early, you might be able to trim away the affected parts and repot in fresh, dry soil.
A Encouraging Closing
Propagating Oxalis enneaphylla is a beautiful way to connect with your plants and expand your collection. Be patient through the process. Some cuttings might be slower than others, and that’s perfectly normal. Enjoy watching those tiny roots develop and the new leaves unfurl. Happy gardening!
Resource:
https://identify.plantnet.org/k-world-flora/species/Oxalis%20enneaphylla%20Cav./data