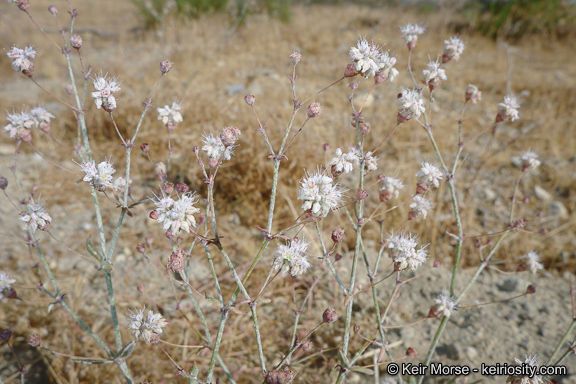
Hello fellow garden enthusiasts! Today, I want to talk about a plant that has truly stolen a piece of my heart over the years: Eriogonum angulosum, often called California Buckwheat. If you’re looking for a native plant that’s tough as nails, brings in all sorts of pollinators, and has a beautiful, airy bloom, you’ve found your match. The best part? It’s surprisingly rewarding to bring more of these beauties into your world through propagation. Ready to get your hands a little dirty?
The Best Time to Start
For Eriogonum angulosum, I’ve found that the late spring to early summer is absolutely prime time for taking cuttings. This is when the plant is actively growing, and the stems have that perfect balance of being pliable but not too soft. Waiting until the new growth has “hardened off” just a little, meaning it’s not super floppy but still has some give, is key.
Supplies You’ll Need
You don’t need a fancy laboratory for this! Here’s what I always have on hand:
- Sharp, clean pruning shears or a sharp knife: For making clean cuts.
- Potting mix: A light, well-draining mix is crucial. I often use a blend of perlite and peat moss or coco coir. Something like a succulent or cactus mix works well too.
- Rooting hormone (optional but helpful): A powder or gel can give your cuttings a nice boost.
- Small pots or trays: With drainage holes, of course!
- Watering can or spray bottle: For gentle watering.
- Clear plastic bags or a propagator: To create a humid environment.
- Labels: To remember what you planted and when!
Propagation Methods: Stem Cuttings
When it comes to Eriogonum angulosum, stem cuttings are my go-to method. It’s straightforward and usually yields great results.
- Collect Your Cuttings: With your clean shears, take stem cuttings that are about 4 to 6 inches long. Look for healthy, vigorous growth. Make your cut just below a leaf node (where a leaf attaches to the stem). This is where roots are more likely to form.
- Prepare the Cuttings: Gently remove the lower leaves from the bottom half of each cutting. You want to expose the nodes where roots will emerge.
- Apply Rooting Hormone (Optional): Dip the cut end of each prepared cutting into your rooting hormone, tapping off any excess.
- Plant Your Cuttings: Fill your small pots or trays with your well-draining potting mix. Gently insert the cut end of each cutting about an inch deep into the soil. You can place a few cuttings in each pot, leaving a little space between them.
- Water Gently: Water the soil thoroughly but gently, ensuring it’s moist but not waterlogged. A spray bottle can be handy here.
- Create Humidity: This is important! Cover the pots with a clear plastic bag, propping it up so it doesn’t touch the leaves, or place them in a propagator. This creates a mini-greenhouse effect, keeping the cuttings from drying out.
The “Secret Sauce”
After years of trial and error, I’ve learned a few things that make a big difference:
- Don’t Overwater! This is probably the biggest killer of cuttings. Allow the soil to dry out slightly between waterings. It’s better to err on the side of slightly too dry than too wet. I often give mine a good soak when I first plant them, and then I’m much more sparing.
- Bottom Heat is Your Friend: If you can, place your propagator or pots on a gentle heat mat. This little bit of warmth from below encourages root development and significantly speeds up the process, especially if your ambient temperatures are a bit cooler.
- Patience is a Virtue (and a Necessity): These little guys can take their time. Don’t despair if you don’t see roots forming within a couple of weeks. Give it a good 4-6 weeks, sometimes longer, before you try to gently tug on a cutting to check for resistance.
Aftercare & Troubleshooting
Once you feel some gentle resistance when tugging a cutting, or if you see tiny roots emerging from the drainage holes, it’s time for a change!
- Acclimatize: Gradually remove the plastic bag or open the propagator vents over a few days to help your new plants adjust to normal humidity.
- Pot Up: When the new plants are sturdy and have a good root system, you can transplant them into individual pots. Use a potting mix similar to what you started with.
- Watering: Continue to water them as you would a mature plant, allowing the soil to dry slightly between waterings.
- Signs of Trouble: The most common problem is rot, which usually happens from overwatering. If your cuttings turn black and mushy, it’s a sign they’ve gotten too much moisture and not enough air circulation. You might also see wilting, which could be due to dryness or just the cutting struggling to establish. If you see rot, remove the affected cuttings immediately to prevent it from spreading.
A Little Garden Magic
Propagating Eriogonum angulosum is such a satisfying way to expand your garden or share these wonderful native plants with friends. Don’t be discouraged if your first few attempts aren’t perfect; gardening is all about learning and experimenting. Just keep trying, be patient, and enjoy the magic of bringing new life into your garden. Happy growing!
Resource:
https://identify.plantnet.org/k-world-flora/species/Eriogonum%20angulosum%20Benth./data