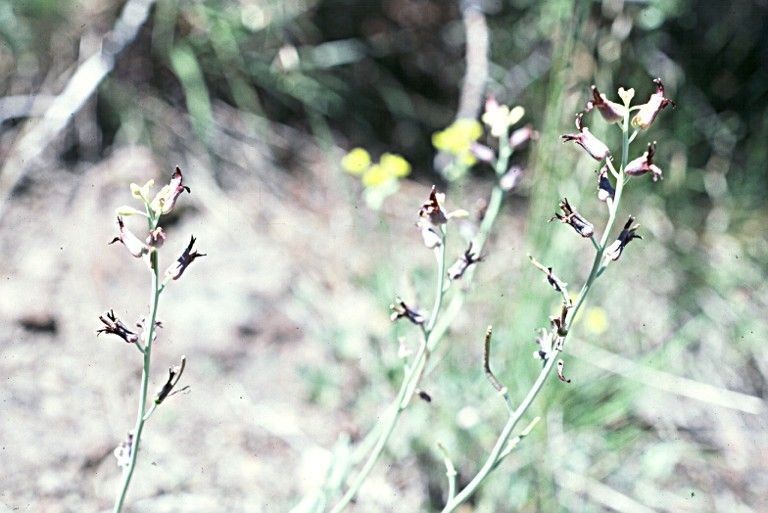
Hello there, fellow plant lovers! I’m so excited to talk to you today about a California native that has captured my heart over the years: Streptanthus oliganthus, also known as the few-flowered jewel flower. Its delicate, nodding flowers and unique form make it a truly special addition to any garden. Deciding to propagate this beauty is a wonderful idea; there’s nothing quite like the satisfaction of growing a new plant from a piece of your existing one. Now, full disclosure, Streptanthus oliganthus can be a bit of a sensitive soul when it comes to propagation, so it’s not the absolute easiest for a complete beginner, but with a little patience and these tips, you’ll be well on your way to success!
The Best Time to Start
For the highest success rate with Streptanthus oliganthus, I’ve found that starting in late spring or early summer is your sweet spot. You want to work with healthy, actively growing stems. This is when the plant is full of vigor and has the best chance of rooting. Avoid trying to propagate from old, woody stems or during the heat of mid-summer or the dormancy of winter.
Supplies You’ll Need
Here’s a little checklist to get you prepared:
- Sharp, clean pruning shears or a craft knife: Essential for making clean cuts to prevent disease.
- Rooting hormone (optional, but recommended): A great boost for encouraging root development. Look for one with a fungicide.
- Well-draining potting mix: A blend of perlite, coarse sand, and a peat-based potting soil works wonders. You can even find specialized succulent or cactus mixes that are excellent.
- Small pots or seed trays: Clean ones are a must to prevent fungal issues.
- Plastic bags or a propagator lid: To create a humid environment.
- Watering can or spray bottle: For gentle watering.
- A sunny, but not scorching, location: Protect your cuttings from direct, harsh sun.
Propagation Methods
The most reliable way I’ve found to propagate Streptanthus oliganthus is through stem cuttings. It’s straightforward once you know the steps!
Stem Cuttings:
- Select your parent plant: Choose a healthy, mature Streptanthus oliganthus that shows good growth.
- Take the cuttings: Using your clean shears or knife, take cuttings from the soft, new growth that is about 3-4 inches long. Make your cut just below a leaf node (where a leaf attaches to the stem).
- Prepare the cuttings: Gently remove the lower leaves from the cutting, leaving only the top few leaves. If the remaining leaves are very large, you can cut them in half to reduce water loss.
- Apply rooting hormone (optional): Dip the cut end of the stem into your rooting hormone powder, tapping off any excess.
- Plant the cuttings: Make a hole in your prepared potting mix with a pencil or your finger. Insert the cutting into the hole, ensuring the leaf nodes that were below the soil line are covered. Gently firm the soil around the stem.
- Water gently: Water the potting mix thoroughly but gently, ensuring it’s moist but not waterlogged.
- Create humidity: Cover the pot or tray with a plastic bag or propagator lid. This traps moisture, which is crucial for cuttings. Make sure the leaves don’t touch the sides of the bag. Prick a few holes in the bag for some air circulation if you don’t have a lid.
- Provide the right conditions: Place the covered pot in a bright location, but out of direct sunlight. A temperature of around 65-70°F is ideal.
The “Secret Sauce” (Pro Tips)
Here are a couple of tricks I’ve learned over the years that make a big difference:
- Avoid misting the leaves too much. While humidity is key, constantly wet foliage can encourage rot. Relying on the enclosed environment is usually enough.
- Consider bottom heat. If you have a seedling heat mat, placing your pots on it (especially if rooting in cooler conditions) can significantly speed up root formation. It gives the roots the warmth they need to get going.
Aftercare & Troubleshooting
Once your cuttings have been in the propagator for a few weeks, you can start checking for roots. Gently tug on a cutting – if there’s resistance, you’ve likely got roots!
- Slowly acclimate: Once you see signs of rooting, gradually remove the plastic bag or lid over a few days to let the new plants adjust to the ambient humidity.
- Watering: Continue to keep the soil evenly moist but not soggy. Water when the top inch of soil feels dry to the touch.
- Transplanting: When the new plants have developed a good root system and look robust (usually after a few months), you can transplant them into their own small pots using a good quality, well-draining potting mix.
Signs of Failure: The most common issue you’ll encounter is rot. If your cuttings turn black and mushy at the base, or wilting severely without any signs of drying out, it’s likely rot. This is usually caused by too much moisture and not enough air circulation. Unfortunately, once rot sets in, it’s difficult to save the cutting.
A Encouraging Closing
And there you have it! Propagating Streptanthus oliganthus might require a little more finesse than some other plants, but the reward of seeing those tiny seedlings thrive is absolutely worth it. Be patient with the process, enjoy the journey of learning, and celebrate every little success. Happy gardening!
Resource:
https://identify.plantnet.org/k-world-flora/species/Streptanthus%20oliganthus%20Rollins/data