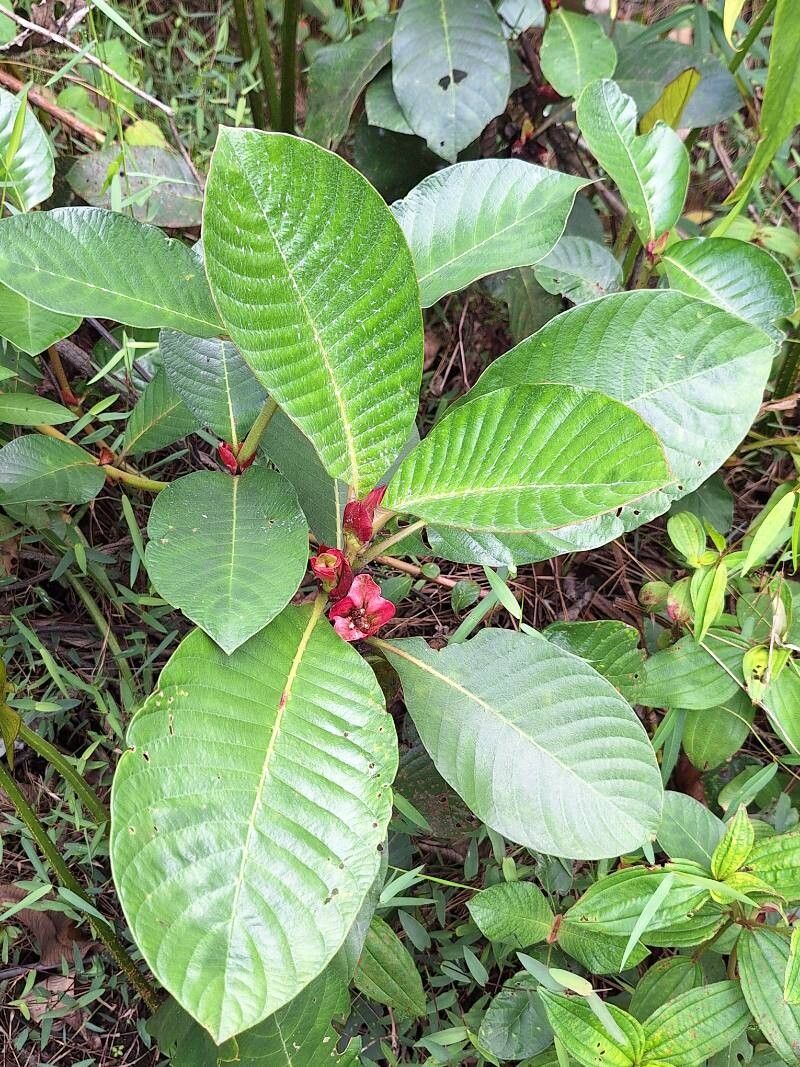
Hello fellow plant enthusiasts! Today, we’re going to chat about a truly special plant: Stipularia africana. You might know it by its common name, the African Spade Leaf. It’s got these gorgeous, heart-shaped leaves with a unique, almost velvety texture that just scream elegance. Plus, it’s a fairly tidy grower, making it perfect for smaller spaces or as a statement piece on a shelf.
Now, let’s talk about propagating it. I’ve found Stipularia africana to be quite a rewarding plant to multiply. It’s not overly fussy, which is always a good sign for anyone looking to expand their collection without too much stress. For beginners, I’d say it leans towards the easier side of propagation, which is excellent news! You’ll definitely feel a sense of accomplishment when you see those little roots start to form.
The Best Time to Start
For the highest success rate with Stipularia africana, spring and early summer are your best friends. This is when the plant is in its most active growth phase. You’ll find it’s putting out plenty of fresh, vibrant stems that are perfect for taking cuttings. Trying to propagate when the plant is a bit more dormant, like in the dead of winter, just won’t yield the same enthusiastic results. Think of it as catching the plant when it’s full of energy and ready to bounce back.
Supplies You’ll Need
Gathering your tools before you begin will make the whole process much smoother. Here’s what I always have on hand:
- Sharp, clean pruning shears or a knife: This is crucial for making clean cuts, which helps prevent disease.
- Rooting hormone (optional but recommended): This isn’t strictly necessary for Stipularia africana, but it can really give your cuttings a boost and speed up root development. I prefer the powder form.
- Well-draining potting mix: A good blend of peat moss, perlite, and a little bit of compost works wonders. You can also find specific “starter” or “propagation” mixes at your local garden center.
- Small pots or propagation trays: Clean, small pots (4-6 inch diameter) are perfect.
- Clear plastic bag or propagation dome: This creates a mini-greenhouse effect, keeping humidity high.
- Watering can or spray bottle: For gentle watering.
- Labels and a marker: To keep track of what you’ve propagated and when!
Propagation Methods
I’ve had the most luck with Stipularia africana using stem cuttings. It’s straightforward and usually very effective.
Stem Cuttings:
- Select a healthy stem: Look for a piece of stem that is at least 4-6 inches long and has at least two to three sets of leaves. Avoid anything that looks old, woody, or has any signs of pests or disease. Gently bend a young stem; if it snaps cleanly, it’s usually a good candidate.
- Make the cut: Using your sharp, clean shears, make a clean cut just below a leaf node (the point where a leaf attaches to the stem). This is where roots are most likely to form.
- Prepare the cutting: Gently remove the lower leaves, leaving just the top two or three. This prevents the submerged leaves from rotting. If the remaining leaves are very large, you can even cut them in half horizontally to reduce water loss.
- Apply rooting hormone (optional): Dip the cut end of the stem into your rooting hormone, shaking off any excess.
- Plant the cutting: Fill your small pot with your well-draining potting mix. Make a small pilot hole in the center of the soil with your finger or a pencil. Insert the cut end of the Stipularia africana stem into the hole, ensuring the leaf nodes are buried. Gently firm the soil around the stem.
- Water gently: Water the soil thoroughly until you see water draining from the bottom of the pot.
- Create a humid environment: Place the potted cutting inside a clear plastic bag (making sure the leaves don’t touch the sides) or cover it with a plastic dome. You can also prop up the bag with a few stakes to prevent it from collapsing onto the leaves.
- Place in bright, indirect light: Find a warm spot for your cutting that receives plenty of bright, but indirect light. Avoid direct sun, which can scorch the delicate new leaves.
The “Secret Sauce” (Pro Tips)
Over the years, I’ve learned a few little tricks that can really make a difference.
- Avoid waterlogged soil at all costs. This is probably the biggest killer of cuttings. Make sure your mix is airy and drains well. If you’re unsure, err on the side of drying out slightly between waterings, but don’t let it get bone dry.
- Bottom heat can be your best friend. If you have a seedling heat mat, placing your pots on it can significantly speed up root development. It mimics the warmth of the soil in spring and gives those roots a gentle nudge to get going.
- Don’t be afraid to check for roots! After about 3-4 weeks, you can gently tug on the cutting. If you feel resistance, it’s a good sign that roots have formed. For a more definitive check, you can carefully unpot it to peek. Just be gentle so you don’t damage any nascent roots.
Aftercare & Troubleshooting
Once you start to see new leaf growth, that’s your cue that roots have formed! Congratulations!
- Gradual acclimatization: Start by opening the plastic bag or dome for a few hours each day, gradually increasing the time until the plant is fully used to the ambient humidity. This prevents shock.
- Maintain consistent moisture: Keep the soil lightly moist but not soggy.
- Move to a slightly larger pot: Once the plant has developed a decent root system and is producing more leaves, you can transplant it into a slightly larger pot with fresh potting mix.
- Watch out for rot: The most common problem you might encounter is rot, which typically appears as mushy, dark stems or leaves. This is almost always due to overwatering or poor drainage. If you see this, salvage any healthy parts and try again with a drier mix.
- Wilting can happen: Sometimes cuttings will wilt a bit while they’re establishing. As long as the stems are firm and not rotting, this is usually just part of the process. Keep humidity up and be patient.
A Encouraging Closing
Propagating plants is a journey of patience and observation. There will be times things don’t quite work out, and that’s okay! Every attempt teaches you something new. Getting your own Stipularia africana from a tiny cutting is incredibly satisfying. So grab your shears, get your hands in the soil, and enjoy the magic of watching new life emerge. Happy propagating!
Resource:
https://identify.plantnet.org/k-world-flora/species/Stipularia%20africana%20P.Beauv./data