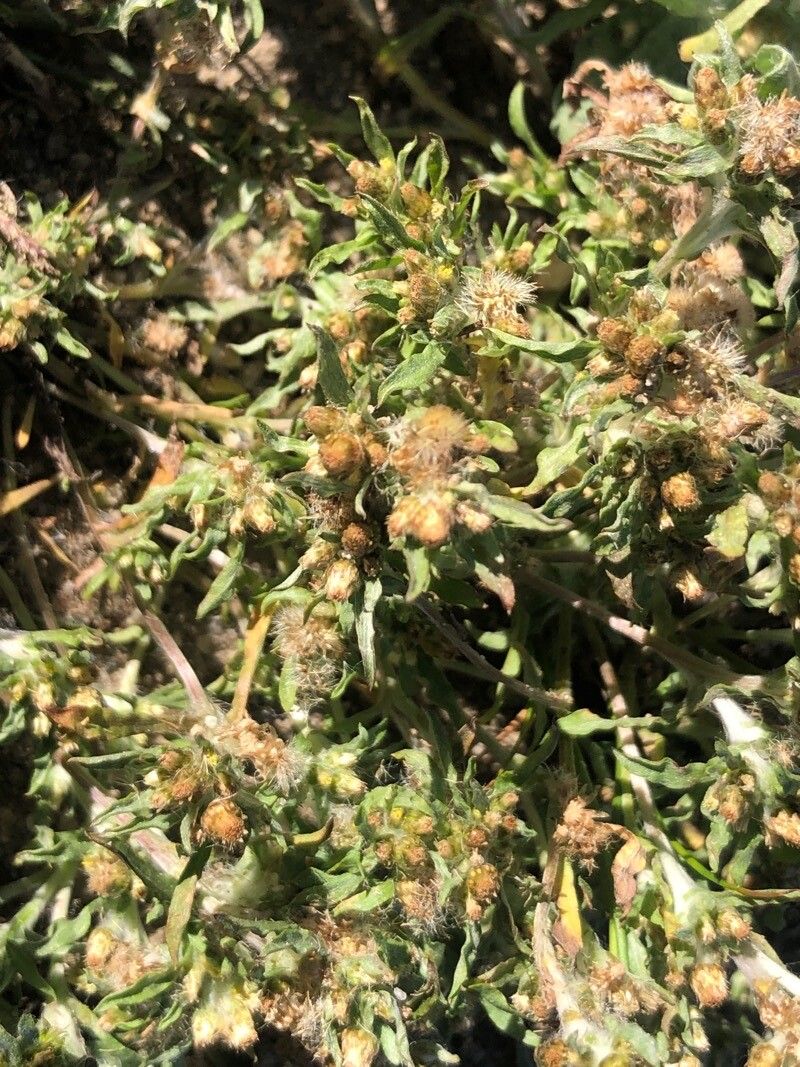
Hello there, fellow plant lovers! Today, I want to chat about a little gem that often gets overlooked: Gnaphalium uliginosum, or as many of us affectionately call it, “Common Cudweed.” This plant might not have the dramatic blooms of a rose or the architectural presence of a succulent, but it possesses a quiet charm that really grows on you. Its soft, woolly foliage and delicate, often overlooked flowers bring a lovely texture to the garden, particularly in drier or wilder corners. And the best part? It’s surprisingly easy to share its charm with friends! Propagating it is a wonderfully rewarding way to multiply your enjoyment without breaking the bank. Honestly, for beginners, this is a fantastic plant to get your propagation skills honed.
When to Get Your Hands Dirty
The absolute best time to tackle propagating Gnaphalium uliginosum is in late spring to early summer. This is when the plant is actively growing, meaning it has plenty of energy to put into developing new roots. Look for young, non-flowering shoots. They’re more pliable and have a better chance of taking hold. You can also try in the autumn, but the success rate might be a little lower as the plant prepares for dormancy.
Your Propagation Toolkit
Ready to get started? Here’s what you’ll want to have on hand:
- Sharp, clean pruning shears or a sharp knife: For making clean cuts on your cuttings.
- Rooting hormone (optional but helpful): A little powder or gel can give your cuttings a boost.
- A well-draining potting mix: I like a blend of equal parts peat moss or coco coir and perlite or coarse sand.
- Small pots or seed trays: Clean ones, of course!
- A watering can with a fine rose: To water gently without disturbing the cuttings.
- Plastic bags or a propagator: To create a humid environment.
- Labels and a marker: To keep track of what you’ve planted and when.
Spreading the Love: Propagation Methods
Gnaphalium uliginosum is quite obliging when it comes to propagation, primarily favoring stem cuttings. Here’s how we’ll do it:
Stem Cuttings:
- Select your donor plant: Find a healthy, vigorous Gnaphalium uliginosum with several young, non-woody stems.
- Take your cuttings: Using your clean shears or knife, cut stems that are about 3-4 inches long. Make the cut just below a leaf node (where a leaf attaches to the stem). Remove the lower leaves, leaving just a couple at the very top.
- Prepare your cuttings: If you’re using rooting hormone, lightly dip the cut end into the powder or gel. This might seem like a small step, but it can make a big difference.
- Plant your cuttings: Fill your small pots or seed trays with your well-draining potting mix. Make a little hole with your finger or a pencil, and gently insert the cuttings. Firm the soil gently around them.
- Water them in: Water thoroughly but gently, ensuring the soil is moist but not waterlogged.
- Create humidity: This is key! You can tent a plastic bag loosely over the pot or place it inside a propagator. Make sure the leaves don’t touch the inside of the bag if possible.
- Provide light and warmth: Place the pots in a bright spot out of direct sunlight. A greenhouse or even a windowsill that gets bright, indirect light is perfect. Some gentle warmth from a heat mat can speed things up, but it’s not strictly necessary for this plant.
My Gardener’s “Secret Sauce”
Now, for a couple of little tricks I’ve picked up over the years that often make propagation just that much easier:
- Don’t drown your cuttings: While humidity is vital, avoid letting water pool at the bottom of your pots. Too much standing water is the quickest way to encourage rot. Ensure good drainage, and if you see water collecting, tip out the excess.
- The “lean-to” method: Sometimes, instead of a bag, I’ll prop the cuttings up against the side of the pot with a small stone or twig. This can actually help them root by giving them a bit of stability and still allowing for air circulation. Don’t overcrowd the pot; give each cutting a little elbow room!
Nurturing Your New Sprouts & What to Watch For
Once your cuttings are planted, the waiting game begins. Keep the soil consistently moist but not soggy and maintain that humid environment. You’ll know they’re rooting when you see new tiny leaves or shoots appearing at the top of the cutting. This usually takes anywhere from 2 to 6 weeks, depending on the conditions.
If you notice mushy stems or leaves turning black and falling off, that’s the dreaded rot. It usually means there’s too much moisture and not enough air circulation. Don’t despair! You can try pulling out the affected cuttings, making sure the remaining ones have better air flow, and reducing watering slightly.
When your baby cudweeds have a decent root system – you might even see roots peeking out the drainage holes – it’s time to gently pot them up into individual, slightly larger containers. Continue to keep them moist and in bright, indirect light for a few more weeks before acclimatizing them to outdoor conditions.
Just Keep Growing!
Propagating plants is a journey, and Gnaphalium uliginosum is a wonderfully forgiving one to begin with. Be patient, trust the process, and don’t be afraid to try again if your first few attempts don’t quite take. There’s such a thrill in watching a tiny cutting transform into a flourishing plant. Happy propagating, my friends!
Resource:
https://identify.plantnet.org/k-world-flora/species/Gnaphalium%20uliginosum%20L./data