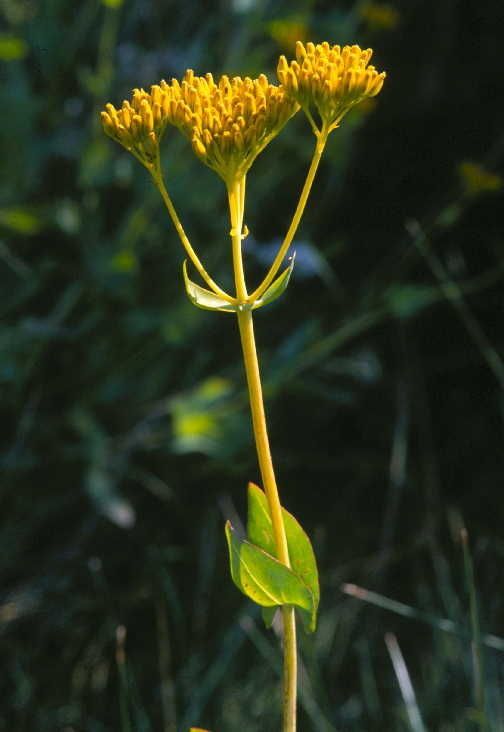
Hey there, fellow garden enthusiasts! Today, we’re diving into the wonderful world of Flaveria chlorifolia. I’ve been growing this beauty for years, and let me tell you, its cheerful yellow blooms and easy-going nature make it a favorite in my garden. Plus, the sheer joy of watching a tiny cutting transform into a thriving plant is incredibly rewarding. If you’re new to gardening, you’ll be happy to know that Flaveria chlorifolia is a fantastic plant to start with. Its resilience is truly a gift.
The Best Time to Start
For the highest success rates, late spring or early summer is your golden window. This is when the plant is actively growing and has plenty of energy to put into developing new roots. You can also take cuttings in early autumn, but give them enough time to establish before cooler weather sets in. Wait until the plant has some good, healthy growth – no need to rush with very young, wispy stems.
Supplies You’ll Need
Gathering your supplies beforehand makes the whole process smoother. Here’s what I always have on hand:
- Sharp Pruning Shears or a Clean Knife: For taking clean cuts.
- Rooting Hormone (Optional but Recommended): A little powder or gel can significantly speed things up.
- Well-Draining Potting Mix: A standard seed-starting mix or a blend of peat moss, perlite, and a bit of compost is perfect.
- Small Pots or Trays: Clean containers with drainage holes are a must.
- Clear Plastic Bags or a Propagator: To create a humid environment.
- Watering Can or Spray Bottle: For gentle watering.
Propagation Methods
There are a couple of ways to go about this, but my favorite is by stem cuttings. It’s straightforward and yields great results.
Stem Cuttings:
- Take Your Cuttings: Look for healthy, non-flowering stems that are at least 4-6 inches long. Using your clean shears or knife, cut just below a leaf node (where a leaf attaches to the stem). I like to take several cuttings at once, just in case.
- Prepare the Cuttings: Gently remove the lower leaves from the stem, leaving just a few at the top. This prevents them from rotting in the soil.
- Apply Rooting Hormone (If Using): Dip the cut end into the rooting hormone, tapping off any excess.
- Plant Your Cuttings: Fill your small pots or trays with your prepared potting mix. Make a small hole with a pencil or your finger and insert the cutting so that at least one leaf node is buried beneath the soil. Gently firm the soil around it.
- Water Gently: Water the soil thoroughly until it’s evenly moist but not waterlogged.
- Create Humidity: Cover the pots with a clear plastic bag or place them in a propagator. This helps keep the humidity high, which is crucial for rooting. You can prop the bag up with stakes so it doesn’t touch the leaves.
- Place in Bright, Indirect Light: Find a warm spot that receives plenty of bright, filtered light, but avoid direct sun, which can scorch the young cuttings.
Water Propagation (A Simpler Alternative):
If you prefer a simpler approach, you can also try water propagation.
- Take Cuttings: Follow steps 1 and 2 as above.
- Place in Water: Pop your prepared cuttings into a jar or glass of water. Ensure at least one leaf node is submerged but that the remaining leaves are above the water line.
- Change Water Regularly: Change the water every few days to keep it fresh and prevent bacterial growth.
- Watch for Roots: In a few weeks, you should see small white roots forming. Once the roots are about an inch long, you can pot them up into soil as described above.
The “Secret Sauce” (Pro Tips!)
Here are a few things I’ve learned over the years that make a big difference:
- Bottom Heat is Your Friend: If you have it, placing your pots on a heat mat designed for propagation can really speed up root development. It mimics the warmth of spring soil.
- Don’t Let Leaves Touch Water (in Water Propagation): This is so important for avoiding rot. Any submerged leaves are a potential entry point for disease. A little trim often solves this!
- Check for Resistance: When you think your cuttings might be rooted (usually after 3-4 weeks), give them a very gentle tug. If you feel resistance, it means roots have formed!
Aftercare & Troubleshooting
Once you see new growth, it’s a good sign your cuttings have rooted.
- Acclimate Gradually: If you used a plastic bag or propagator, gradually introduce your new plants to drier air over a few days by opening it up for increasing periods.
- Keep Watering Consistently: Water when the top inch of soil feels dry. Avoid letting them dry out completely.
- Pot Up When Ready: Once your plants have a decent root system and are growing well, you can pot them into slightly larger containers with good quality potting soil.
- Watch for Rot: The most common problem is rot, which presents as mushy, black stems or leaves. This is usually due to overwatering or poor drainage. If you spot it, sadly, that cutting is likely lost. It’s why good drainage and not overwatering are so vital. Yellowing leaves can also sometimes indicate too much or too little water, or not enough light.
There you have it! Propagating Flaveria chlorifolia is a wonderfully accessible way to multiply your garden’s beauty. Be patient with the process; nature has its own rhythm. Enjoy watching your little green babies thrive! Happy gardening!
Resource:
https://identify.plantnet.org/k-world-flora/species/Flaveria%20chlorifolia%20A.Gray/data