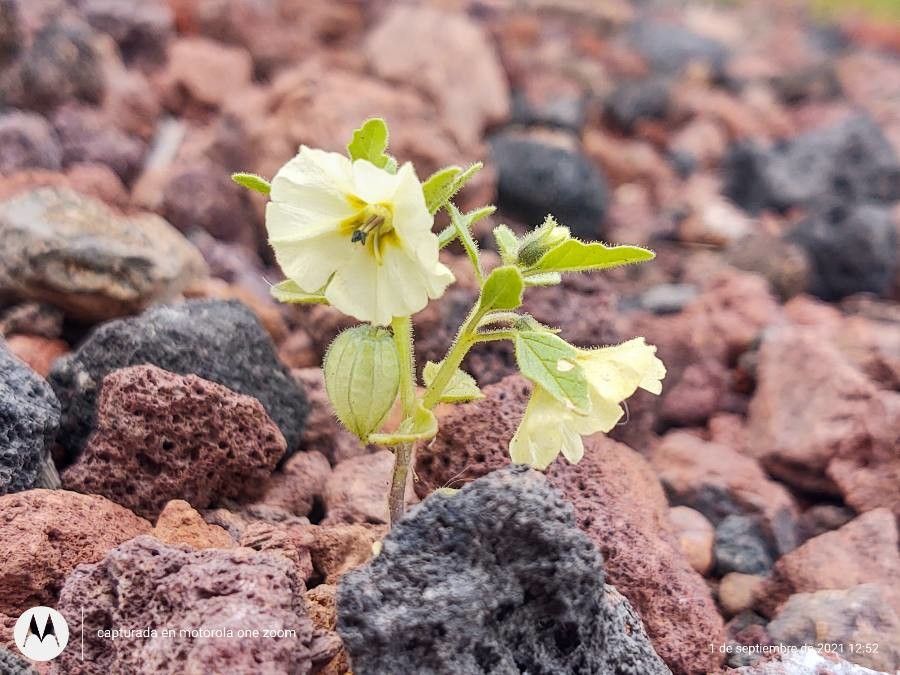
Hello there, fellow plant lovers! If you’ve ever been captivated by the sunshine-yellow blooms and intriguing, papery lanterns of Physalis sulphurea, you’re in for a treat. This cheerful little plant, often called the yellow cape gooseberry or Peruvian groundcherry, brings such a lovely pop of color and a touch of the exotic to any garden or sunny windowsill. And guess what? You can easily bring that joy into more spots by propagating your own! It’s a wonderfully rewarding way to expand your collection, share with friends, or simply get more of what you love. For beginners, I’d say Physalis sulphurea is quite forgiving, making it an excellent plant to try your hand at propagating.
The Best Time to Start
The absolute sweet spot for propagating Physalis sulphurea is in the late spring and early summer, right as the plant is hitting its stride and actively growing. This is when cuttings will have the most energy to root. If you miss this window, don’t fret! You can often get away with taking cuttings in mid-summer, but they might take a little longer to establish. Avoid taking cuttings from a plant that’s stressed by heat or drought.
Supplies You’ll Need
Gathering your supplies before you begin makes the whole process much smoother. Here’s what I usually have on hand:
- Sharp, clean pruning shears or a small knife: A clean cut is crucial for preventing infection.
- Rooting hormone (optional but recommended): This really gives your cuttings a boost. I prefer a powder form for stem cuttings.
- Small pots or trays: Clean terracotta or plastic pots work well. Make sure they have drainage holes!
- Well-draining potting mix: I like a mix of perlite, vermiculite, and peat moss or coco coir. You can also find good quality seed-starting mixes.
- A mister or spray bottle: For keeping things humid.
- Plastic bags or a propagator: To create a mini-greenhouse effect.
- Labels: To keep track of your cuttings!
Propagation Methods
Physalis sulphurea is wonderfully amenable to a couple of propagation methods, and I find stem cuttings to be the most reliable and straightforward.
Stem Cuttings
-
Take Your Cuttings: In late spring or early summer, select a healthy, non-flowering stem from your established plant. Look for stems that are about 4-6 inches long and have a bit of flexibility, not too woody and not too soft. Using your clean shears or knife, make a clean cut just below a node (where a leaf attaches to the stem). Remove the lower leaves, leaving just a couple at the very top. This prevents them from rotting in the soil.
-
Apply Rooting Hormone: Dip the cut end of the stem into your rooting hormone powder, tapping off any excess. This extra step really encourages root development.
-
Plant the Cuttings: Fill your small pots with your prepared potting mix. Make a small hole in the center of the soil with your finger or a pencil. Gently insert the cut end of the stem into the hole, ensuring the node where you removed the leaves is below the soil line. Firm the soil gently around the cutting.
-
Create a Humid Environment: Water the soil lightly until it’s evenly moist, but not soggy. Then, cover the pot with a plastic bag or place it inside a clear plastic propagator. This traps humidity, which is vital for cuttings to root. You can prop the bag up with a couple of skewers so it doesn’t touch the leaves.
-
Placement: Place the potted cuttings in a bright spot, but out of direct, intense sunlight. A windowsill that gets bright, indirect light is usually perfect.
-
Patience is Key: Keep the soil consistently moist but not waterlogged. You should start to see new leaf growth or feel a slight resistance when you gently tug on the cutting in 2-4 weeks.
The “Secret Sauce” (Pro Tips)
Here are a couple of things I’ve learned over the years that really help:
- Bottom Heat is Your Friend: If you can manage it, placing your pots on a propagation mat or over a heating vent provides gentle bottom warmth. This consistently warm soil mimics ideal conditions and can significantly speed up root formation. It’s like giving your cuttings a warm hug to encourage them!
- Don’t Overwater! This is a big one. It’s so tempting to drown your cuttings in an attempt to keep them happy, but waterlogged soil is the fastest way to invite rot. Aim for consistently moist, not soggy. If you see water pooling on the surface, you’ve gone too far.
Aftercare & Troubleshooting
Once your cuttings have developed a good root system – you’ll know because they’ll be actively growing and resistant to a gentle tug – it’s time to transition them.
- Acclimatization: Gradually remove the plastic cover over a few days. This helps the new plant adjust to lower humidity.
- Repotting: You can then pot them up into slightly larger containers with your regular potting mix.
- Watering: Water them thoroughly when the top inch of soil feels dry.
- Light: Continue to provide bright, indirect light.
Now, for the common issues: If your cuttings turn mushy or black at the base, that’s a sure sign of rot, usually caused by overwatering or a lack of air circulation. If you see this happening, unfortunately, that cutting is likely lost. Your best bet is to pluck it out and examine your watering and humidity levels with your other cuttings. Yellowing leaves can sometimes indicate too much direct sun or insufficient water, but often, it’s just the cutting shedding older leaves to focus energy on rooting.
A Encouraging Closing
Propagating Physalis sulphurea is such a satisfying endeavor, and with a little patience and these tips, you’ll be well on your way to enjoying even more of its sunny charm. Don’t be discouraged if not every cutting makes it – that’s part of the learning process! Celebrate the successes, learn from the challenges, and most importantly, enjoy the journey of nurturing new life from your favorite plants. Happy growing!
Resource:
https://identify.plantnet.org/k-world-flora/species/Physalis%20sulphurea%20(Fernald)%20Waterf./data