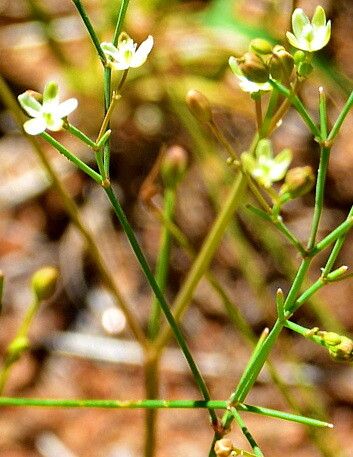
Oh, hello there! Come on in, let’s chat about your garden. Today, I want to share a little secret about a plant that has brought me so much joy over the years: Paramollugo nudicaulis. You might know it by its common name, the “wandering dewdrop” or sometimes just “dewdrop.” It’s such a delicate beauty, with these lovely little pale pink flowers that seem to shimmer in the sunlight. Propagating it feels like playing fairy godmother for your plants – watching a tiny piece flourish into a whole new specimen is just magical. And the best part? You’ll be delighted to know it’s quite an approachable plant for even those just dipping their toes into the world of propagation.
The Best Time to Start
When it comes to Paramollugo nudicaulis, I find that spring and early summer are your golden windows for propagation. This is when the plant is actively growing, pushing out new shoots that are robust and eager to root. Waiting until after your plant has settled into the warmer weather will give you the best chance of success, rather than trying to coax new life from it during its dormant or stressed periods.
Supplies You’ll Need
Here’s what I keep handy when I’m getting ready to propagate my dewdrop plants:
- Sharp pruning shears or a clean craft knife: For making precise cuts.
- Rooting hormone (optional but helpful): A little boost can speed things along.
- A well-draining potting mix: I usually mix equal parts perlite and peat moss or coir. Something that doesn’t hold too much moisture is key.
- Small pots or seed trays: Clean containers are a must to prevent disease.
- Watering can with a fine rose: For gentle watering.
- Plastic bags or cloches: To create a humid environment.
Propagation Methods
Paramollugo nudicaulis is wonderfully adaptable, and you’ve got a couple of excellent ways to create more plants.
Stem Cuttings
This is my go-to method.
- Take your cuttings: In spring or early summer, select a healthy, non-flowering stem. Look for a section that’s about 3-4 inches long.
- Make the cut: Just below a leaf node (where a leaf attaches to the stem), make a clean cut with your sharp shears or knife. This is where roots are most likely to form.
- Prepare the cutting: Gently remove the lower leaves, leaving just a couple at the very top. If you’re using rooting hormone, dip the cut end into it now.
- Plant your cuttings: Moisten your potting mix in your small pots. Make a small hole with your finger or a pencil and insert the cut end of the stem. Gently firm the soil around it.
- Create humidity: Mist the cuttings lightly with water and cover the pot with a plastic bag or a clear plastic cloche. This traps moisture and mimics the humid conditions the cuttings need to thrive. Place them in bright, indirect light.
Water Propagation
This is a visually satisfying method, and Paramollugo nudicaulis often roots readily in water.
- Select and cut: Follow steps 1 and 2 from the stem cuttings method.
- Place in water: Remove all but the top two leaves. Place the cutting in a clean glass or jar filled with room-temperature water.
- Change the water: Change the water every few days to keep it fresh and prevent bacterial growth.
- Wait for roots: You’ll start to see tiny roots emerge within a couple of weeks. Once the roots are about an inch long, you can carefully transplant them into your well-draining potting mix.
The “Secret Sauce” (Pro Tips)
Having gardened for a while, I’ve learned a few little tricks that can make all the difference.
- Never let the leaves touch the water in water propagation. If they sit in the water, they’ll rot quickly, and you’ll lose your cutting before it even has a chance to form roots.
- When you’re using bottom heat (which I highly recommend for cuttings in pots), just a gentle warming mat can do wonders. It encourages root development from below, which really speeds up the process and improves success rates.
- Don’t be afraid to pinch off any tiny flower buds that form on your cuttings. The plant’s energy is much better spent on developing strong roots rather than producing flowers at this stage.
Aftercare & Troubleshooting
Once your cuttings show signs of rooting – you’ll see new leaf growth or feel a gentle tug when you very lightly try to pull them – it’s time to transition them.
- Reduce humidity gradually: After a week or so, start to open the plastic bags or cloches a little each day to acclimate them to normal humidity levels.
- Watering: Water when the top inch of soil feels dry. Avoid overwatering, as this is the quickest way to invite root rot, which is a common sign of failure. You’ll notice wilting, mushy stems, or a foul smell if rot has set in.
- Light: Continue to provide bright, indirect light. Direct sun can scorch these tender new plants.
A Encouraging Closing
Growing new plants from cuttings is such a rewarding journey. It takes a little patience, a lot of observation, and a forgiving spirit. Don’t get discouraged if a few don’t make it – that’s part of learning! Just enjoy the process, celebrate each success, and soon you’ll have a whole collection of your own beautiful Paramollugo nudicaulis. Happy gardening!
Resource:
https://identify.plantnet.org/k-world-flora/species/Paramollugo%20nudicaulis%20(Lam.)%20Thulin/data