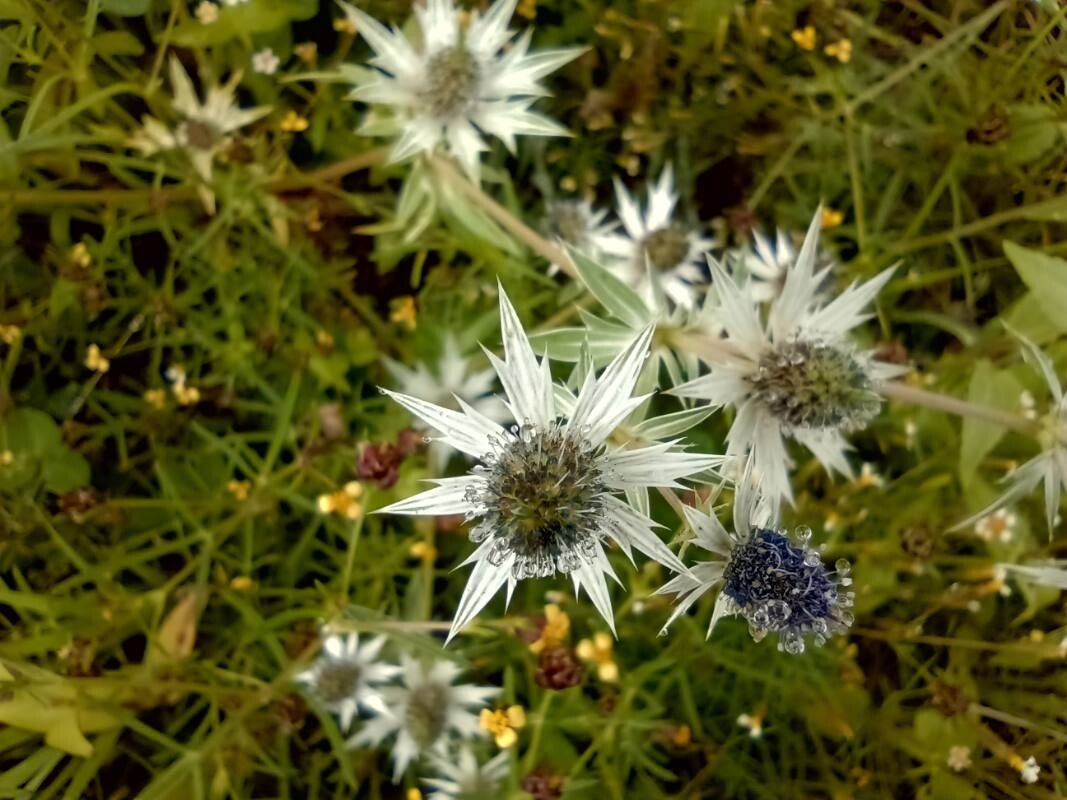
Oh, Eryngium heterophyllum! If you’ve ever admired those spiky, architectural beauties in a garden, you’ve likely fallen for the magic of sea holly. Their silvery-blue to steely-gray blooms, often with a metallic sheen, add such a unique texture and color interest, especially when they dry beautifully for arrangements. Propagating them yourself is a wonderfully rewarding endeavor, giving you more of these stunning plants to fill your own garden or share with friends. Now, I won’t lie, Eryngium can be a tad finicky, so it might be a medium challenge for absolute beginners, but with a little patience and these tips, you’ll be well on your way.
The Best Time to Start
For Eryngium heterophyllum, late spring to early summer is your sweet spot. This is when the plant is actively growing, meaning it has the energy reserves to put into developing new roots. Aim to take cuttings or divide plants when they are not in full bloom. That said, if you miss this window, you can sometimes succeed with divisions in early autumn as the plant starts to wind down for the year, but spring success is generally higher.
Supplies You’ll Need
Here’s what you’ll want to have on hand before you begin:
- Sharp, clean pruning shears or a sharp knife: Essential for making clean cuts that heal well.
- Rooting hormone powder or gel: This isn’t strictly mandatory for all Eryngium, but it can significantly boost your success rate, especially with cuttings.
- Well-draining seed starting mix or a 50/50 blend of perlite and peat moss/coir: Eryngium absolutely loathes sitting in soggy soil. This mix is key.
- Small pots or trays: Clean, small containers are perfect for starting cuttings.
- Watering can with a fine rose or a spray bottle: Gentle watering is crucial.
- Labels and a permanent marker: So you don’t forget what you planted where!
- Optional: A propagator or plastic bag: To create a humid environment for cuttings.
- Optional: A heat mat: For cuttings, bottom warmth can really speed up root development.
Propagation Methods
I’ve found two primary methods work best for Eryngium heterophyllum: stem cuttings and division.
Stem Cuttings
This is my preferred method for increasing my Eryngium stock.
- Select healthy stems: Look for new, but not overly soft growth. Stems that are about 4-6 inches long and have started to firm up are ideal. Avoid flowering stems.
- Make the cut: Using your sharp shears, make a clean cut just below a leaf node (where a leaf attaches to the stem). This is where the plant’s rooting hormones are most concentrated.
- Prepare the cutting: Remove the lower leaves, leaving just a few at the top. If the cutting is very leafy, you can even trim the remaining leaves in half to reduce water loss.
- Apply rooting hormone: Dip the cut end of the stem into the rooting hormone powder or gel. Tap off any excess.
- Plant your cuttings: Fill your small pots with your well-draining potting mix. Make a small hole with a pencil or your finger, and insert the prepared cutting, ensuring the node where you removed the leaves is buried. Gently firm the soil around the base.
- Water gently: Water thoroughly but be careful not to dislodge the cuttings.
- Create humidity: Place the pot in a plastic bag or propagator. Ensure the bag doesn’t directly touch the leaves. If you have a heat mat, place the pot on it.
- Provide light: Keep them in a bright spot, out of direct sunlight.
Division
This method is best done on established plants, ideally in spring.
- Prepare your plant: Water the parent plant well a day or two before you plan to divide it. This helps reduce stress and makes the soil easier to work with.
- Carefully excavate: Gently dig around the base of the plant, lifting the entire clump from the soil. You can use a garden fork for this.
- Separate the roots: Gently pull the root ball apart with your hands. If the roots are densely tangled, you might need a clean, sharp spade or knife to cut through them. Aim for divisions that have at least a few healthy shoots and a good portion of roots.
- Trim if necessary: If the roots are excessively long or damaged, you can trim them back a bit to encourage new growth.
- Replant immediately: Plant your divisions into their new homes or pots filled with your well-draining mix. Ensure the crown (where the stems emerge from the roots) is at soil level.
- Water well: Water the newly planted divisions thoroughly.
The “Secret Sauce” (Pro Tips)
Here are a few things I’ve learned over the years that really make a difference:
- “Sacrifice” the smallest leaves: On your stem cuttings, if you have very tiny leaves near the bottom that might get submerged in water or soil, don’t be afraid to pinch them off entirely. They’re unlikely to survive submerged and will just draw energy away from root development.
- Whisper quiet when watering: After planting cuttings or divisions, give them a really gentle watering. Avoid a forceful stream. If you’re using a spray bottle, a fine mist is perfect for cuttings. For divisions, make sure the water soaks in without washing away soil.
- Don’t rush the separation: When dividing large clumps, it’s tempting to yank them apart. Be patient. Gentle teasing and wiggling will preserve more fine roots, which are crucial for the new plant’s survival. If you absolutely must cut, use a sterilized tool to prevent disease.
Aftercare & Troubleshooting
Once your cuttings have sprouted new growth or your divisions are planted, it’s time for tender loving care.
- For cuttings: Keep them in the humid environment (bag or propagator) until you see vigorous new growth and they feel firm when gently tugged. This can take anywhere from 4-8 weeks. Once they’re ready, gradually acclimate them by opening the bag for a few hours each day. Once they’re hardened off, treat them like small established plants, keeping the soil consistently moist but not soggy.
- For divisions: Water them regularly, but let the top inch of soil dry out between waterings. Keep them in a spot with bright, indirect light initially. As they establish, you can move them to a sunnier location.
Now, what if things go wrong? The most common culprit for failure is rot, usually due to overwatering or poor drainage. If your cuttings turn mushy and black, or if your divisions wilt despite being watered, this is likely the issue. Sadly, there’s no coming back from rot, so it’s about learning from it for next time. If a cutting simply fails to root and stays looking perky but doesn’t act like it’s growing, it might just not have been viable. Don’t despair! Just try again with fresh material when conditions are right.
Happy propagating! It’s such a joy to watch these tough little plants spring to life, and with a bit of care, you’ll have a whole garden of Eryngium to admire. Be patient with the process, enjoy the hands-on work, and celebrate every little success!
Resource:
https://identify.plantnet.org/k-world-flora/species/Eryngium%20heterophyllum%20Engelm./data