Oh, hello there! Pull up a chair and let’s talk ferns. Specifically, let’s chat about the beauty that is Polystichum shensiense. Honestly, this fern is a quiet achiever in the garden, with its elegant, lacy fronds that add such a refined touch. They have this wonderful texture, almost leathery, and a lush green that just sings. Plus, they’re surprisingly tough once they get going.
Now, as for propagating Polystichum shensiense, I’d say it’s a fantastic project, but perhaps not the absolute easiest for a total beginner. It takes a little patience and a keen eye, but the reward of watching a brand new frond unfurl from a tiny start? Simply glorious. It’s a journey that connects you even deeper with your plants.
The Best Time to Start
For our Polystichum shensiense, the absolute prime time to get your hands dirty is late winter to early spring, just as the plant is waking up from its winter slumber. You’ll see new growth starting to emerge, and the plant has all the energy it needs to throw into making little babies. Trying to propagate when it’s stressed, like during a heatwave or when it’s fully dormant, is just asking for disappointment.
Supplies You’ll Need
Before we dive in, let’s get our toolkit ready. Think of this as gathering your ingredients for a wonderful recipe:
- Sharp, clean pruning shears or a knife: For making clean cuts. No crushing those delicate stems!
- Well-draining potting mix: I like a blend of good quality potting soil with plenty of perlite and horticultural grit to ensure good aeration. A peat-free mix works beautifully here.
- Small pots or propagation trays: Whatever you have available, just make sure they have drainage holes.
- Watering can or spray bottle: For gentle watering and misting.
- (Optional) Rooting hormone: While not always strictly necessary for this fern, it can give your cuttings a little boost. Look for a powder or gel specifically for soft or semi-hardwood cuttings.
- Clear plastic bag or propagation dome: To create a humid microclimate.
Propagation Methods
Polystichum shensiense is most commonly and successfully propagated through division. This is like giving the parent plant a gentle haircut and seeing if you can split off a piece to grow on its own.
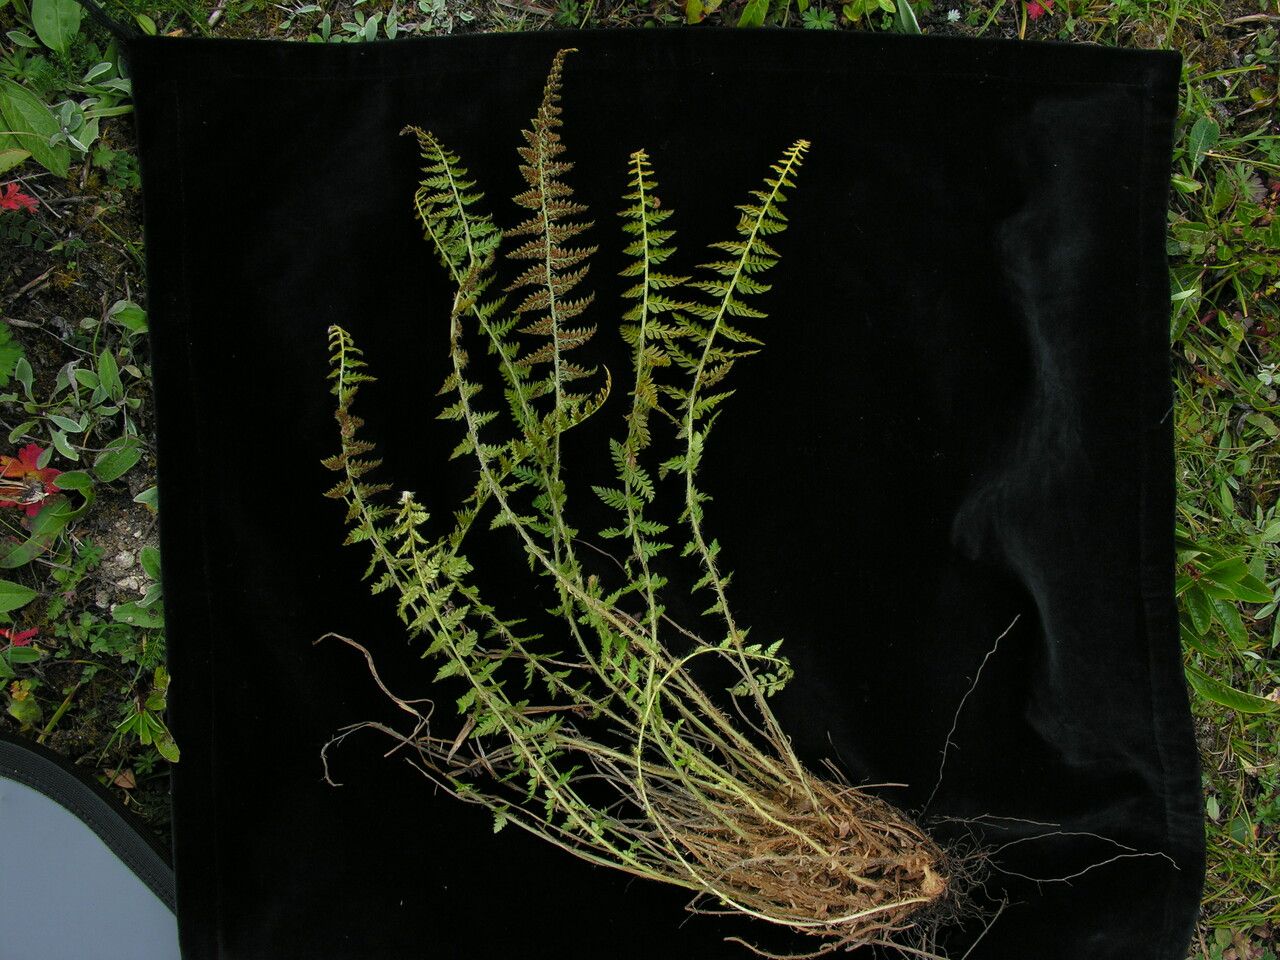
- Gently dig up the parent plant: During that late winter/early spring window, carefully excavate your Polystichum shensiense from its pot or garden bed. Try to disturb the root ball as little as possible.
- Examine the root ball: Look for natural divisions. You’ll often see where new crowns (the central growing point of the fern) are forming. They might be slightly separated from the main clump.
- Separate the divisions: This is where your clean pruning shears or knife come in. Carefully cut or pull apart the divisions. You want each division to have at least one healthy crown and a good portion of roots attached. Don’t try to break them apart with your bare hands if it requires too much force; a clean cut is always better.
- Pot up the divisions: Plant each division in its own pot filled with your well-draining potting mix. Ensure the crown is at or just slightly above soil level.
- Water gently: Water thoroughly but gently, ensuring the soil is moist but not waterlogged.
The “Secret Sauce” (Pro Tips)
Here are a couple of things I’ve learned over the years that make a big difference:
- Don’t be afraid to be a little ruthless with division: If a clump is very dense, you might need to make more than one cut. The parent plant will recover beautifully, and you’ll have more new ferns to enjoy! Always prioritize good roots and a healthy crown on your divisions.
- Humidity is your friend: After potting up your divisions, cover them with a clear plastic bag or pop on a propagation dome. This creates that steamy, humid environment ferns absolutely adore and helps them root without drying out. Just make sure a leaf or frond isn’t pressed directly against the condensation; it can encourage rot. You might need to open it for a few minutes each day to allow for some air circulation.
Aftercare & Troubleshooting
Once your divisions are potted up, place them in a bright, indirect light location. Avoid direct sun at all costs – it will scorch those tender new fronds. Keep the soil consistently moist, but never soggy. Think of it like a wrung-out sponge.
You’ll know your division is happy when you see new frond growth emerging from the crown. This can take several weeks, so be patient!
The most common issue you might encounter is rot. If you see mushy, discolored stems or fronds, it’s usually a sign of too much moisture and poor air circulation. If this happens, immediately pull the affected division out, trim away any rotten parts with clean shears, and repot it in fresh, drier soil. Ensure you’re not overwatering and that the pot has good drainage.
A Little Closing Encouragement
Propagating plants is a journey of learning and observation. Embrace the process, learn from any setbacks, and celebrate every success. Watching a piece of your beloved Polystichum shensiense grow into its own beautiful plant is one of the most satisfying experiences in gardening. Happy propagating, and enjoy the greenery!
Resource:
https://identify.plantnet.org/k-world-flora/species/Polystichum%20shensiense%20Christ/data