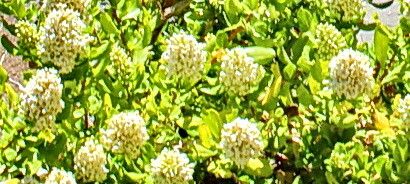
Hello, fellow garden enthusiasts! I’m so glad you’ve popped by. Today, we’re going to talk about a shrub that I’ve grown to adore over the years: Escallonia myrtoidea. If you’re looking for a resilient, handsome evergreen with lovely glossy leaves and pretty pinkish-white flowers that attract pollinators, you’re in for a treat. And the best part? Propagating it is a wonderfully rewarding way to fill your garden, or share with friends. Now, I’ll be honest, Escallonia can be a bit of a slow starter when it comes to rooting, so it might be a tad more challenging than, say, a basil plant. But with a little patience and the right approach, you’ll be well on your way to success.
The Best Time to Start
My best advice for propagating Escallonia is to take stem cuttings. And the opportune moment? Late spring or early summer, just as the plant is actively growing but before it puts all its energy into flowering. You want to look for new growth that’s firm but not yet woody. Think of it as “semi-hardwood” – it should snap with a clean break, not bend limply.
Supplies You’ll Need
Before we dive in, let’s gather our tools. Having everything at the ready makes the process so much smoother.
- Sharp pruning shears or a clean knife: For taking your cuttings.
- Rooting hormone powder or gel: This is a real game-changer for encouraging root development.
- Small pots or trays: With drainage holes, of course!
- A good potting mix: I like a blend of equal parts perlite and peat moss, or a sterile seed-starting mix. This ensures excellent drainage, which is crucial.
- A plastic bag or clear propagator lid: To create a humid environment.
- Watering can or spray bottle: For gentle watering.
- Optional: A heat mat: For providing gentle bottom warmth.
Propagation Methods: Stem Cuttings
This is my go-to method for Escallonia, and I find it to be the most reliable.
- Take the cuttings: Using your clean shears, snip pieces of stem that are about 4-6 inches long. Make your cut just below a leaf node (where a leaf joins the stem). Remove any lower leaves, leaving just the top few.
- Dip in rooting hormone: Gently dip the cut end of each cutting into your rooting hormone. Tap off any excess. This stuff really gives your cuttings a boost.
- Pot them up: Fill your small pots with your rooting mix. Make a small pilot hole with your finger or a pencil, then insert the cutting. Gently firm the soil around the stem to ensure good contact.
- Water lightly: Give them a good but gentle watering. You want the soil to be moist but not waterlogged.
- Create humidity: Cover the pots with a clear plastic bag or a propagator lid. This traps moisture and keeps your cuttings from drying out. Make sure the leaves don’t touch the plastic if possible. If you’re using a bag, you might need to support it with stakes so it doesn’t crush the foliage.
- Find a good spot: Place your pots in a bright location, but out of direct sunlight. A greenhouse or a sunny windowsill is usually perfect.
The “Secret Sauce” (Pro Tips)
Here are a couple of little tricks I’ve learned over the years that can make all the difference:
- Bottom Heat is Your Friend: Escallonia roots can be a bit shy. Placing your pots on a gentle heat mat can significantly speed up the rooting process. You’re aiming for a soil temperature around 70-75°F (21-24°C).
- Don’t Drown Those Dreams: It’s a common mistake to overwater when you’re excited about new cuttings. Too much moisture can lead to rot. The goal is consistently moist soil, not soggy. I often check by feeling the weight of the pot – if it feels light, it’s time to water.
- Be Patient with the Pull Test: Resist the urge to tug on your cuttings to see if they’ve rooted! Wait until you see signs of new leaf growth, which can take anywhere from 6 weeks to a few months for Escallonia.
Aftercare & Troubleshooting
Once you see signs of new growth, congratulations! That means roots are forming.
- Gradual Acclimation: Slowly start to harden off your new plants by removing the plastic bag or propagator lid for increasing periods each day. This helps them adjust to normal humidity levels.
- Continue Watering: Keep the soil consistently moist.
- Potting On: When the new plants have established a good root system (you might see roots peeking out of the drainage holes), you can carefully transplant them into slightly larger pots with a good quality potting mix.
- Watch for the Signs of Rot: The most common issue is rot, which will manifest as blackening stems or mushy bases. If you see this, sadly, that cutting is likely lost. It usually means the conditions were too wet or the air circulation was poor. Ensure your mix is well-draining and that your pots have good drainage holes.
So there you have it! Propagating Escallonia myrtoidea might require a touch more patience, but the reward of seeing those tiny roots emerge and new leaves unfurl is incredibly satisfying. Don’t be discouraged if not every cutting takes. Gardening is all about learning, experimenting, and enjoying the process. Happy propagating, and I can’t wait to see your new Escallonia babies flourish!
Resource:
https://identify.plantnet.org/k-world-flora/species/Escallonia%20myrtoidea%20Bertero%20ex%20DC./data