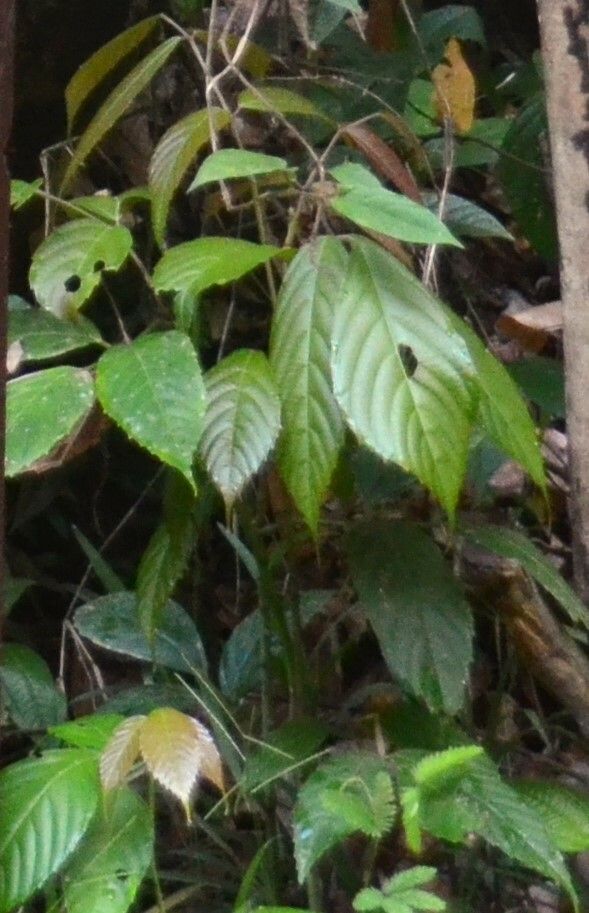
Oh, hello there! Come on in and have a seat. I’m so glad you’re interested in Cayratia mollissima. This plant is a real gem, isn’t it? With its delicate, almost fuzzy leaves and beautiful vining habit, it brings a wonderful touch of the tropics into any space. And the best part? It’s surprisingly rewarding to propagate. It’s not the absolute easiest vine to start from scratch, but with a little attention, you’ll be well on your way to a whole new plant.
The Best Time to Start
For Cayratia mollissima, I find the late spring or early summer is your golden window. This is when the plant is really hitting its stride, putting out lots of fresh, vigorous growth. That active growth phase means the stems have good energy reserves and are much more receptive to rooting. You can try it at other times, but you’ll likely see the best success when the weather is warm and the days are long.
Supplies You’ll Need
Before we get our hands dirty, let’s gather our tools. Having everything ready makes the process so much smoother.
- Sharp Pruning Shears or a Clean Knife: A clean cut is crucial to prevent disease.
- Rooting Hormone (Optional but Recommended): This helps give your cuttings a little boost. I like to use a powder, but gels work too.
- Well-Draining Potting Mix: A good blend is key. I often use a mix of equal parts peat moss and perlite, or a good quality seed starting mix.
- Small Pots or Seedling Trays: Clean pots are a must!
- Clear Plastic Bags or a Propagation Dome: This creates a humid microclimate for your cuttings.
- Water: For rooting in water or for watering your soil.
- A Spray Bottle: For misting.
Propagation Methods
Cayratia mollissima is quite adaptable, and I’ve had great success with a couple of favorite methods.
Stem Cuttings
This is my go-to for Cayratia mollissima. It’s straightforward and usually yields good results.
- Select Healthy Stems: Look for vibrant, non-woody stems that are at least 6-8 inches long. Ideally, they should have a few sets of leaves and some small aerial roots already forming near the nodes (the little bumps where leaves emerge).
- Make the Cut: Using your sharp shears or knife, make a clean cut just below a node. This is where the magic happens – new roots will emerge from here.
- Prepare the Cutting: Remove the lower leaves, leaving just the top two or three. If the leaves are very large, you can even cut them in half to reduce water loss.
- Dip in Rooting Hormone: If you’re using rooting hormone, lightly dip the cut end of the stem into it. Tap off any excess.
- Plant Your Cuttings: Fill your clean pots with your well-draining potting mix. Make a small hole in the center with your finger or a pencil and gently insert the cut end of the stem, ensuring at least one node is buried in the soil. Firm the soil gently around the cutting.
- Provide Humidity: Water the soil thoroughly but gently. Drape a clear plastic bag over the pot, creating a mini-greenhouse. You can also use a propagation dome. Make sure the plastic doesn’t touch the leaves too much. Place the pot in a warm spot with bright, indirect light.
Water Propagation
If you’re feeling a little more adventurous, or just want to watch the roots grow, water propagation can be fun!
- Prepare the Cuttings: Follow steps 1-3 from the stem cuttings method. You don’t need to worry about rooting hormone here.
- Place in Water: Find a clean jar or glass and fill it with fresh water. Submerge only the bottom portion of the cutting, making sure the leaves are well above the waterline. This is super important!
- Change Water Regularly: Every few days, change the water to keep it fresh. You’ll start to see little white root nubs appearing from the nodes within a few weeks.
- Pot Up When Roots are Established: Once the roots are about an inch long, you can gently transplant them into your well-draining potting mix, following the planting instructions in the stem cutting method.
The “Secret Sauce” (Pro Tips)
Here are a few little tricks I’ve picked up over the years that can really make a difference.
- The Node is King: When you’re making cuttings, always ensure you have at least one leaf node below the soil or water line. This is where the plant stores the energy and hormones to sprout new roots. Don’t bury more than one or two nodes, though, as older ones can sometimes rot.
- Bottom Heat is Your Friend: If you’re struggling for a bit more oomph, especially in cooler months, a propagation mat can be a godsend. It provides gentle warmth to the base of the cuttings, encouraging root development much faster. Just place your pots on top of it.
- Don’t Rush the Transplant: For water propagation, I always wait until the roots are at least an inch long and look healthy before moving them to soil. If you transplant too early, the delicate new roots can be easily damaged.
Aftercare & Troubleshooting
Once you see those first little signs of life – new leaf growth or significant root development – you’re doing great!
- Gradual Acclimation: If you used a plastic bag or dome, gradually introduce your new plant to drier air over a week. Start by opening the bag for a few hours a day, then remove it permanently.
- Light Watering: Continue to water when the top inch of soil feels dry. Don’t overwater, as this is the most common killer of new cuttings. You want the soil to be consistently moist but not soggy.
- Watch for Rot: The most common problem you’ll encounter is rot. If your cutting turns black and mushy, unfortunately, it’s likely a goner. This usually happens due to too much moisture, poor drainage, or a lack of airflow. Discard any rotten cuttings immediately to prevent it from spreading.
- Leggy Growth: If your cutting is stretching and looking pale, it’s a sign it needs more light. Move it to a brighter spot, still avoiding direct scorching sun.
Happy Rooting!
See? It’s not rocket science, but it does require a little patience and observation. Don’t get discouraged if not every cutting makes it – that’s part of the gardening journey! The joy of watching a new plant emerge from a simple stem is truly wonderful. Go ahead, give it a try. You’ve got this!
Resource:
https://identify.plantnet.org/k-world-flora/species/Cayratia%20mollissima%20(Wall.)%20Gagnep./data