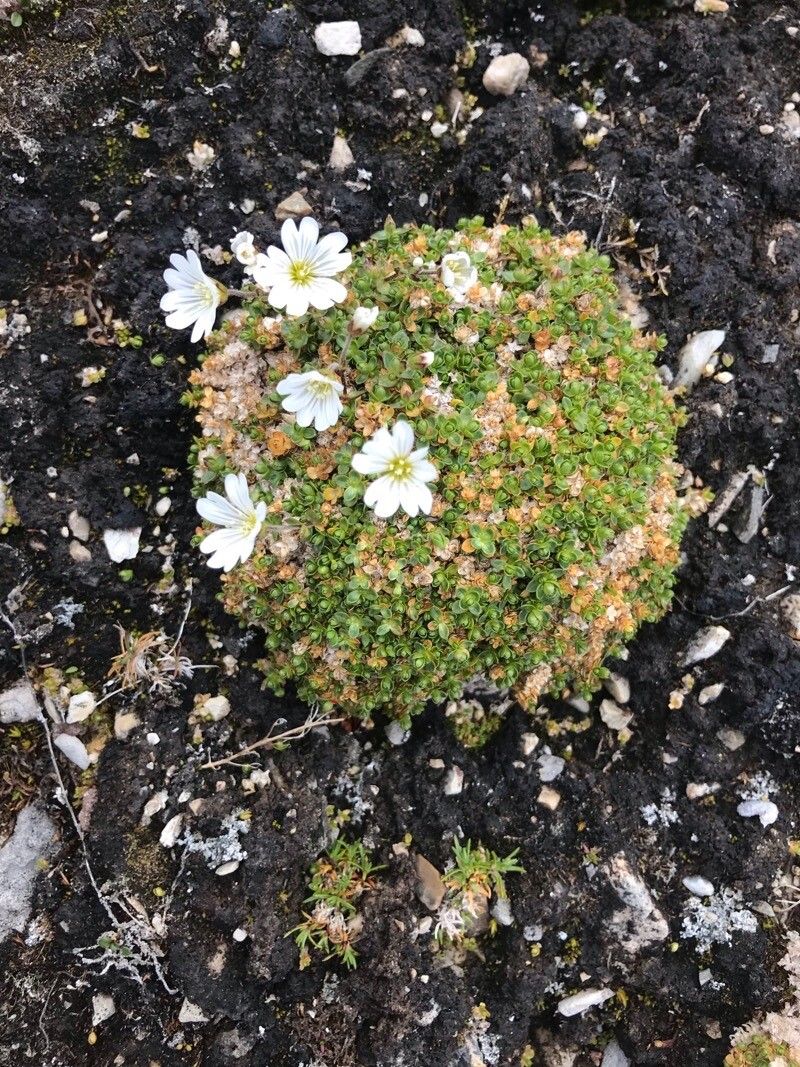
Oh, hello there! Come on in, grab yourself a cup of something delicious. Today, we’re going to chat about Cerastium regelii, often called Arctic Mouse-ear chickweed. It’s such a charming little plant, isn’t it? With its delicate white flowers and fuzzy, grey-green leaves, it brings a touch of alpine magic to any garden. And the best part? It’s surprisingly easy to multiply! If you’ve ever admired its resilience and beauty, you’ll find propagating it incredibly rewarding. Honestly, even if you’re new to the gardening game, this one is a friendly companion.
The Best Time to Start
For Cerastium regelii, spring is absolutely your golden ticket. As the plant starts its vigorous growth spurt after the last frost, it’s full of energy and ready to put down new roots. Aim for late spring or early summer. The days are getting longer, the light is good, and the temperatures are warm but not yet scorching. This gives your new cuttings or divisions plenty of time to establish themselves before the heat of summer or the cold of winter sets in.
Supplies You’ll Need
Gathering your tools beforehand makes the whole process smoother. Here’s what I usually have on hand:
- Sharp pruning shears or a clean, sharp knife: For taking clean cuts.
- Seed-starting mix or a well-draining potting mix: A blend of peat moss, perlite, and vermiculite works wonderfully. You want something that doesn’t hold onto too much moisture.
- Small pots or seed trays: With drainage holes, of course!
- Rooting hormone (optional but helpful): A powder or gel to encourage faster root development.
- Plastic bags or a propagator lid: To create a humid environment.
- Watering can with a fine rose or a spray bottle: For gentle watering.
- Labels and a marker: Don’t lose track of what you’ve planted!
Propagation Methods
There are a couple of foolproof ways to get more Cerastium regelii from your existing plant.
Stem Cuttings
This is my go-to method for this plant. It’s fast and usually gives excellent results.
- Select your stems: Look for healthy, non-flowering stems that are about 3-4 inches long. Pinch or snip them off just below a leaf node (where the leaves attach to the stem).
- Prepare the cuttings: Gently remove the lower leaves from the cutting, leaving just a few at the tip. This prevents them from rotting in the soil.
- Dip in rooting hormone (optional): If you’re using rooting hormone, dip the cut end into it. Tap off any excess.
- Plant your cuttings: Make small holes in your prepared potting mix with a pencil or your finger. Insert the cuttings into the holes, ensuring the leaf nodes are buried. Gently firm the soil around them.
- Water gently: Water the soil lightly to settle it around the cuttings.
- Create humidity: Cover the pots loosely with a plastic bag or use a propagator lid. This traps moisture and keeps the cuttings from drying out. Place them in a bright spot, but out of direct, harsh sunlight.
Division
If your Cerastium regelii has become a bit of a clump, division is a fantastic way to rejuvenate it and get multiple new plants.
- Gently unearth the plant: Carefully dig up the entire plant, trying to disturb the roots as little as possible.
- Examine the root ball: You’ll see that the plant naturally forms separate sections, each with its own roots and shoots.
- Divide the clumps: Use your hands or a clean trowel to gently pull or cut the clumps apart. Make sure each section has a good amount of roots and at least a few healthy shoots.
- Replant immediately: Pot up the divisions into well-draining soil as you would plant any other small perennial. Water them in well.
The “Secret Sauce” (Pro Tips)
Here are a couple of little tricks I’ve learned over the years that can make a big difference:
- Don’t let the leaves touch the soil if you’re water propagating (though I usually stick to soil for this one): If you ever try water propagation with Cerastium (or almost anything else!), make sure no leaves are submerged. They’ll just rot and invite disease. In soil, ensuring the lowest leaves are removed is your best defense against rot.
- A bit of bottom heat can’t hurt: If you’re struggling with cuttings taking a very long time to root, popping them onto a gentle heat mat can speed things up. It mimics that cozy warmth of spring and encourages root development.
Aftercare & Troubleshooting
Once those tiny roots start to form (you might see new leaf growth, which is a good sign!), it’s time to gradually acclimate your new plants.
- Reduce humidity: Slowly start to lift the plastic bag or open the propagator lid for increasing periods each day to get them used to drier air.
- Watering: Keep the soil consistently moist, but not waterlogged. As they grow stronger, you can ease up slightly.
- Transplanting: Once your new plants have a decent root system (you can check by gently tugging on them – they should feel secure), you can transplant them into their own larger pots or their permanent garden spot.
The most common problem you might encounter is rot. If your cuttings turn mushy and black, it’s usually a sign of too much moisture and not enough air circulation. Don’t be discouraged if a few don’t make it – it’s all part of the learning process! Just discard the rotted ones and try again with fresh cuttings and free-draining soil.
A Encouraging Closing
So there you have it! Propagating Cerastium regelii is a joy. Be patient with your new little plants; they’re working hard to establish themselves. Enjoy the process, the learning, and soon you’ll have even more of these delightful fuzzy beauties to share or plant out. Happy gardening!
Resource:
https://identify.plantnet.org/k-world-flora/species/Cerastium%20regelii%20Ostenf./data