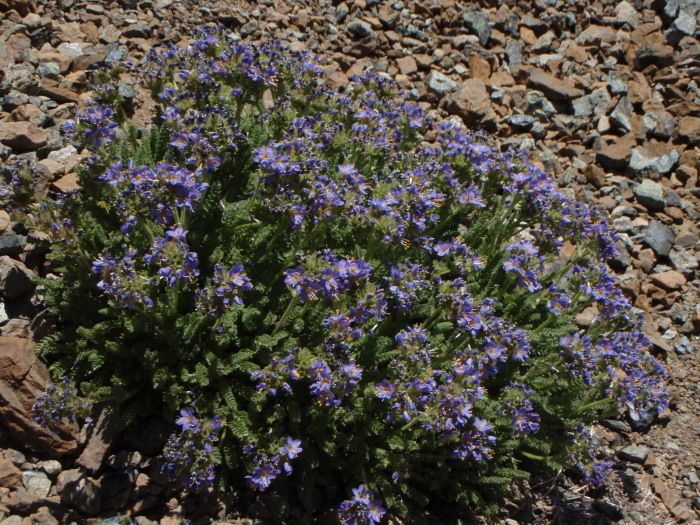
Hey there, fellow garden enthusiasts! I’m so excited to chat with you today about a real gem: Polemonium chartaceum. If you haven’t met this beauty yet, imagine delicate, airy foliage topped with charming, bell-shaped flowers that shimmer in shades of blue and purple. It’s got this wonderfully ethereal quality that just brightens up any shady corner or woodland border.
Now, why propagate it? Well, for starters, it’s a fantastic way to fill your garden with more of this loveliness, or even share those precious cuttings with friends. There’s a special satisfaction in nurturing a new plant from a tiny piece of its parent. For folks just starting out, Polemonium chartaceum can be a little on the finicky side. It’s not impossible, but it does appreciate some specific attention. Don’t let that deter you, though – with a few pointers, you’ll be a pro in no time!
The Best Time to Start
For Polemonium chartaceum, the sweet spot is usually late spring to early summer. This is when the plant is actively growing and has plenty of energy to put into developing new roots. You’ll want to take cuttings from healthy, non-flowering stems. Look for stems that are firm but not woody – think that satisfying snap when you bend them, rather than a bend.
Supplies You’ll Need
Gathering your supplies beforehand makes the whole process much smoother. Here’s what I always have on hand:
- Sharp Pruning Shears or a Clean Knife: For making clean cuts.
- Rooting Hormone: A powder or gel will help encourage stronger root development.
- Well-Draining Potting Mix: A good blend is 50% standard potting soil and 50% perlite or pumice. This is crucial to prevent soggy roots.
- Small Pots or Seedling Trays: With drainage holes, of course!
- Plastic Bags or a Clear Dome: To create a mini-greenhouse effect.
- Watering Can with a Fine Rose: For gentle watering.
- Labels: To keep track of your cuttings!
Propagation Methods
I’ve found the most reliable way to propagate Polemonium chartaceum is through stem cuttings. Here’s how I do it:
- Take Your Cuttings: Select a healthy stem as I mentioned, and using your clean shears, make a cut just below a leaf node. A leaf node is that little bump where the leaves attach to the stem. Aim for cuttings that are about 4-6 inches long.
- Prepare the Cuttings: Gently remove the lower leaves from the bottom half of the cutting. You want to expose the nodes where roots will eventually emerge. If your cutting has any flower buds, pinch those off. They’ll just drain energy away from root formation.
- Apply Rooting Hormone: Dip the cut end of each stem into your rooting hormone, tapping off any excess. This step is really beneficial for encouraging a robust root system.
- Plant the Cuttings: Fill your small pots with your well-draining mix. Make a small hole in the center of the soil with your finger or a pencil. Insert the prepared cutting into the hole, ensuring the nodes where you removed the leaves are below the soil surface. Gently firm the soil around the stem.
- Water Gently: Water the soil thoroughly but gently, making sure the potting mix is evenly moist but not waterlogged.
The “Secret Sauce” (Pro Tips)
Here are a couple of things I’ve learned over the years that make a big difference:
- Bottom Heat is Your Friend: Polemonium chartaceum loves a bit of warmth from below. Placing your pots on a heat mat designed for seedlings can significantly speed up root development. It provides that gentle, consistent warmth that mimics ideal soil conditions.
- Don’t Drown Them: While you want to keep the soil consistently moist, avoid letting the cuttings sit in standing water. Overwatering is the quickest way to invite rot, which is the enemy of propagation. Check the moisture level by gently pressing the soil surface – if it feels dry, it’s time to water.
Aftercare & Troubleshooting
Once your cuttings are planted and nestled under their plastic cover or dome, find them a bright spot out of direct sunlight. This is important because direct sun can scorch those tender new cuttings.
You’ll want to open the plastic cover or dome for a few minutes each day to allow for air circulation. This helps prevent fungal diseases.
You’ll know your cuttings are rooting when you see new leaf growth! You can also give them a gentle tug – if there’s resistance, roots have formed. This usually takes anywhere from 4 to 8 weeks, sometimes longer. Once they’ve developed a good root system, you can gradually acclimate them to slightly drier air by slowly opening the cover more each day before removing it entirely. Then you can transplant them into larger pots.
Keep an eye out for any signs of rot, which will often look like mushy, black stems. If you see this, it’s usually a sign of too much moisture. You may need to discard affected cuttings and try to improve drainage and air circulation for the remaining ones. Sometimes, a cutting just won’t take, and that’s okay!
A Encouraging Closing
Propagating plants is a journey, and sometimes a bit of patience is all that’s needed. Don’t get discouraged if your first attempts aren’t perfect. Each cutting you try teaches you a little more about your plant and your own gardening style. Enjoy the process of watching those tiny root hairs emerge and the promise of new life! Happy gardening!
Resource:
https://identify.plantnet.org/k-world-flora/species/Polemonium%20chartaceum%20H.Mason/data