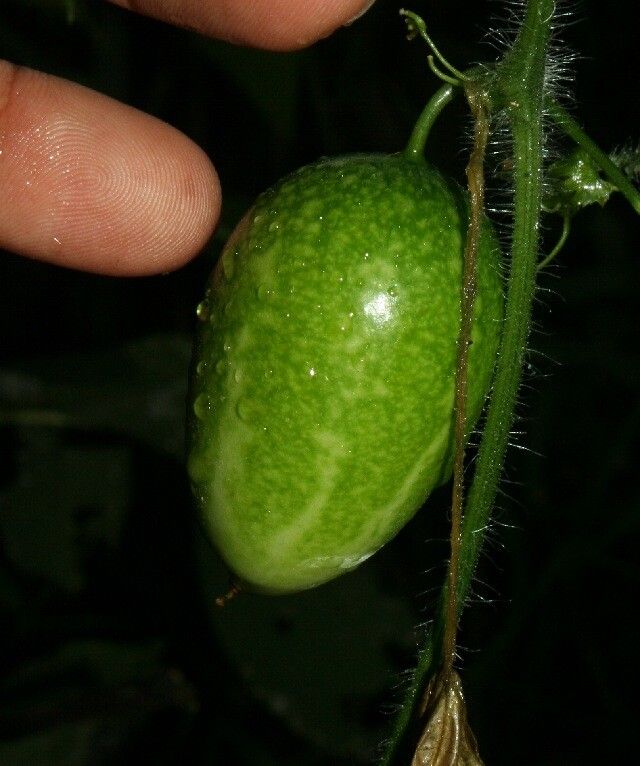
Oh, hello there! Come on in, grab a mug, and let’s chat about something truly special: Melothria trilobata. If you’ve ever encountered this delightful little vine, you know its charm. It’s got these adorable, tiny cucumber-like fruits, looking like miniature jewels sprinkled amongst its foliage. It’s not just a pretty face, though; the fruits are edible too, offering a refreshing, slightly tangy bite that’s just perfect for salads.
Propagating Melothria trilobata is one of my absolute favorite gardening rituals. It’s incredibly rewarding to take a piece of a healthy plant and coax it into a brand new one, essentially doubling your own green thumb power. Now, if you’re new to the garden, I’ll be honest: it’s not the absolute easiest plant to start from scratch, but with a little patience and the right approach, it’s absolutely achievable for beginners. Think of it as a gentle challenge that leads to a big payoff!
The Best Time to Start
Timing is everything in gardening, isn’t it? For Melothria trilobata, the sweet spot for propagation is late spring or early summer. This is when the plant is in its most vigorous growth phase. You’ll see new stems and leaves unfurling with gusto, meaning the plant has plenty of energy to put into developing roots. Trying to propagate too late in the season, when growth is slowing down, can make the process a bit more sluggish.
Supplies You’ll Need
Before we get our hands dirty, let’s make sure we have everything ready. This is like prepping for a delicious recipe; having all your ingredients measured out makes the process so much smoother.
- Clean Pruning Shears or a Sharp Knife: Essential for taking clean cuts from the parent plant.
- Rooting Hormone (Optional, but Recommended): A little boost can significantly increase your success rate. Look for a powder or gel.
- Well-Draining Potting Mix: I like a mix of equal parts peat moss or coco coir, perlite, and a little bit of compost. This ensures good aeration and prevents soggy roots.
- Small Pots or Seed Trays: Clean ones are a must to prevent diseases.
- Plastic Bags or a propagator: To create a humid environment for your cuttings.
- Watering Can with a Fine Rose: For gentle watering.
- Labeling Stakes: So you remember what you’ve planted and when!
Propagation Methods
Let’s dive into how we’ll actually create new little Melothria plants. I’ve found the most successful method for this particular vine is stem cuttings.
Stem Cuttings:
This is my go-to method. It’s straightforward and gives excellent results.
- Select Your Stems: Look for healthy, non-flowering stems on your mature Melothria trilobata plant. Ideally, these should be about 4-6 inches long and have at least two sets of leaves. The stem should be somewhat firm but still flexible, not woody and old.
- Make the Cut: Using your clean pruning shears or knife, make a clean cut just below a leaf node (the point where a leaf attaches to the stem). This node is where roots are most likely to form.
- Prepare the Cutting: Gently remove the leaves from the bottom half of the cutting. If the remaining leaves are very large, you can carefully cut them in half horizontally to reduce water loss through transpiration. You want to leave just one or two sets of leaves at the top.
- Apply Rooting Hormone: Dip the cut end of the stem into your rooting hormone, tapping off any excess. This step is particularly helpful for trickier-to-root plants, and Melothria can sometimes be a bit shy about putting out roots.
- Planting: Fill your small pots with your prepared potting mix. Make a small hole in the center of the soil with your finger or a pencil. Gently insert the bottom one to two inches of the cutting into the hole. Firm the soil around the stem to ensure good contact.
- Water Gently: Water the soil thoroughly but gently. You don’t want to dislodge the cutting.
- Create a Humid Environment: This is crucial! Place a clear plastic bag over the pot, securing it around the rim with a rubber band or string. Alternatively, you can use a propagator with a lid. This traps moisture and keeps the humidity high, which the cuttings need to survive before they develop roots.
The “Secret Sauce” (Pro Tips)
Every gardener has their little tricks, right? Here are a couple that I swear by for getting Melothria trilobata cuttings to flourish:
- Bottom Heat is Your Friend: If you have it, placing your pots on a gentle heat mat can make a world of difference. Melothria loves warmth, and bottom heat encourages root development much faster than ambient room temperature alone. Just ensure the mat isn’t too hot – it should feel comfortably warm, not hot.
- Freshly Dug vs. Store-Bought Soil: While a good potting mix is fine, I often find that cuttings root exceptionally well when planted in a mix that includes a bit of freshly composted garden soil, provided it’s not heavy clay. It seems to mimic their natural environment a little better and has beneficial microbes. Just make sure it’s well-aerated and not compacted.
Aftercare & Troubleshooting
Once your cuttings are planted and snuggled into their humid homes, the waiting game begins.
Keeping an Eye Out: Check your cuttings every few days. You want to ensure the soil stays consistently moist but not waterlogged. If the soil looks dry, give it a gentle watering. If the plastic bag is collecting a lot of condensation, you can briefly lift it to allow for some air circulation.
Rooting Takes Time: Be patient! It can take anywhere from 3 to 6 weeks for Melothria trilobata cuttings to develop a good root system. You can gently tug on a cutting; if there’s resistance, it’s likely rooted. You might also start to see new growth at the top, which is a fantastic sign.
Troubleshooting:
- Wilting and Yellowing Leaves: This is common in the initial stages. If it’s just a bit of yellowing on the lower leaves, it might be the plant sacrificing them to put energy into root growth. However, if the entire cutting is wilting and looking sickly, it’s often a sign of too much or too little water, or simply that the cutting isn’t viable.
- Rotting: This is the biggest culprit of failure. It’s usually caused by overwatering and poor drainage. If you see the cut end of the stem turning mushy and brown, unfortunately, that cutting is likely lost. Ensure your potting mix is airy and that you’re not drowning it. Reducing humidity slightly can also help if things are consistently damp.
Once you feel your cuttings have a solid root system (usually when you see new growth and they resist a gentle tug), you can gradually acclimate them to normal room conditions. Remove the plastic bag for a few hours each day, slowly increasing the time until the bag is no longer needed. Then, you can transplant them into slightly larger pots.
A Encouraging Closing
And there you have it! Don’t be discouraged if your first attempt isn’t a runaway success. Every plant and every cutting is a little bit different. The joy is in the process, in nurturing a tiny piece of that beautiful vine into something new. So, grab your shears, find a healthy specimen, and give it a try. You’ve got this, and I can’t wait for you to experience the thrill of seeing those first tiny roots emerge. Happy gardening!
Resource:
https://identify.plantnet.org/k-world-flora/species/Melothria%20trilobata%20Cogn./data