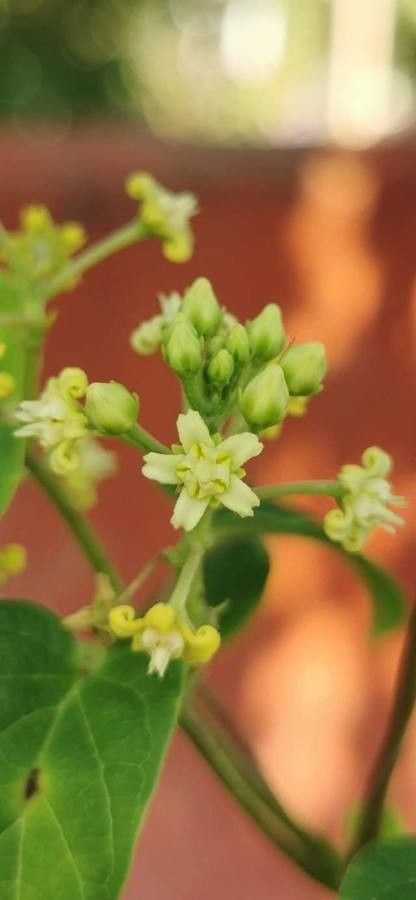
Oh, hello there! Pull up a chair, grab a mug of your favorite brew. Today, we’re going to talk about a plant that truly steals my heart: Cynanchum racemosum. If you’re a fan of delicate, star-like blooms and a scent that can waft through your garden on a warm evening, you’re in for a treat. Propagating this beauty might sound a bit daunting, but trust me, it’s a deeply satisfying endeavor. For those of you just starting out, I’d say it’s moderately easy – a little patience goes a long way!
The Best Time to Start
When it comes to getting new Cynanchum racemosum plants going, spring is your absolute best friend. Think about when the plant is really entering its prime growth phase, pushing out all that lovely new foliage. This is when the stems have plenty of energy to draw from, making them ideal for taking cuttings. Aim for when the new growth is becoming semi-firm, not super floppy and new, nor completely woody.
Supplies You’ll Need
Gathering your supplies beforehand makes the whole process so much smoother. Here’s what I always have on hand:
- Sharp pruning shears or a clean, sharp knife: Essential for making clean cuts that heal well.
- Rooting hormone (optional, but helpful): A little dip can encourage faster and stronger root development.
- Well-draining potting mix: I like a mix of equal parts peat moss, perlite, and coarse sand. Or, a good quality seed-starting mix will also work beautifully.
- Small pots or trays: Clean pots are crucial to prevent disease.
- Plastic bag or a clear plastic dome: To create a humid environment for your cuttings.
- Watering can with a fine rose: Gentle watering is key.
- Optional: Heat mat or a warm, bright location: Bottom heat can really speed things up.
Propagation Methods
Let’s get our hands dirty! Cynanchum racemosum is wonderfully responsive to stem cuttings.
- Taking the Cuttings: Gently select healthy, non-flowering shoots from your established plant. Using your clean shears or knife, take cuttings that are about 4-6 inches long. Make your cut just below a leaf node (where a leaf attaches to the stem). This is where the magic happens!
- Preparing the Cuttings: Carefully remove the lower leaves from each cutting, leaving just the top two or three leaves. If your leaves are quite large, you can even lightly trim them in half to reduce water loss.
- Applying Rooting Hormone (if using): Dip the cut end of each stem into your rooting hormone, tapping off any excess.
- Planting the Cuttings: Fill your clean pots with your well-draining potting mix. Make a small hole with your finger or a pencil, and gently insert the cut end of the stem. Firm the soil gently around the base of the cutting. You can plant several cuttings in one pot, ensuring they have a little space between them.
- Creating Humidity: Water the soil lightly. Then, cover the pot with a clear plastic bag, securing it around the rim with a rubber band, or place a clear plastic dome over the cuttings. This creates a mini-greenhouse effect, keeping the cuttings from drying out.
- Location, Location, Location: Place your pots in a bright spot that receives indirect sunlight. Avoid harsh, direct sun, which can scorch your young cuttings. If you have a heat mat, place the pots on it for optimal rooting.
The “Secret Sauce” (Pro Tips)
Here are a couple of tricks that have served me well over the years:
- Don’t let those bottom leaves touch the soil! When you’re planting, any leaves that are submerged can quickly rot, and that’s the last thing we want. Trim them off carefully.
- Bottom heat is a game-changer. While it’s not strictly essential, a gentle warmth from beneath will significantly speed up the rooting process for Cynanchum racemosum. Think of it like tucking your cuttings into a warm bed.
Aftercare & Troubleshooting
Once your cuttings have been planted, mist them lightly every few days to keep the humidity high. You can occasionally lift the plastic bag or dome to allow for some air circulation.
You’ll know your cuttings are rooting when you see new leaf growth appearing or if you gently tug on a cutting and feel resistance. This can take anywhere from 3 to 6 weeks, sometimes a bit longer, so be patient! Once roots have formed and new growth is robust, you can gradually remove the plastic cover and begin watering a little less frequently, allowing the top inch of soil to dry out between waterings.
The most common issue you might encounter is rot. If your cuttings turn mushy and black, or if the soil stays constantly soggy, it’s a sign of too much moisture and not enough air circulation. Don’t despair – just try again with fresh cuttings and ensure your soil drains well.
A Encouraging Closing
Growing plants from cuttings is such a rewarding way to expand your garden and share the joy of gardening with others. With Cynanchum racemosum, a little bit of care and attention will yield beautiful results. Be patient with your baby plants, celebrate each new leaf, and enjoy the process. Happy propagating!
Resource:
https://identify.plantnet.org/k-world-flora/species/Cynanchum%20racemosum%20(Jacq.)%20Jacq./data