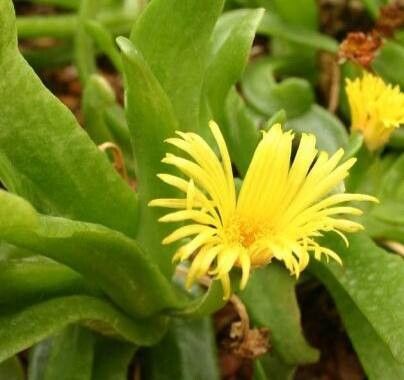
Hello, fellow plant lovers! If you’ve ever marveled at the unique, almost sculptural beauty of Glottiphyllum depressum, you’re not alone. These delightful succulents, with their tongue-shaped leaves and low-growing habit, bring a touch of magic to any collection. And the best part? They are wonderfully rewarding to propagate! Trust me, seeing a tiny new plant emerge from a piece of its parent is a thrill that never gets old. For beginners, Glottiphyllum depressum is quite forgiving, making it an excellent choice to dip your toes into the world of succulent propagation.
The Best Time to Start
Generally, succulents like Glottiphyllum depressum are best propagated during their active growing season. For most of us, this means spring and early summer. The days are getting longer, the temperatures are warming up, and the plants are bursting with energy. This is when they are most likely to root successfully and establish themselves into happy, independent little greens.
Supplies You’ll Need
Gathering your supplies beforehand makes the whole process smooth sailing. Here’s what I usually have on hand:
- Well-draining potting mix: A good cactus and succulent mix is perfect. You can also make your own by blending potting soil with perlite or pumice (about a 50/50 ratio).
- Sharp, clean pruning shears or a sharp knife: Essential for making clean cuts. Sterilize them with rubbing alcohol to prevent spreading any nasty bugs or diseases.
- Rooting hormone powder (optional but recommended): This helps speed up the rooting process and increases your chances of success.
- Small pots or trays: Whatever you have available, as long as they have drainage holes!
- Watering can or spray bottle: For gentle watering.
- Gravel or small stones (optional): To cover the soil surface and help prevent rot.
Propagation Methods
Glottiphyllum depressum is wonderfully versatile, and you can easily propagate it through two main methods: stem cuttings and division.
Stem Cuttings
This is my go-to for Glottiphyllum depressum. It’s straightforward and rarely fails.
- Select a healthy stem: Look for a mature, non-flowering stem that has at least a couple of leaf pairs.
- Make the cut: Using your sterilized shears or knife, make a clean cut just below a leaf node. The leaf node is where the new roots will eventually emerge from.
- Allow to callous: This is crucial! Let the cut end of the “cutting” dry and form a slightly tough callus. This usually takes 2-5 days, depending on your climate. You can place it on a paper towel in a bright, dry spot, away from direct sun. This step prevents rot.
- Prepare the pot: Fill your small pot or tray with your well-draining potting mix.
- Apply rooting hormone (optional): If using, dip the calloused end of the cutting into the rooting hormone powder.
- Plant the cutting: Make a small hole in the soil and gently insert the calloused end of the cutting. Firm the soil around it. You want the leaf node, where you made the cut, to be just at or slightly below the soil surface.
- Water sparingly: Water very lightly, just enough to settle the soil. Don’t drench it.
Division
This method works well if your Glottiphyllum depressum has started to form clumps.
- Remove from pot: Gently slide your mature plant out of its pot.
- Clean the roots: Carefully brush away excess soil from the root ball. You want to be able to see where the individual growth points are.
- Separate the divisions: Use your fingers or a clean knife to gently pull or cut apart the plant into smaller sections. Each section should have at least a few leaves and some healthy roots.
- Allow to callous: If you had to make any clean cuts through the roots or stems, allow those areas to callous for a day or two, just like with cuttings.
- Pot up the divisions: Plant each division in its own small pot filled with your succulent mix. Ensure the roots are spread out and covered with soil.
- Water sparingly: Water very lightly, as you would with cuttings.
The “Secret Sauce” (Pro Tips)
Here are a couple of things I’ve learned over the years that really make a difference:
- Don’t let the leaves touch the soil surface (on cuttings): If the leaves of your cutting are sitting directly on the soil, they are more prone to rot, especially if the soil stays too wet. Try to position the cutting so the leaves are slightly elevated, or consider planting it a little deeper so the lowest leaf is just above the soil.
- Bottom heat is your friend (for faster rooting): If you have a propagation mat or can place your pots on top of a warm, but not hot, appliance (like a router), this can significantly speed up root formation. It mimics the warmth of spring soil.
Aftercare & Troubleshooting
Once your cuttings or divisions are planted, resist the urge to water them constantly! Let the soil dry out between waterings. A good rule of thumb is to wait until you see new growth or the roots emerging from the drainage holes. This might take several weeks.
The most common issue you’ll encounter is rot. If you notice your cutting or division turning mushy, black, or developing foul odors, it’s likely rot. This usually happens from overwatering or not allowing the cutting to callous properly. If you catch it early, you might be able to salvage a healthy part and let it re-callous.
A Encouraging Closing
Propagating succulents like Glottiphyllum depressum is a journey of patience and observation. Don’t get discouraged if your first attempt isn’t perfect. Every gardener learns by doing! Enjoy the process of nurturing these little bits of green, and before you know it, you’ll have a whole bunch of new friends to admire and share. Happy growing!
Resource: