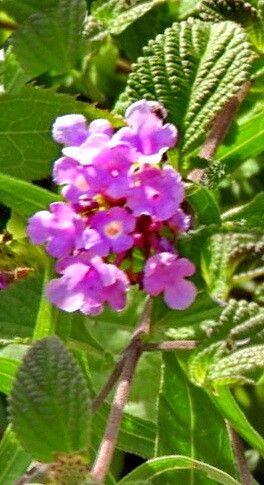
Oh, Lantana megapotamica! That vibrant splash of color and those delightful little blooming clusters are just pure garden joy. If you’ve ever found yourself admiring a particularly robust specimen, you’ve likely wondered if you could bring a piece of that magic home. The great news is, yes, you absolutely can! Propagating Lantana megapotamica is a wonderfully rewarding process, and honestly, it’s quite forgiving. I’d say it’s a fantastic plant for beginners looking to dip their toes into the world of propagation. You’ll be sharing cuttings with friends before you know it.
The Best Time to Start
For the highest success rate, aim to take your cuttings in late spring or early summer. This is when the plant is actively growing, full of energy, and ready to put down new roots. You’re essentially tapping into its natural vigor. Avoid taking cuttings from woody, old stems or during the dead of winter.
Supplies You’ll Need
Gathering your tools beforehand makes the whole process smoother. Here’s what I like to have on hand:
- Sharp pruning shears or a clean knife: For making nice, clean cuts.
- Small pots or trays: Clean ones are key to preventing disease.
- Rooting hormone (optional but helpful): I find it gives cuttings a nice boost, but Lantana is often happy without it.
- Potting mix: A well-draining mix is crucial. I usually use a blend of equal parts potting soil and perlite or coarse sand. You can also buy specifically designed seed starting or cactus mixes.
- Watering can or spray bottle: For gentle watering.
- Plastic bag or propagation dome (optional): To create a humid environment.
- Labels and a marker: Trust me, you’ll thank yourself later!
Propagation Methods
There are a couple of tried-and-true ways to get more Lantana megapotamica. Stem cuttings are my go-to.
Stem Cuttings
- Select healthy stems: Look for non-flowering, semi-hardwood stems that are about 4-6 inches long. These aren’t the brand-new, floppy green shoots, nor are they the hard, woody old stems. Think of something in between – firm but not stiff.
- Make the cut: Using your sharp shears or knife, make a clean cut just below a leaf node. A leaf node is where a leaf attaches to the stem; this is where new roots are most likely to form.
- Prepare the cutting: Gently remove the lower leaves from the cutting, leaving just the top two or three leaves. If any of these top leaves are very large, you can snip them in half to reduce water loss.
- Apply rooting hormone (if using): Dip the cut end of the stem into the rooting hormone, tapping off any excess.
- Planting: Insert the cut end of the stem about an inch deep into your prepared potting mix in a small pot. Gently firm the soil around the stem.
- Water gently: Water the soil thoroughly until it’s evenly moist but not waterlogged.
- Create humidity (optional): You can cover the pot with a clear plastic bag (making sure the leaves don’t touch the plastic!) or place it under a propagation dome. This will help keep the humidity high, which is beneficial for cuttings getting started. Place it in a bright location out of direct sunlight.
Water Propagation
This is a wonderfully simple method and often very successful with Lantana.
- Select and cut stems: Follow steps 1 and 2 from the stem cutting method.
- Remove lower leaves: Just like with soil propagation, remove all leaves that would sit below the water line.
- Place in water: Put the prepared cuttings in a clean jar or glass filled with fresh water. Make sure no leaves are submerged; they will rot quickly!
- Location and changes: Place the jar in a bright spot out of direct sun. Change the water every few days to keep it fresh and prevent bacteria buildup.
- Watch for roots: You should start to see tiny white roots emerge from the leaf nodes within a couple of weeks. Once the roots are about an inch long, they are ready to be transplanted into pots filled with your well-draining potting mix.
The “Secret Sauce” (Pro Tips)
Here are a few little tricks I’ve picked up to increase my success rate:
- Bottom Heat is Your Friend: If you have a heat mat designed for seedlings, placing your pots on it can make a huge difference. The warmth encourages faster root development. Don’t overdo it; just gentle warmth is enough.
- Don’t Let Leaves Touch Water in Water Propagation: I can’t stress this enough! Any leaf tissue submerged in water is a prime spot for rot, which will quickly take down your cutting. Keep those leaf edges high and dry.
- Start with Multiple Cuttings: Not every cutting will take, and that’s perfectly normal! By taking several cuttings at once, you significantly increase your chances of having a few successful new plants. Think of it as insurance for your gardening efforts.
Aftercare & Troubleshooting
Once your cuttings have developed a good root system – you’ll see roots emerging from the drainage holes, or when gently tugged, the cutting feels firm – it’s time to transplant them into slightly larger pots if they aren’t already there. Continue to keep the soil evenly moist but not soggy. As they grow and establish, you can gradually introduce them to more sunlight.
The most common problem you’ll face is rot. This usually happens if the soil is kept too wet, or if cuttings in water have submerged leaves. You’ll see the stem turn mushy and black, and it won’t recover. If you see this happening, unfortunately, that cutting is a goner. The best way to combat it is to ensure excellent drainage and proper watering.
A Encouraging Closing
Propagating Lantana megapotamica is a delightful journey. Be patient with your little cuttings; they are working hard to put down roots and establish themselves. Even if not every single one makes it, the process itself is incredibly rewarding. Soon, you’ll have a whole new host of these cheerful bloomers to enjoy and share. Happy propagating!
Resource:
https://identify.plantnet.org/k-world-flora/species/Lantana%20megapotamica%20(Spreng.)%20Tronc./data