Oh, hello there! Come on in, pull up a chair. I’ve got a fresh pot of coffee brewing. Today, we’re diving into a plant that’s really captured my heart – Pseuderanthemum velutinum. You know, its velvety leaves and those darling little blooms are just exquisite. And the best part? Bringing new ones into the world from your existing beauties is a deeply rewarding experience.
Introduction: Why Pseuderanthemum Velutinum is Worth Growing (and Propagating!)
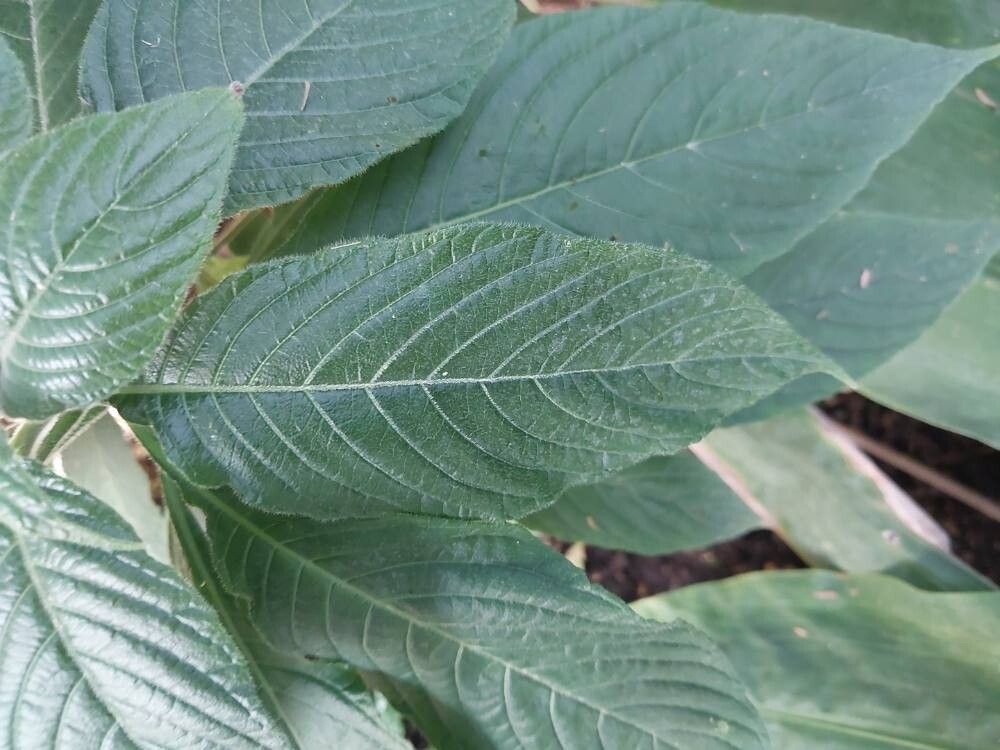
Pseuderanthemum velutinum, often called the Velvet-Leaf Pseuderanthemum, is a real stunner. Its fuzzy, rich green leaves have an almost prehistoric feel, and in the right conditions, it sends up delicate spikes of white flowers with intricate markings. It’s not a plant you see everywhere, which makes it all the more special.
Now, for the big question: is it easy to propagate? I’d say it’s moderately easy. It’s not as foolproof as a pothos, but with a little attention and the right approach, even beginners can have a wonderful success rate. Think of it as a gardening project that teaches you a bit more about plant care.
The Best Time to Start
Timing is everything in the garden, isn’t it? For Pseuderanthemum velutinum, your best bet is during its active growing season. That usually means late spring through summer. When the plant is putting on new growth, it has the energy it needs to push out roots. Trying to propagate when it’s dormant is like asking someone to run a marathon without training!
Supplies You’ll Need
Gathering your supplies before you start makes the whole process go much smoother. Here’s what I like to have on hand:
- Sharp, clean pruning shears or a knife: For taking cuttings. Sterilize them with rubbing alcohol to prevent disease.
- A well-draining potting mix: I usually use a mix of equal parts peat moss or coco coir, perlite, and a good quality potting soil. You want it to hold some moisture but not get soggy.
- Small pots or trays: Clean containers with drainage holes are a must.
- Rooting hormone (optional but helpful): A powder or gel can give your cuttings a nice boost.
- A plastic bag or dome: To create a mini-greenhouse environment.
- A watering can or spray bottle: For gentle watering.
- Clean water: For any water propagation attempts.
Propagation Methods: Bringing New Life
There are a couple of foolproof ways to get more Pseuderanthemum velutinum. I find stem cuttings to be the most reliable.
Stem Cuttings
This is my go-to method for these plants. It’s straightforward and yields great results.
- Take the cuttings: Select a healthy stem that has at least two to three nodes (the little bumps where leaves emerge). Using your clean shears, cut the stem about 4-6 inches long. Make the cut just below a node.
- Prepare the cuttings: Gently remove the lower leaves, leaving just one or two at the very top. This prevents them from rotting in the soil or water.
- Apply rooting hormone (optional): If you’re using rooting hormone, dip the cut end of the stem into the powder or gel. Tap off any excess.
- Plant the cuttings: Moisten your potting mix. Make a small hole with your finger or a pencil and insert the cutting, ensuring that at least one node is buried. Gently firm the soil around it. If you’re planting multiple cuttings, space them a couple of inches apart.
- Water gently: Water thoroughly but avoid making the soil waterlogged.
- Create humidity: Cover the pot or tray with a clear plastic bag or a propagator lid. This tiny greenhouse effect is crucial for keeping the cuttings from drying out. Prop the bag up so it doesn’t touch the leaves.
- Place in bright, indirect light: Find a warm spot out of direct sunlight. A windowsill that gets bright morning or late afternoon sun is perfect.
Water Propagation
This method is a bit more hands-off initially and fun to watch, but I find stem cuttings directly in soil tend to establish stronger roots faster for this particular plant. Still, it’s worth a try!
- Take and prepare cuttings: Follow steps 1 and 2 above for taking and preparing your stem cuttings.
- Place in water: Fill a clean jar or glass with room-temperature water. Place the cuttings in the water, making sure no leaves are submerged. The nodes are where the magic happens, and they need to be in contact with the water.
- Change water regularly: Change the water every 2-3 days to keep it fresh and prevent bacterial growth.
- Provide bright, indirect light: Just like with soil cuttings, place the jar in a bright spot away from direct sun.
- Watch for roots: You should start to see small white roots emerging from the nodes in a few weeks.
The “Secret Sauce” (Pro Tips)
Here are a few little tricks I’ve picked up over the years that can make a big difference:
- Don’t let those leaves touch the water! I can’t stress this enough with water propagation. Anything submerged will rot, and that’s a quick way to lose your cutting.
- Bottom heat is your friend. If you have a heat mat designed for seedlings, using it under your pots can significantly speed up root development. It mimics the warmth of summer soil and gives those roots a real encouraging nudge.
- Be patient with the “leaf droop.” Sometimes, especially in the first week or two, cuttings might look a little sad and droopy. As long as the stems are firm and the leaves haven’t turned completely yellow or black, give them time. The humidity is doing its work!
Aftercare & Troubleshooting
Once you see signs of new growth, like tiny new leaves emerging or the cutting looking perkier and resisting a gentle tug, it’s a good indicator that roots have formed.
- Acclimatization: If you used a plastic bag or dome, gradually start to vent it over a few days before removing it completely. This helps the new plant adjust to the drier air.
- Watering: Keep the soil consistently moist but not soaking wet. As the plant grows, you can eventually water it as you would a mature Pseuderanthemum velutinum.
- Fertilizing: Wait until you see robust new growth before offering a diluted liquid fertilizer. Maybe a quarter-strength mixture to start.
Troubleshooting: The most common issue you’ll encounter is rot. If your cutting turns mushy, black, or starts falling apart, it’s a sign of too much moisture and not enough air circulation. Unfortunately, rot is usually the end of the line for that cutting. If your cuttings simply fail to root and stay alive after several weeks, they might be too old, the conditions might not be right, or they just weren’t viable. Don’t get discouraged! Just start again.
A Little Encouragement
Propagating plants is such a beautiful way to connect with nature and expand your green collection. It teaches us patience and observation. Don’t fret if your first attempt isn’t a showstopper. Every cutting is a learning experience. Just enjoy the process, be gentle with your new little plants, and celebrate every tiny success. Happy propagating!
Resource:
https://identify.plantnet.org/k-world-flora/species/Pseuderanthemum%20velutinum%20Lindau/data