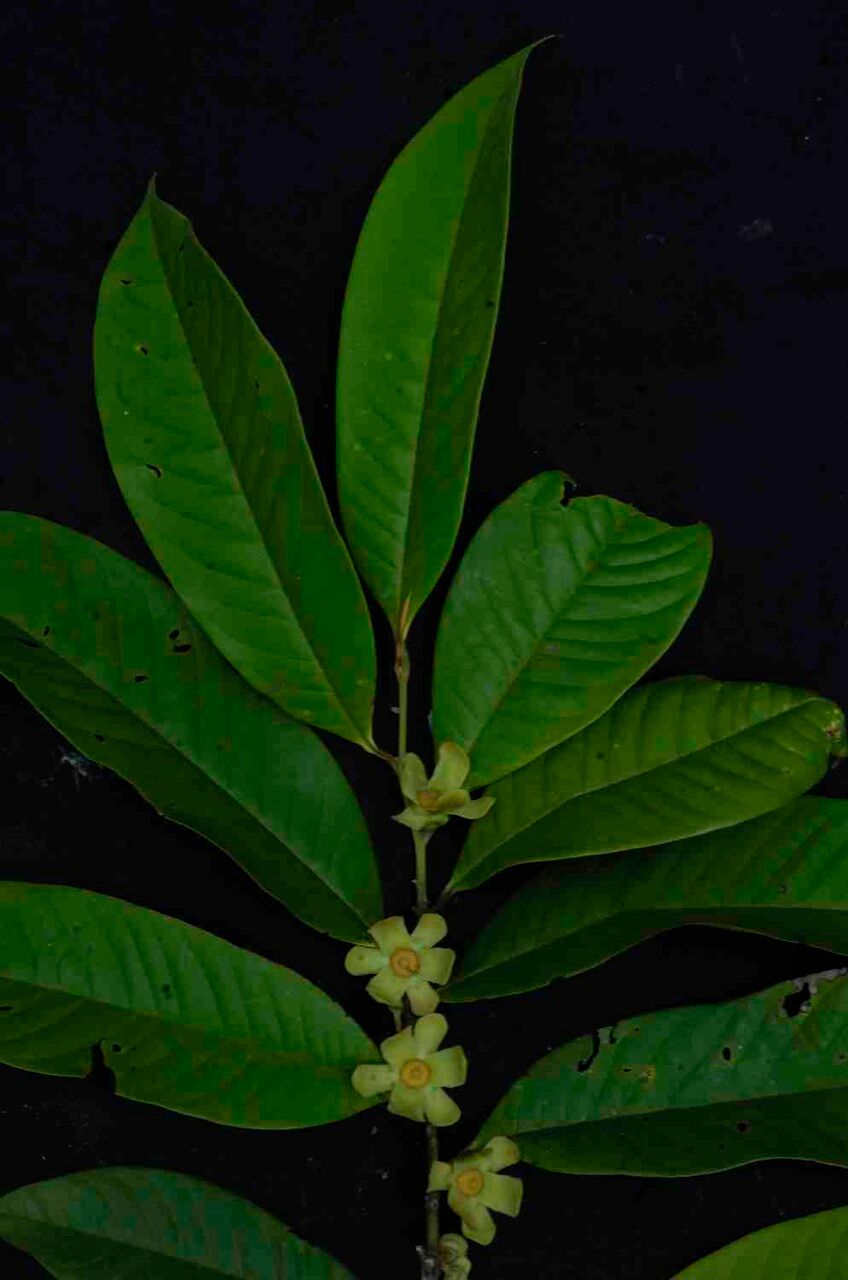
Hey there, fellow plant enthusiasts! I’m so excited to talk to you today about a real gem: Guatteria pogonopus. If you’re looking for a plant that’s not only beautiful but also a bit of a conversation starter, this is it. Its unique foliage and wonderful fragrance make it a joy to have around. And the best part? You can easily bring more of this loveliness into your life through propagation!
Now, I’ll be honest with you. Guatteria pogonopus isn’t exactly a “stick it in the ground and forget it” kind of plant when it comes to propagation, especially for absolute beginners. It requires a little patience and attention to detail. But trust me, the reward of nurturing a new plant from a tiny cutting is absolutely worth the effort. Think of it as a delightful challenge that will deepen your connection with your garden.
The Best Time to Start
When it comes to getting the best results with Guatteria pogonopus, spring and early summer are your golden ticket. This is when the plant is actively growing, meaning it has the energy reserves to channel into developing new roots. Look for healthy, non-woody new growth – think stems that are firm but still a bit flexible, not stiff and old. This is prime propagation material!
Supplies You’ll Need
Gathering your supplies beforehand makes the whole process smoother. Here’s what I usually have on hand:
- Sharp Pruning Shears or a Clean Knife: For making clean cuts.
- Potting Mix: A well-draining blend is crucial. I like a mix of peat moss, perlite, and a bit of coarse sand. You can also find specialized seed starting mixes that work well.
- Small Pots or Trays: Clean containers are a must to prevent disease.
- Rooting Hormone (Optional but Recommended): A powder or gel can significantly speed up root formation.
- Plastic Bags or a Clear Dome: To create a humid environment.
- Watering Can with a Fine Rose: For gentle watering.
- Labels: To keep track of what you’ve propagated!
Propagation Methods
While Guatteria pogonopus can be a tad finicky, stem cuttings are your most reliable bet. Let’s dive in!
Stem Cuttings
This is my go-to method for Guatteria pogonopus. It’s efficient and has a great success rate if you follow these steps carefully.
- Take Your Cuttings: Using your sharp shears, select a healthy stem from your established plant. Aim for pieces that are about 4-6 inches long. Make the cut just below a leaf node (where a leaf attaches to the stem).
- Prepare the Cuttings: Gently remove the lower leaves. We only want a few leaves at the top to help with photosynthesis. If you’re using rooting hormone, dip the cut end of the stem into it, tapping off any excess.
- Plant Your Cuttings: Fill your clean pots with your prepared potting mix. Make a small hole in the center with your finger or a pencil. Carefully insert the cut end of the stem into the hole, ensuring at least one leaf node is buried in the soil. Gently firm the soil around the stem.
- Create Humidity: This is key! Water the soil thoroughly but gently. Then, cover the pot with a plastic bag secured with a rubber band or place it under a clear plastic dome. This creates a mini-greenhouse effect, keeping the humidity high, which cuttings absolutely love.
- Find the Right Spot: Place your pots in a warm location with bright, indirect light. Avoid direct sun, which can scorch your delicate cuttings.
Water Propagation (With Reservations)
While I generally lean towards soil for Guatteria pogonopus, some folks have success with water. It’s less reliable for this particular plant, but if you want to give it a try:
- Prepare Cuttings: Follow steps 1 and 2 above for preparing your stem cuttings.
- Place in Water: Instead of potting mix, place the cut ends of your prepared cuttings into a clean jar or glass of room-temperature water. Make sure to remove any leaves that would be submerged – these will just rot and contaminate the water.
- Change Water Regularly: Change the water every 2-3 days to keep it fresh and oxygenated.
- Provide Light: Place the jar in a location with bright, indirect light.
- Plant When Ready: Once you see a decent amount of root growth (at least an inch or two), you can then carefully transplant them into pots with well-draining soil. This transition can be tricky, so be very gentle.
The “Secret Sauce” (Pro Tips)
Here are a few little tricks I’ve picked up over the years that can make a big difference:
- Bottom Heat is Your Friend: Guatteria pogonopus absolutely loves cozy warmth from below. If you can, pop your pots onto a heat mat designed for seedlings. This encourages root development much faster than just ambient room temperature.
- Don’t Let Leaves Touch the Water (in Soil): When you have your cuttings in pots covered with plastic, be mindful that the leaves don’t touch the sides of the plastic bag. If they do, it can create a microclimate where fungal diseases thrive. You can use stakes to prop up the plastic if needed.
- Mist Sparingly, Water Consistently: While humidity is crucial, don’t over-mist the leaves once they are in soil. Excessive moisture on the foliage can also invite problems. Instead, focus on keeping the soil consistently moist but not waterlogged. Dip your finger in about an inch; if it feels dry, it’s time for a gentle watering.
Aftercare & Troubleshooting
Once you start seeing those beautiful new roots emerging (you can gently tug on a cutting after a few weeks – if there’s resistance, you’ve got roots!), it’s time for a new phase.
- Acclimatize Gradually: After about a month, or when you see good root development, it’s time to gradually acclimate your new plant to normal household humidity. Start by opening the plastic bag for a few hours each day, slowly increasing the time over a week.
- Potting Up: Once acclimated, you can carefully transplant your rooted cutting into its own small pot with fresh, well-draining potting mix. Water it in well.
- Common Pitfalls: The most common issue is rot. This usually happens due to overwatering or poor drainage. If you see your cutting turning black and mushy or yellowing and wilting without any signs of new growth, rot is likely the culprit. Unfortunately, there’s not much you can do once this sets in, so prevention is key! Another sign of trouble is if the cutting just looks sad and limp with no root development after many weeks – this can mean it hasn’t rooted or is struggling.
A Encouraging Closing
There you have it! Propagating Guatteria pogonopus is a journey that requires a little faith and a lot of gentle care. Don’t get discouraged if your first attempt isn’t perfect. Every gardener has had their share of experiments that didn’t quite pan out. The most important thing is to enjoy the process, learn from each step, and celebrate every tiny success. Happy propagating!
Resource:
https://identify.plantnet.org/k-world-flora/species/Guatteria%20pogonopus%20Mart./data