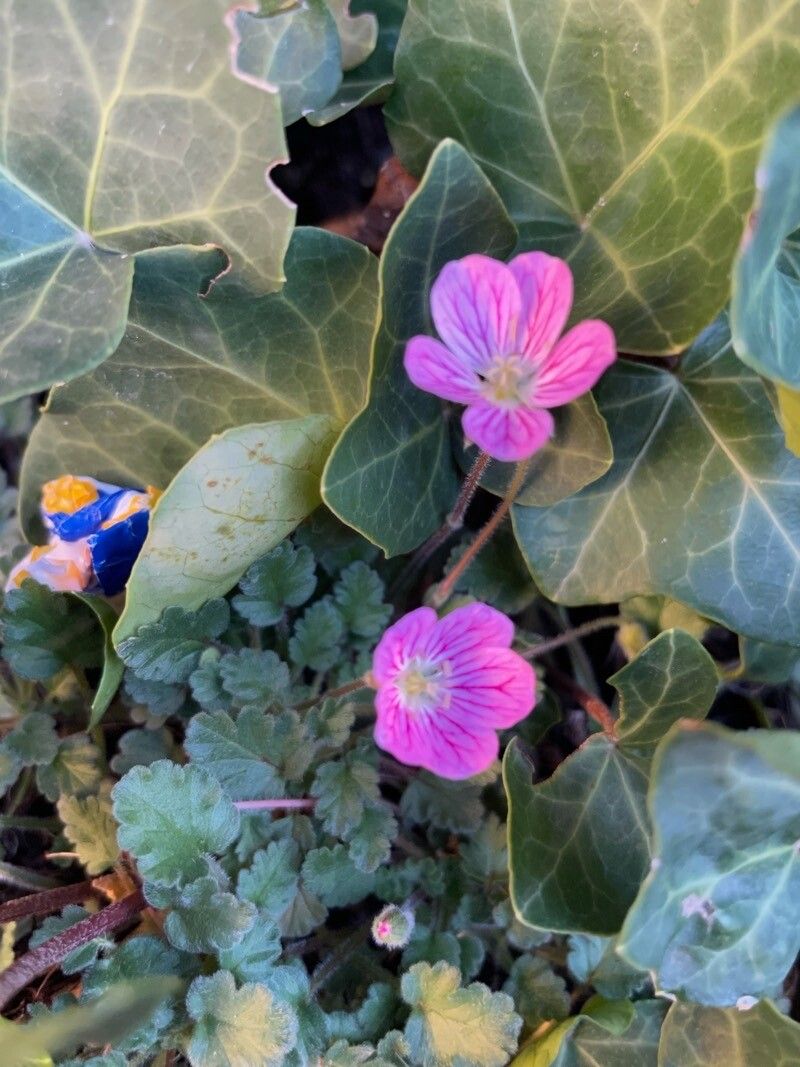
Oh, Erodium boissieri! If you’re looking for a charming addition to your rock garden or a cheerful splash of color in a sunny border, this little gem is an absolute delight. Its delicate, often silvery foliage and sweet little flowers are like tiny treasures blooming just for you. And the best part? Propagating it is a wonderfully rewarding way to multiply that beauty. Now, I won’t lie, Erodium boissieri can be a touch more particular than, say, a common geranium, but with a little patience and the right approach, you’ll be successful. It’s more of a “careful beginner” plant, if you ask me.
The Best Time to Start
For Erodium boissieri, spring is your absolute golden ticket. Think of it as giving your new plant the longest possible growing season to establish itself before the heat of summer or the chill of winter. Aim for when the plant is actively growing, but before it gets too stressed by prolonged heat. You want healthy, vigorous material to work with.
Supplies You’ll Need
Here’s what I always have on hand when I’m propagating Erodium:
- Sharp, clean pruning shears or a sharp knife: Vital for clean cuts, which prevents disease.
- A well-draining potting mix: This is non-negotiable! I usually mix equal parts perlite, coarse sand, and a good quality potting soil. You can also buy specialized succulent or cactus mixes.
- Small pots or seed trays: Clean ones, of course!
- Rooting hormone (optional, but recommended for stem cuttings): Look for one with a fungicide.
- A watering can with a fine rose or a spray bottle: For gentle watering.
- Plastic bags or a propagator lid: To create a humid environment.
- Labels and a pen: To remember what you’ve planted and when!
Propagation Methods: Let’s Get Our Hands Dirty!
Erodium boissieri is fairly amenable to a couple of common methods.
1. Stem Cuttings: The Classic Approach
This is my go-to for increasing my Erodium collection.
- Take your cuttings: Snip healthy, non-flowering stems that are about 3-4 inches long. Make your cut just below a leaf node (where a leaf meets the stem). Remove any lower leaves, leaving just a few at the top.
- Dip in rooting hormone (optional): If you’re using it, gently dip the cut end into the rooting hormone, tapping off any excess.
- Plant your cuttings: Make small holes in your prepared potting mix. Insert the cuttings, ensuring the nodes are buried (this is where roots will form). Gently firm the soil around them.
- Water gently: Moisten the soil thoroughly but avoid waterlogging.
- Create humidity: Cover the pots with a plastic bag, making sure the leaves don’t touch the plastic if possible, or use a propagator lid. This will keep the moisture in.
- Find a good spot: Place the pots in a bright location out of direct sunlight. A windowsill that gets morning sun is usually perfect.
2. Division: When the Plant Gets Big
If you have a mature Erodium boissieri plant that’s looking a bit crowded or leggy, it’s ready for a little spa treatment.
- Gently unpot: Carefully remove the entire plant from its container.
- Inspect the root ball: Gently tease apart the soil to get a good look at the roots. You’re looking for distinct sections of the plant that have their own roots.
- Divide the plant: Using your clean hands or a sharp knife, carefully separate the plant into smaller clumps. Each clump should have a healthy portion of roots and a few shoots.
- Pot up: Plant each division into its own pot filled with your well-draining mix.
- Water lightly: Give them a gentle drink.
- Keep them cozy: Keep these divided plants in a slightly shaded spot for a week or two as they recover, offering good humidity.
The “Secret Sauce” (Pro Tips)
Here are a few little tricks I’ve learned over the years that seem to make all the difference:
- Don’t let the leaves touch the water in your propagation setup. Whether you’re water propagating (which I find is more fiddly with Erodium) or using humidity domes, if those leaves sit in moisture for too long, they’ll rot faster than you can say “garden bloom.”
- Bottom heat is your friend for cuttings. If you can, place your pots on a heat mat set to a low temperature (around 70°F or 21°C). This encourages root development from underneath, giving your cuttings a real head start.
- Air circulation is key after rooting. Once you start seeing tiny roots (you might see them peeking through the drainage holes or new growth at the top), gradually introduce more air. This means removing the plastic bag or lid for longer periods each day to prevent fungal issues.
Aftercare & Troubleshooting
Once your cuttings have successfully rooted – you’ll usually see new growth within a few weeks to a couple of months – it’s time to treat them like little seedlings. Gradually increase their exposure to sunlight and reduce the humidity. Continue to water them when the top inch of soil feels dry.
Now, what if things go wrong? The most common culprit with Erodium propagation is rot. If your cuttings turn mushy and black, that’s a sure sign of too much moisture and not enough air circulation. If you see this happening, try to remove the affected cuttings immediately, improve air flow, and let the soil dry out a bit more between waterings. Don’t be discouraged; it happens to the best of us!
A Little Patience, A Lot of Reward
Propagating Erodium boissieri is a journey, not a race. Enjoy the process of nurturing these tiny new lives. Watch for those first signs of roots, the unfurling of new leaves, and know that you’ve created something beautiful with your own two hands. Happy gardening!
Resource:
https://identify.plantnet.org/k-world-flora/species/Erodium%20boissieri%20Coss./data