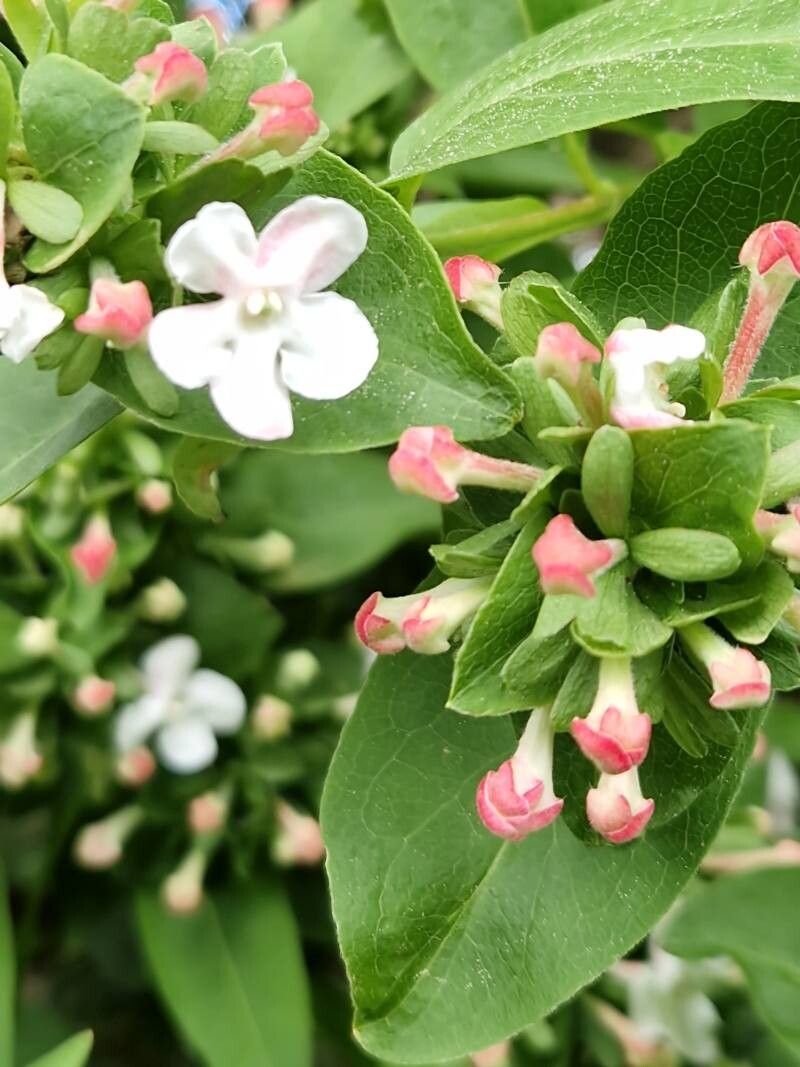
Hello, fellow garden lovers! Today, we’re diving into the delightful world of Zabelia tyaihyoni. I remember the first time I saw this shrub gracing a garden – its delicate, bell-shaped flowers and graceful arching branches were simply captivating. And the scent! A subtle, sweet perfume that drifts on the summer breeze. If you’re looking to add more of this beauty to your own space, or to share it with friends, you’ll be happy to know that propagating Zabelia is a wonderfully rewarding endeavor. It’s generally quite forgiving, making it a lovely project for both seasoned gardeners and those just starting out with propagation.
The Best Time to Start
For Zabelia tyaihyoni, the sweet spot for propagation is definitely late spring to early summer. This is when the plant is actively growing, and its new shoots are supple and full of life. This vibrant energy really gives cuttings the best chance to root successfully. Avoid trying to take cuttings when the plant is stressed, like during extreme heat or drought.
Supplies You’ll Need
Here’s what I always have on hand when I’m taking Zabelia cuttings:
- Sharp pruning shears or a sterile knife: Clean cuts are crucial to prevent disease.
- Rooting hormone: This isn’t always essential for Zabelia, but it can give your cuttings a significant boost. I like to use a powder form.
- Well-draining potting mix: A good blend is often a mix of potting soil, perlite, and a touch of coarse sand. You want to avoid anything that stays waterlogged.
- Small pots or trays: Clean ones are a must!
- Plastic bags or a propagation dome: This creates a humid environment for your cuttings.
- Water: For misting and, if you choose, water propagation.
Propagation Methods
I’ve found success with a couple of methods for Zabelia, but stem cuttings are my go-to for this particular shrub.
Stem Cuttings:
- Choose your material: Look for healthy, non-flowering shoots that are about the thickness of a pencil. They should be flexible but not so soft that they bend easily.
- Make the cut: Using your sharp pruners, take cuttings that are 4 to 6 inches long. Make a clean cut just below a leaf node (where a leaf attaches to the stem). This is where the magic of rooting often happens.
- Prepare the cutting: Gently remove the lower leaves, leaving just a couple at the very top. This prevents them from rotting when in the soil.
- Dip in rooting hormone: If you’re using it, lightly dip the cut end of the stem into the rooting hormone powder, tapping off any excess.
- Plant your cuttings: Fill your clean pots with your well-draining mix. Make a hole with a pencil or your finger and insert the cut end of the Zabelia cutting. Firm the soil gently around it.
- Create humidity: Water the soil lightly. Then, cover the pot with a clear plastic bag, securing it around the rim with a rubber band, or place it under a propagation dome. This creates a mini-greenhouse.
- Find a bright spot: Place your pots in a location that gets bright, indirect light. Avoid direct sun, which can scorch the delicate cuttings.
Water Propagation (Less Common, but can work!):
If you’re feeling experimental, you can try water propagation. Follow steps 1-3 above. Then, simply place the prepared cuttings in a clean jar or vase of water, ensuring that the nodes where you removed the leaves are submerged. Check the water level regularly and change it every few days.
The “Secret Sauce” (Pro Tips)
Here are a couple of things I’ve learned over the years that really make a difference for Zabelia:
- Don’t be afraid to give them a little wiggle: Once you think they might be rooted (usually after a few weeks), give a cutting a very gentle tug. If you feel resistance, you’re on the right track! If it pulls out easily, it just means it needs more time.
- Bottom heat is your friend: If you have a heated propagator mat, using it can significantly speed up the rooting process for Zabelia. Those happy roots just love a little warmth from below.
Aftercare & Troubleshooting
Once you see new leaf growth on your cuttings, that’s a fantastic sign your Zabelia is rooting! Gradually acclimate them to drier air by opening the plastic bag or propagation dome for a few hours each day over a week or so. Continue to keep the soil lightly moist but not waterlogged. For water-propagated cuttings, look for white, healthy roots about an inch long before carefully potting them into your well-draining mix.
The most common issue you might encounter is rot. If you see your cuttings turning mushy or black, it’s usually a sign of too much moisture or poor drainage. Sometimes, it’s just a lost cause, and you’ll need to try again. Don’t get discouraged!
Happy Propagating!
The journey of coaxing new life from a cutting is incredibly satisfying. Be patient with your Zabelia tyaihyoni – sometimes they take their sweet time. Enjoy the process, celebrate every tiny leaf, and soon you’ll have more of these lovely shrubs to enjoy. Happy gardening!
Resource: