Oh, hello there, fellow garden enthusiast! Come on in, grab a cuppa. Today, we’re diving into the wonderful world of Valeriana graciliflora. You know, those delicate, lovely flowers with their sweet scent that just beckon you closer? Growing them from scratch is such a delightful journey, and honestly, it’s not as daunting as you might think.
Why Propagate Valeriana Graciliflora?
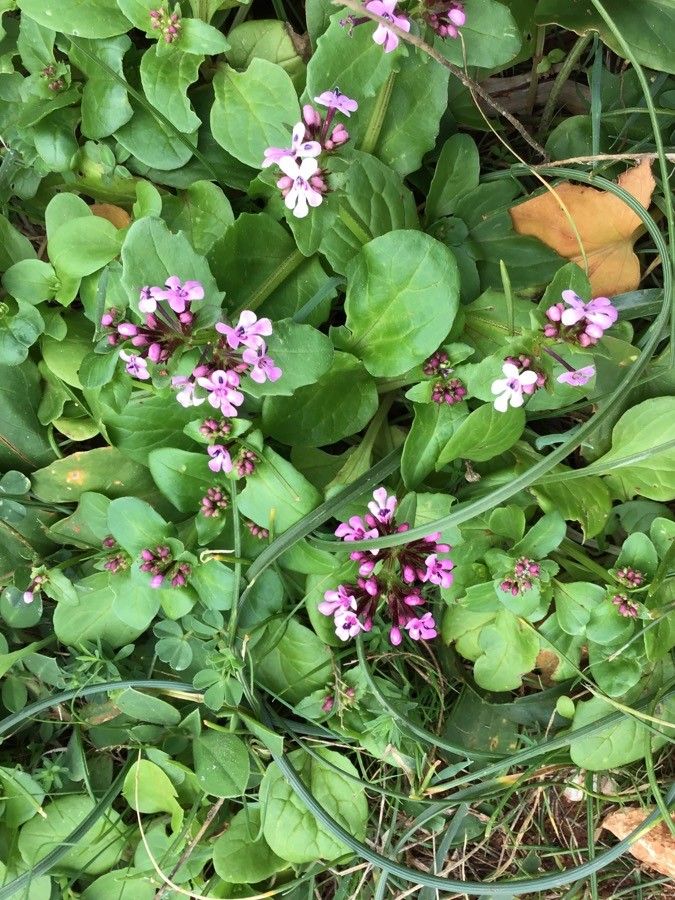
There’s something incredibly satisfying about making more of a plant you adore. Valeriana graciliflora is a charmer with its airy blooms, attracting all sorts of beneficial insects to your garden. Propagating it means you can fill those empty spots, share with friends, or simply ensure you have a steady supply of its gentle beauty. For beginners, I’d say it’s moderately easy. With a little know-how, you’ll be well on your way!
When’s the Perfect Time to Get Started?
The best time to really get going with propagating Valeriana graciliflora is in the late spring or early summer. This is when the plant is actively growing, and its stems are nice and pliable, perfect for taking cuttings. You can also divide established plants in early spring, just as they’re starting to wake up from their winter slumber.
Gathering Your Tools of the Trade
Before we get our hands dirty, let’s make sure we have everything we need. It’s always best to be prepared!
- Sharp pruning shears or a clean knife: For making clean cuts.
- Seed-starting mix or a well-draining potting mix: Something light that won’t hold too much moisture. I often add a bit of perlite to my general potting mix for extra drainage.
- Small pots or trays: With drainage holes, of course!
- Rooting hormone (optional but helpful): A little boost can encourage faster root development.
- Plastic bags or a propagator: To create a humid environment.
- Watering can or spray bottle: For gentle watering.
- Labels and a marker pen: So you don’t forget what you planted where!
Let’s Get Propagating!
There are a couple of wonderful ways to multiply your Valeriana graciliflora. I find the most reliable methods are stem cuttings and division.
Stem Cuttings: Capturing New Life
This is my favorite for a reason; it’s often quite successful!
- Take your cuttings: Look for healthy, non-flowering shoots. Using your clean shears or knife, cut a stem about 4-6 inches long. Make the cut just below a leaf node (where a leaf attaches to the stem).
- Prepare the cuttings: Gently remove the lower leaves, leaving just a couple of sets at the top. This prevents them from rotting in the soil.
- Apply rooting hormone (if using): Dip the cut end of the stem into the rooting hormone powder, tapping off any excess.
- Plant your cuttings: Fill your small pots with your prepared potting mix. Make a hole in the center with your finger or a pencil, and insert the cut end of the stem. Firm the soil gently around it.
- Water and cover: Water the soil lightly. Then, cover the pot with a clear plastic bag or place it inside a propagator. This creates a mini-greenhouse, keeping the humidity high, which is crucial for cuttings to root.
Division: Sharing the Bounty
If you have a mature Valeriana graciliflora plant, dividing it is a fantastic way to get multiple plants and also reinvigorates the parent plant.
- Dig up the plant: In early spring, carefully dig up the entire plant. Try to disturb the roots as little as possible.
- Inspect the root ball: Gently shake off some of the excess soil. You’ll see where the plant has naturally divided into clumps.
- Separate the divisions: Using your hands or a clean spade, gently pull or cut the root ball apart into smaller sections. Each division should have roots and some shoots.
- Replant: Replant the divisions into their new locations or pots. Water them well.
The “Secret Sauce” (My Insider Tips)
Over the years, I’ve learned a few little tricks that really make a difference.
- Bottom heat is a game-changer for cuttings. If you have a heat mat, placing your pots on it can significantly speed up root formation. It mimics the warmth of spring soil wonderfully.
- Don’t let the leaves of your cuttings touch the soil. I know I touched on this, but it’s worth repeating! Any leaves in contact with the damp soil are prime candidates for rot. Snip them off if they’re getting too low.
- For divisions, make sure each piece has healthy roots. If a division seems to have very few or no roots, it might be a struggle. Focus on the ones with a good root system.
Aftercare and What to Look For
Once your cuttings have rooted (you can gently tug them; if there’s resistance, they’ve got it!), or your divisions are replanted, it’s time for continued care.
- Gradually remove the plastic cover: Once roots have formed, start airing out the cuttings by lifting the plastic bag for a few hours each day. This helps them acclimatize to drier air.
- Keep them consistently moist, but not waterlogged: Water when the top inch of soil feels dry. Overwatering is the quickest way to invite root rot, which looks like a mushy, black base on your cutting or a wilting, yellowing plant. If you suspect rot, act fast by removing the affected part and repotting in drier soil.
- Move to larger pots: Once your new plants have a good root system and are showing new growth, transplant them into slightly larger pots.
Go Forth and Grow!
Propagating Valeriana graciliflora is a rewarding experience, and with a little patience and these tips, you’ll be well on your way to creating more of these beautiful blooms. Don’t be discouraged if not every cutting takes; gardening is all about learning and observing. Enjoy the process, and happy growing!
Resource: