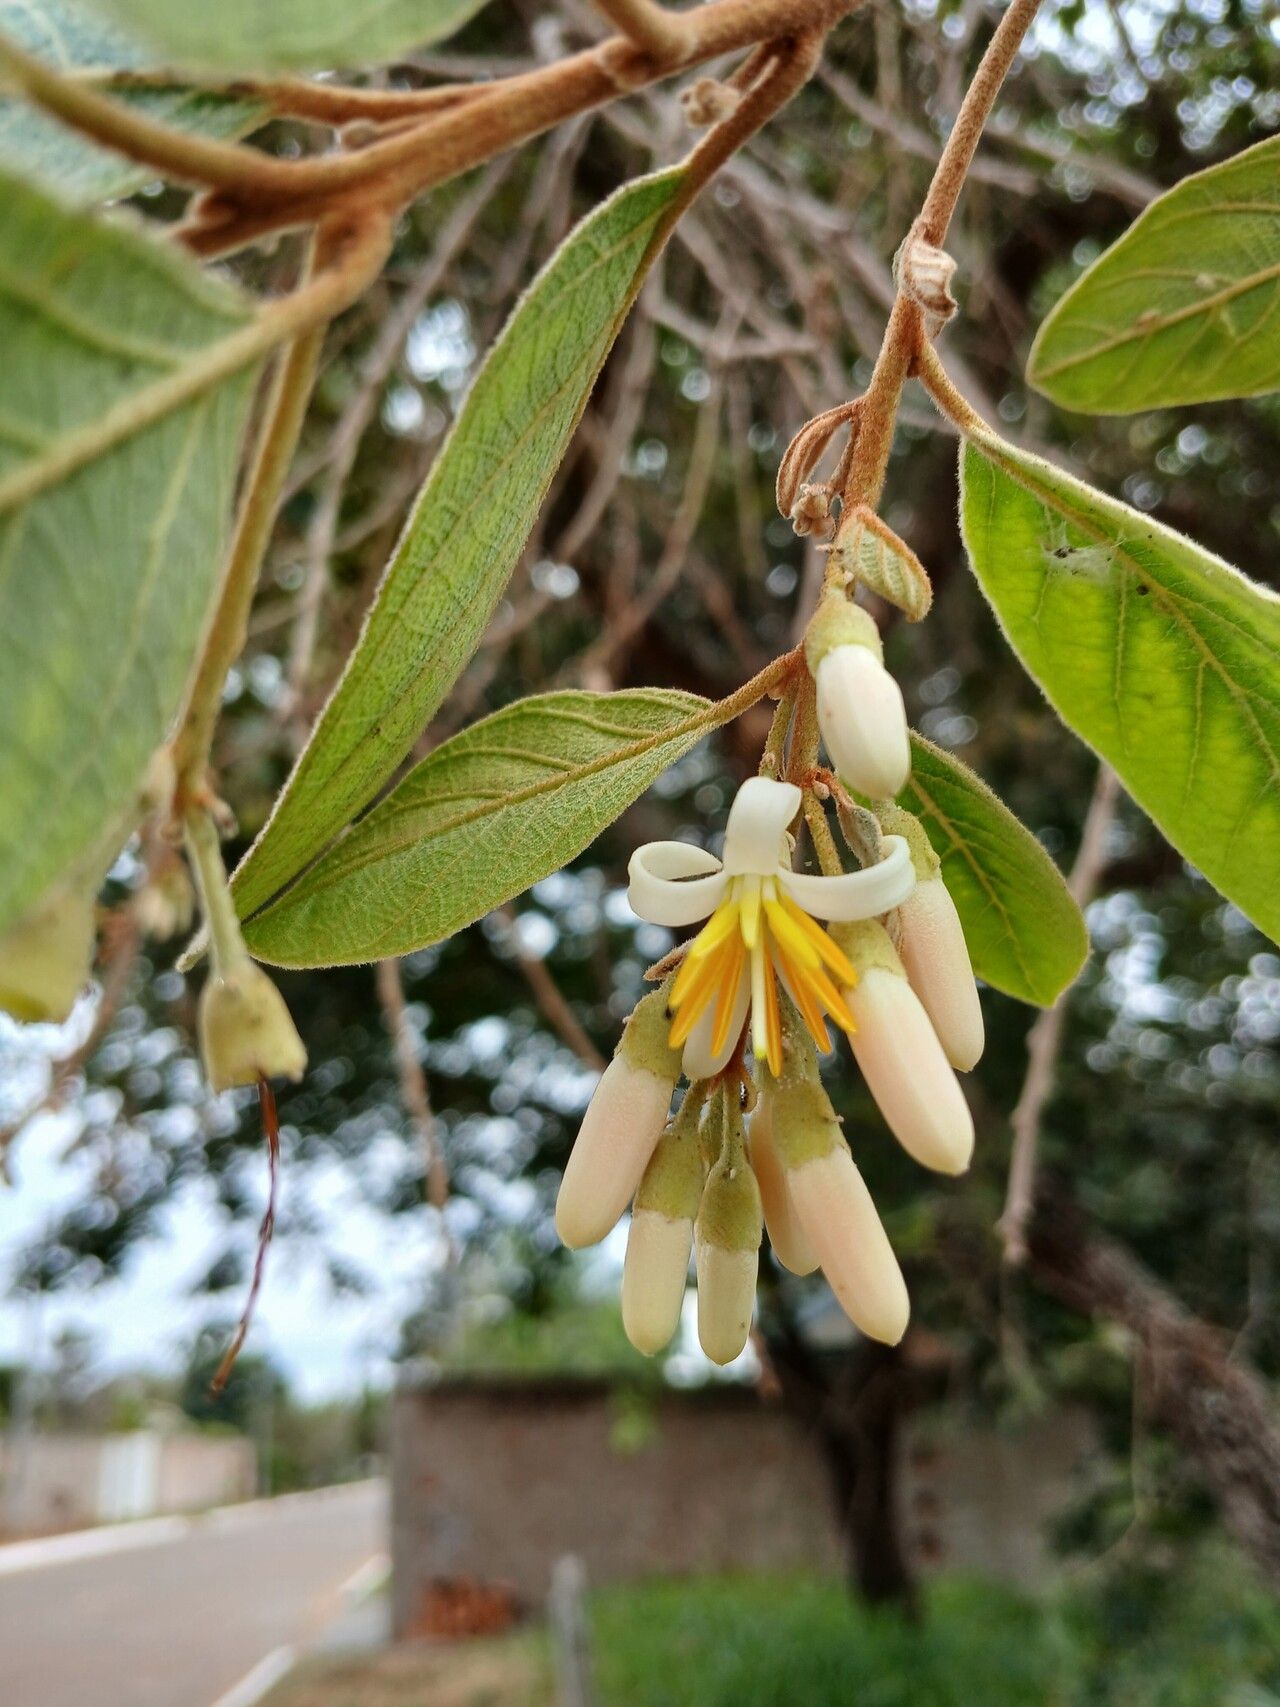
Hello, fellow garden enthusiasts! I’m absolutely thrilled to dive into the world of Styrax ferrugineus with you today. This lovely little shrub, also known as the “Brazilian Snowbell,” is a real charmer. Its delicate, bell-shaped white flowers, often appearing in abundance, bring a touch of airy elegance to any garden. Plus, the subtle, sweet fragrance makes a summer evening simply magical.
Propagating Styrax ferrugineus might sound a little daunting, but I promise, it’s a wonderfully rewarding journey. While it’s not the absolute easiest plant for a complete beginner, with a little patience and a few key techniques, you’ll be well on your way to success. Seeing those tiny roots emerge from a cutting you nurtured? Pure gardening joy!
The Best Time to Start
For the best chance of success with Styrax ferrugineus, think late spring to early summer. This is when the plant is actively growing and has plenty of energy to put into rooting new material. You’ll want to select new, but not too soft, growth – think pencil-thick stems that are starting to firm up. Avoid woody, old stems or brand new, floppy shoots.
Supplies You’ll Need
Gathering your tools beforehand makes the whole process much smoother. Here’s what I always have on hand:
- Sharp Pruning Shears or a Craft Knife: Clean cuts are essential for healthy root development.
- Rooting Hormone: A good quality rooting powder or gel really boosts your cuttings’ chances.
- Potting Mix: A light, well-draining mix is crucial. I like to use a blend of peat moss, perlite, and a little bit of compost. Sometimes I’ll just grab a good quality seed-starting mix.
- Small Pots or Trays: Clean containers with drainage holes are a must.
- Watering Can with a Fine Rose: Gentle watering prevents disturbing your cuttings.
- Plastic Bag or Clear Dome: To create a humid environment.
- Labels: So you don’t forget what you planted where!
Propagation Methods
I’ve found success with Styrax ferrugineus primarily through stem cuttings. It’s a tried-and-true method.
Stem Cuttings:
- Taking the Cuttings: On a mild day, use your clean shears to take cuttings that are about 4-6 inches long. Make your cut just below a leaf node (where a leaf attaches to the stem). Remove the lower leaves, leaving just a few at the top.
- Applying Rooting Hormone: Dip the cut end of each cutting into your rooting hormone, tapping off any excess. This step is important to encourage root formation.
- Planting the Cuttings: Fill your pots or trays with your prepared potting mix. Make a small hole in the center with a pencil or your finger, and gently insert the cutting, ensuring the leaf node is buried. Firm the soil around the base of the cutting.
- Watering: Water the cuttings gently to settle the soil. You want the soil to be moist, but not waterlogged.
The “Secret Sauce” (Pro Tips)
Now, for a few tricks I’ve picked up over the years that can really make a difference:
- Don’t Let the Leaves Touch the Water: If you’re tempted to try water propagation with Styrax, which I generally don’t recommend for this plant, make sure absolutely none of the leaves are submerged. They’ll just rot. Stick to soil for this one!
- Bottom Heat is Your Friend: Placing your pots on a heat mat can significantly speed up the rooting process. It mimics the warmth of spring soil and encourages those roots to get growing.
- The Merry-Go-Round of Mist: I like to mist my cuttings lightly once a day when they are under their plastic cover. This keeps the humidity high and prevents the leaves from drying out.
Aftercare & Troubleshooting
Once your cuttings are planted, it’s time for pampering! Place them in a bright spot with indirect light. Avoid harsh, direct sun, which can scorch those tender new leaves. Keep the soil consistently moist, but never soggy.
The biggest challenge you might face is rot. If you see stems browning and mushy at the base, it’s often a sign of too much moisture and not enough airflow. You can try gently removing the affected cutting, and if others look suspicious, ensure your drainage is excellent and consider a bit more airflow. Be patient! It can take several weeks, sometimes even a couple of months, for roots to develop. You can gently tug on a cutting to feel resistance – that’s a good sign of roots!
A Little Encouragement
So there you have it! Propagating your own Styrax ferrugineus is a wonderfully satisfying way to expand your garden and share the beauty of this plant. Don’t get discouraged if your first attempt isn’t perfect. Gardening is all about learning and adapting. Enjoy the process, cherish those tiny green shoots, and soon you’ll have a whole new generation of Brazilian Snowbells to admire. Happy planting!
Resource:
https://identify.plantnet.org/k-world-flora/species/Styrax%20ferrugineus%20Nees%20&%20Mart./data