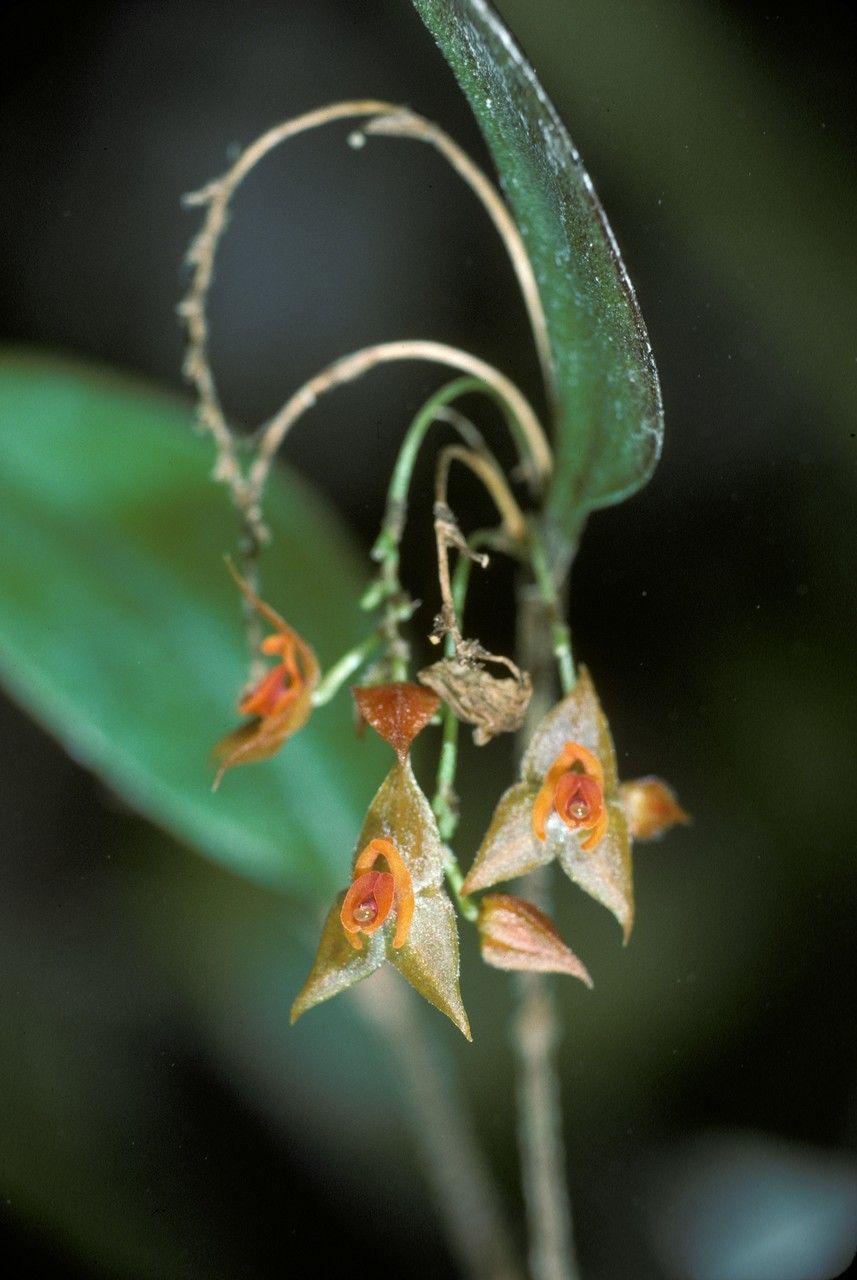
Oh, friends, let’s talk about one of my absolute favorite little gems: Lepanthes grisebachiana. If you’ve ever lost yourself in the intricate beauty of miniature orchids, you know the allure of these tiny wonders. Their delicate, often brightly colored flowers, sometimes resembling miniature dragon heads or tiny jewels, are just captivating. And successfully propagating them? Well, that’s a joy I can’t quite put into words. It’s like unlocking a secret.
Now, right off the bat, I want to be honest. Lepanthes grisebachiana can be a bit of a diva. It’s not the orchid you’ll want to start with if you’re brand new to orchid propagation. However, if you’ve gotten your hands a little dirty with some easier orchids and are ready for a gentle challenge, you’ll find the rewards incredibly sweet. Patience and a bit of attentive care are your best friends here.
The Best Time to Start
For Lepanthes grisebachiana, the prime time to think about propagation is during its active growing season. This usually falls in the spring and early summer. You’ll see new roots and leaves emerging, giving the plant the energy it needs to bounce back and establish itself. Trying to propagate when the plant is dormant or stressed is a recipe for disappointment. Watch for that surge of new growth – that’s your cue!
Supplies You’ll Need
Gathering your tools beforehand makes the whole process smoother. Here’s what I always have on hand:
- Sharp, sterilized pruners or a razor blade: Cleanliness is paramount to prevent disease.
- Fine-grade orchid bark mixes: A well-draining mix is crucial. I often use a blend of bark, perlite, and a bit of chopped sphagnum moss.
- Small pots or specialized propagation trays: Something that holds moisture without becoming waterlogged. Small net pots are fantastic for this.
- Rooting hormone (optional, but helpful): A gentle rooting hormone can give your cuttings a boost.
- Sphagnum moss: For covering cuttings and maintaining humidity.
- Clear plastic bags or a small propagation box: To create a humid environment.
- Distilled or rainwater: Tap water can sometimes be too harsh.
- A small, clean spray bottle: For misting.
- A thermometer and hygrometer: To monitor temperature and humidity, especially if using a propagation box.
Propagation Methods
The most reliable way I’ve found to propagate Lepanthes grisebachiana is through stem cuttings, sometimes referred to as keikis when they form naturally. Division is also an option, but it’s often more about separating existing growth.
Stem Cuttings (Keikis)
- Identify a healthy growth: Look for a developed pseudobulb with a developing leaf or a developing flower spike that’s started to elongate. Sometimes, tiny baby plants (keikis) will naturally form at the base of the pseudobulbs or along the rhizome.
- Make the cut: Using your sterilized pruners or razor blade, carefully cut the keiki or stem section from the mother plant. Try to include at least one healthy pseudobulb and its leaf, and if possible, a small section of the rhizome. If you’re cutting a stem with an emerging spike, that’s also a good candidate.
- Prepare the cutting: If you’re using a rooting hormone, dip the cut end into the powder or gel. Gently shake off any excess.
- Potting up: Place the cutting into your prepared fine-grade orchid bark mix in a small pot. It’s important that the new growth or the base of the pseudobulb is just at the surface of the mix. You don’t want to bury it deeply.
- Create a humid environment: This is where the magic happens for Lepanthes. Gently mist the surface of the potting medium and the cutting with your distilled or rainwater. Then, place the pot inside a clear plastic bag or a propagation box. Seal it to trap humidity.
Division
- Gently unpot the plant: Carefully remove your Lepanthes from its pot.
- Inspect the rhizome: Look for natural breaks in the rhizome where you can see clear signs of independent growth – that is, at least one pseudobulb and a leaf.
- Separate carefully: Using your sterilized pruners or a clean knife, gently separate the divisions. Try to keep as many roots intact as possible on each division. If a division has very few roots, don’t be discouraged; it will grow them.
- Pot each division: Pot each piece into its own small container with the appropriate orchid mix, as described in the stem cutting method.
- Provide humidity: Again, these divisions will need a humid environment to encourage root development, so use the plastic bag or propagation box method.
The “Secret Sauce” (Pro Tips)
Here are a few little tricks I’ve picked up over the years that seem to make all the difference with these fussy orchids:
- Never let the leaves touch standing water. If you’re misting, let it dry slightly. If you’re using a propagation tray, ensure there’s good airflow to prevent the leaves from sitting in moisture, which can lead to rot.
- Bottom heat can be a game-changer. If you have a small seedling mat, placing your propagation tray or pots on it can really encourage root development. Lepanthes appreciate a bit of gentle warmth from below. Just make sure it’s not too hot – think lukewarm bathwater temperature.
- Patience, patience, patience. Lepanthes are not fast growers. It can take weeks, even months, for you to see significant root growth. Don’t be tempted to peek too often or to unpot them to check. Trust the process.
Aftercare & Troubleshooting
Once you see signs of new roots – you might notice them peeking out of the net pot or pushing through the bark – it’s time to start thinking about slightly less intense humidity. Gradually acclimate your new Lepanthes to the ambient humidity of your home. Continue to keep the potting mix consistently moist but never soggy.
The most common sign of failure is rot. If you see your cutting turning black and mushy, it’s likely a sign of too much moisture and not enough air circulation. Unfortunately, rot is often fatal for these delicate plants. Another sign is a shriveled, black leaf that just won’t perk up, even with humidity. If you see this, try increasing airflow slightly or reducing watering a touch.
A Little Encouragement
Propagating Lepanthes grisebachiana is a journey, not a race. There will be times when you’ll wonder if it’s working, and that’s perfectly normal. Celebrate every little sign of progress, and don’t be discouraged by setbacks. Each attempt is a learning experience, and the satisfaction of seeing a tiny new plant thrive under your care is absolutely worth it. So go ahead, get your hands dirty, and enjoy the delightful process of bringing more of these botanical treasures into your world!
Resource:
https://identify.plantnet.org/k-world-flora/species/Lepanthes%20grisebachiana%20Hespenh./data