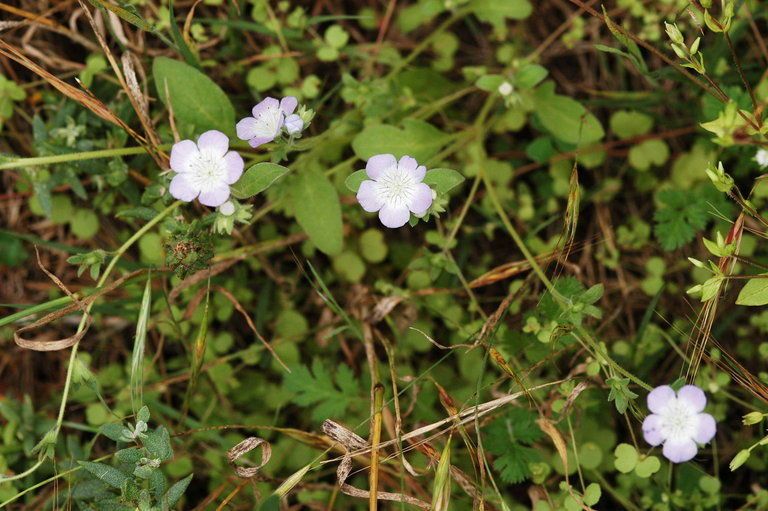
Oh, Phacelia insularis! If you’ve ever seen those sprays of delicate, lavender-blue flowers gracing a coastal garden, you know exactly why I’m so enthusiastic about them. They’re like little pieces of the California coast brought right into your own yard, attracting all sorts of beneficial pollinators. And guess what? Propagating them is absolutely a rewarding endeavor, and I’m happy to share just how you can do it. For beginners, I’d say it’s moderately easy – with a little patience and a few key steps, you’ll be well on your way!
The Best Time to Start
Timing is everything in the garden, and for Phacelia insularis, late spring to early summer is your sweet spot. This is when the plant is actively growing and often has plenty of fresh, new stems to work with. You’re looking for semi-hardwood cuttings, meaning stems that are not brand new and flimsy, but also not old and woody. They should snap cleanly when bent.
Supplies You’ll Need
Gathering your supplies beforehand makes the whole process so much smoother. Here’s what I usually have on hand:
- Sharp pruning shears or a clean knife: For making clean cuts.
- Propagation trays or small pots: With drainage holes, of course!
- Well-draining potting mix: A good blend of perlite, peat moss, and a bit of compost works wonders. You can also buy a specific seed-starting or propagation mix.
- Rooting hormone (optional but recommended): This is a powdered or liquid substance that encourages root development.
- Small plastic bags or a clear plastic dome: To create a mini-greenhouse environment.
- Watering can with a fine rose: For gentle watering.
Propagation Methods
While you can sometimes get Phacelia to come from seed, I find propagating from stem cuttings to be the most reliable and satisfying method. Here’s how I do it:
- Take Your Cuttings: On a bright, cool morning (after the dew has dried!), locate a healthy, upright stem on your mature Phacelia insularis. Using your sharp shears or knife, take cuttings that are about 4-6 inches long. Make your cut just below a leaf node (where a leaf attaches to the stem).
- Prepare the Cuttings: Gently remove the leaves from the bottom two-thirds of each cutting. You want to expose those nodes, as that’s where the roots will emerge. If any flower buds have formed, pinch them off to redirect the plant’s energy into root growth.
- Apply Rooting Hormone (Optional): Dip the cut end of each stem into your rooting hormone, tapping off any excess.
- Potting Up: Fill your small pots or propagation tray with your moistened, well-draining potting mix. Make a small hole in the center of each pot or cell with your finger or a pencil.
- Plant the Cuttings: Insert the prepared cuttings into the holes, ensuring that the nodes where you removed leaves are buried in the soil. Gently firm the soil around each cutting.
- Create a Humid Environment: Water the soil gently until water drains from the bottom. Then, cover the pots with a clear plastic bag (making sure the leaves don’t touch the sides) or place them under a clear plastic dome. This traps humidity, which is crucial for callus formation and rooting.
The “Secret Sauce” (Pro Tips)
Here are a few tricks I’ve learned over the years that really boost success rates:
- Bottom Heat is Your Friend: I swear by placing my propagation trays on a heating mat. This gentle warmth encourages root development from the bottom up, significantly speeding up the process.
- Don’t Let the Leaves Drown: When creating your mini-greenhouse with a plastic bag, do your best to ensure the leaves of the cuttings don’t sit in any condensation that collects at the bottom. This can lead to rot. If you see a lot of condensation, open the bag for an hour to let it air out.
- Freshness Matters: Try to get your cuttings into the soil and covered as soon as possible after taking them. The longer they sit out, the more they’ll start to dry out, making it harder for them to root.
Aftercare & Troubleshooting
Once your cuttings are potted, place them in a spot that receives bright, indirect light. Avoid direct sun, which can scorch the delicate new cuttings. Keep the soil consistently moist but not waterlogged. Water when the top inch of soil feels dry.
You’ll know your cuttings are rooting when you see new leaf growth appearing. You can also gently tug on a cutting; if it resists, it’s developed roots! This usually takes 3-6 weeks, sometimes longer. Once they have a good root system, you can carefully transplant them into slightly larger pots.
The most common problem you’ll encounter is rot. This is usually a sign of too much moisture or poor air circulation. If a cutting turns black and mushy, it’s best to discard it and check your moisture levels and ventilation for the remaining cuttings.
A Little Patience Goes a Long Way
Propagating plants is a truly magical process, and seeing those tiny roots emerge is incredibly rewarding. Don’t get discouraged if not every cutting takes. Nature has its own rhythm. Enjoy the journey, learn from each attempt, and soon you’ll have a whole garden of beautiful Phacelia insularis to share. Happy gardening!
Resource:
https://identify.plantnet.org/k-world-flora/species/Phacelia%20insularis%20Munz/data