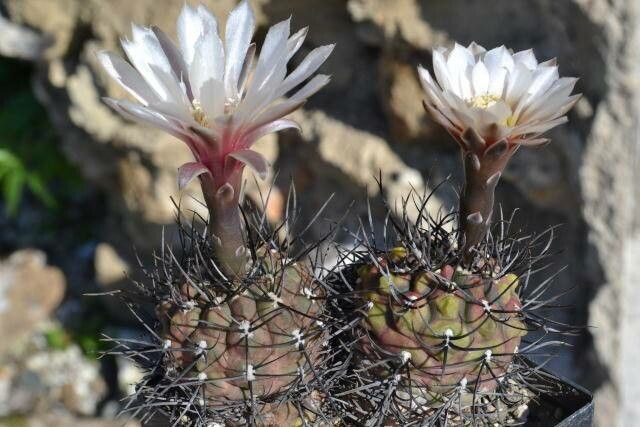
Hello garden friends! Today, we’re diving into the wonderfully spiky world of Gymnocalycium striglianum. These fascinating cacti, with their ribbed bodies and often striking spines, bring a unique charm to any collection. If you’ve ever admired one and wished you had more, you’re in luck! Propagating them is a deeply rewarding experience, like watching a tiny piece of your gardening passion grow into something new. And while some houseplants can be a bit finicky, Gymnocalycium striglianum is generally quite forgiving, making it a fantastic project for both seasoned cactus enthusiasts and curious beginners.
The Best Time to Start
When it comes to getting those new Gymnocalycium babies going, late spring through early summer is really your sweet spot. This is when the plant is actively growing, full of energy, and most receptive to the propagation process. You’re essentially tapping into its natural momentum, which gives your cuttings or offsets the best chance to thrive.
Supplies You’ll Need
Before we get our hands dirty, let’s gather our tools!
- Cactus & Succulent Potting Mix: A well-draining mix is non-negotiable. You can buy a good quality pre-made one, or easily create your own by mixing equal parts perlite, coarse sand, and a bit of potting soil.
- Sharp, Sterilized Pruning Shears or a Clean Knife: This is crucial for making clean cuts that heal well. A quick wipe with rubbing alcohol after each use will prevent any spread of disease.
- Rooting Hormone (Optional, but Recommended): This little booster can significantly speed up root development and increase success rates.
- Small Pots or Seed Trays: Whatever you choose, ensure they have drainage holes.
- Trowel or Spoon: For handling your soil mix.
- Watering Can with a Fine Rose or Spray Bottle: Gentle watering is key.
- Labels and a Pen: To keep track of what you’ve propagated and when.
Propagation Methods
There are a couple of excellent ways to bring more Gymnocalycium striglianum into your life.
Offsets (Baby Plants)
Many Gymnocalycium cacti produce little baby plants, called offsets, around their base. This is arguably the easiest way to go!
- Wait for Maturity: Ensure the offset is at least an inch or two in diameter. This gives it a better chance of survival on its own.
- Gently Loosen: Carefully remove the parent plant from its pot. Use your fingers or a small trowel to gently brush away soil from the base of the offset.
- Make the Cut: If the offset is snugly attached, use your sterilized knife or shears to cleanly cut it away from the mother plant. Try to get a bit of the parent’s stem with the offset if possible.
- Callus Over: This is a vital step! Place the offset in a dry, shaded spot for a few days to a week. You want the cut surface to dry and form a protective callus. This prevents rot.
- Potting Up: Once callused, pot your offset in your prepared cactus mix. Don’t water immediately. Wait a few more days to a week before giving it a very light watering.
Stem Cuttings (Less Common for This Genus, but Possible)
While offsets are more common, you can sometimes take a piece of the main stem if you’re careful.
- Select a Healthy Segment: Choose a firm, mature, and disease-free section of the stem.
- Make the Cut: Using your sterilized shears or knife, make a clean cut.
- Allow to Callus: Just like with offsets, you must allow the cut end to callus over in a dry, shaded spot for a week or more. This is the most critical step for preventing rot.
- Planting: Once callused, you can plant the cutting upright in your cactus mix. You can also try laying it on its side on top of the soil, and it may even root from multiple points!
- Water Sparingly: Again, hold off on watering for at least a week after planting.
The “Secret Sauce” (Pro Tips)
Now, for a few little tricks I’ve learned over the years that really make a difference.
- Don’t Rush the Callusing: I can’t stress this enough. This is the #1 reason cuttings and offsets fail. A good, dry callus is your best defense against rot. Be patient – a few extra days can save your project.
- Bottom Heat is Your Friend: If you can, especially when starting from cuttings or if your room is a bit cool, using a seedling heat mat offers gentle bottom heat that really encourages root development. It provides a consistent, warm environment without overheating the plant.
- Tiny Roots Need Tiny Jobs: When you do start to water, be extremely gentle. A spray bottle is perfect for misting the soil surface. You don’t want to blast fragile new roots away. Think of it like giving a delicate baby a drink.
Aftercare & Troubleshooting
Once your Gymnocalycium babies have started to show signs of life – a bit of new growth or the subtle expansion that suggests roots are forming – you can gradually increase watering. Water only when the soil is completely dry, and then water thoroughly until it drains from the bottom.
The most common enemy here is rot. If you see your cutting or offset turning mushy, brown, or black, especially at the base, it’s likely rot. This usually happens because the callus didn’t form properly, or you watered too soon. Unfortunately, once rot sets in, it’s very difficult to save. Your best bet is to catch it early, cut away the affected parts with your sterilized tool, and re-callus. If it’s too far gone, don’t despair! Start again, keeping those callus tips in mind.
A Gentle Green-Thumb Encouragement
So there you have it! Propagating Gymnocalycium striglianum is a wonderfully accessible and rewarding gardening experience. Be patient with your little ones, embrace the occasional setback as part of the learning process, and most importantly, enjoy watching your green wonders multiply. Happy growing!
Resource: