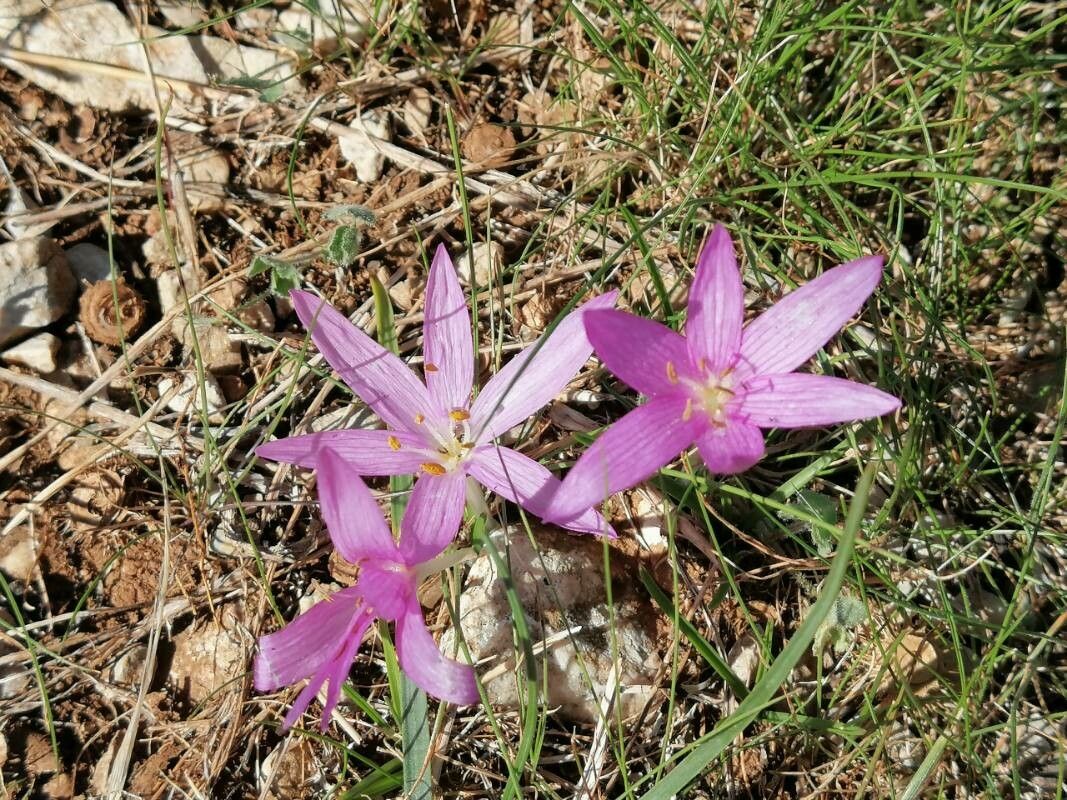
Hello there, fellow garden enthusiasts! I’m so glad you’ve found your way here. Today, we’re diving into the magical world of Colchicum peloponnesiacum. If you haven’t met this beauty yet, imagine delicate, goblet-shaped flowers, usually a lovely soft pink or lilac, often appearing seemingly out of nowhere in late summer or early autumn. They have this ethereal charm that truly captivates. Propagating them, I’ve found, is a wonderfully rewarding process, a little bit like magic unfolding right in your hands. Now, for those of you just starting out, Colchicum peloponnesiacum can be a tad more challenging than, say, a simple succulent. It requires a bit more finesse, but don’t let that deter you! With a little care and attention, you can absolutely succeed.
The Best Time to Start
Timing is everything with these lovely bulbs. The absolute best time to propagate Colchicum peloponnesiacum is in late spring or early summer. This is when the plant is actively growing, and its energy is focused on bulking up after its winter rest and summer dormancy. You’re essentially working with the bulb’s natural growth cycle, which gives you the highest chance of a happy, healthy new plant.
Supplies You’ll Need
Before we get our hands dirty, let’s gather our tools. Think of this as packing a picnic basket for a successful gardening adventure!
- Sharp, clean pruning shears or a sharp knife: For making clean cuts.
- Potting mix: A well-draining mix is crucial. I usually go with a blend of potting soil, perlite, and a touch of grit. Think of it as giving your little ones excellent drainage so they don’t get soggy feet.
- Small pots or propagation trays: About 4-6 inches in diameter is usually perfect. Ensure they have drainage holes!
- Labels and a marker: So you don’t forget which wondrous seedling is which.
- Watering can with a fine rose or a spray bottle: For gentle watering.
- (Optional) Rooting hormone powder: This can give a little boost, but it’s not always necessary for colchicum division.
Propagation Methods
For Colchicum peloponnesiacum, the most successful and straightforward method is division. These plants naturally form clumps of corms (which look like bulbs, but botanically are slightly different!). Once they’ve matured, they’ll produce offsets, much like a family growing larger.
Here’s how to do it:
- Carefully dig up the parent corm. The best time for this is after the foliage has completely died back, which is usually in late spring. You want to wait until the leaves have yellowed and started to wither. Gently loosen the soil around the clump with a trowel or garden fork. Lift the entire clump out of the ground.
- Gently separate the corms. You’ll often see smaller corms attached to the sides of the main, larger corm. Gently wiggle them apart. If they’re stubborn, you can use your clean knife or shears to make a clean cut, ensuring each new corm has a bit of its own basal plate (where roots will emerge). Don’t worry if a little old leaf shoot is attached; it will likely wither away.
- Inspect your new corms. Make sure they look firm and healthy, not soft or mushy. Discard any that show signs of rot or damage.
- Plant your new corms. Fill your pots with your well-draining potting mix. I usually plant them about 2-3 inches deep, with the flat basal plate facing downwards. You can plant multiple small corms in one pot, or give each larger one its own space to grow.
- Water gently. Give them a good watering to settle the soil.
The “Secret Sauce” (Pro Tips)
Over the years, I’ve learned a few little tricks that make all the difference. These aren’t complicated, but they’re the kind of things that nudge your success rate up.
- Give them room to breathe. Don’t overcrowd your pots with corms. They need a bit of space to grow and multiply. If you pack them in too tightly, you increase the risk of disease and competition for resources.
- Think dry dormancy is best. After planting your divisions, I like to keep the soil just barely moist, not wet, until I see signs of new growth. Colchicums naturally go through a dry dormancy period, and that can translate to their early stages after division, too. They don’t want to sit in soggy soil while they’re trying to establish new roots.
- Patience is key with the foliage. You might not see those iconic autumn flowers the very next season from a newly divided corm. They often spend their first year focusing on building up their strength and root system. Don’t be disheartened if your newly planted corms don’t bloom immediately; they’re just quietly working their magic underground.
Aftercare & Troubleshooting
Once you see signs of life – a tiny shoot emerging – you can increase watering slightly, but always make sure the soil dries out a bit between waterings. Keep them in a bright spot, but avoid intense, direct sun, especially when they are young.
The most common issue you might encounter is rot. This is almost always due to overwatering and poor drainage. If a corm looks mushy, dark brown or black, and smells off, it’s likely rotted. Unfortunately, there’s not much you can do once rot sets in. The best defense is excellent drainage from the start. Another sign of trouble can be a yellowing or wilting of new shoots that happens too early, which can also point to waterlogged conditions or insufficient root development.
A Encouraging Closing
So there you have it! Propagating Colchicum peloponnesiacum is a journey, not a race. It might take a bit of waiting, a little bit of watchful care, but the reward of seeing those first delicate blooms emerge from your own propagated corms is truly special. Be patient with yourself and your new plants. Enjoy the process, and soon enough, you’ll be sharing this little bit of autumn magic with others. Happy gardening!
Resource: