Oh, hello there, fellow garden enthusiast! You’ve stumbled upon my little corner of the internet, and I couldn’t be happier. Today, we’re diving into something truly special: propagating Sambucus australis, or as some of us affectionately call it, the Australian Elderberry.
Why You’ll Love Growing More Sambucus australis
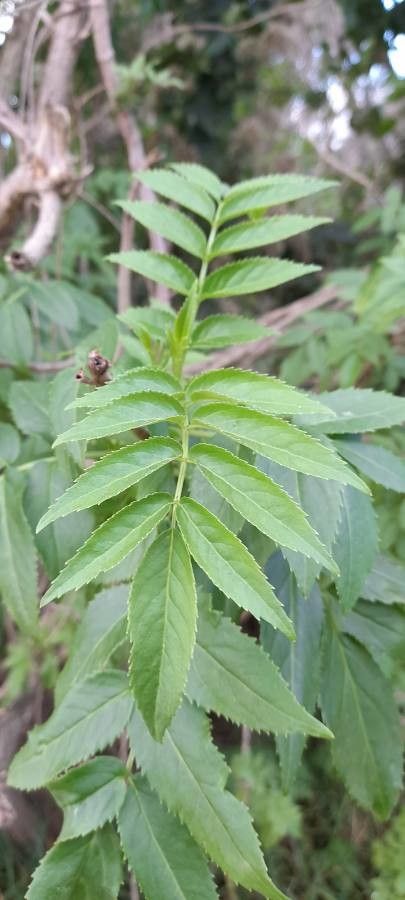
There’s something so incredibly satisfying about taking a piece of a plant you love and coaxing it into a brand new life. Sambucus australis is just one of those beauties. Its delicate white flowers in spring are a magnet for pollinators, and the dusky, often purple, foliage adds such a sophisticated touch to any garden. Plus, who doesn’t love the idea of having more of something gorgeous? I find propagating elderberries to be a wonderfully rewarding process, and honestly, it’s quite beginner-friendly, which is always a plus in my book!
When to Get Your Hands Dirty
The best time to start propagating Sambucus australis is generally in late spring or early summer, after the plant has finished its initial burst of growth and before the intense heat of midsummer sets in. This is when the new growth is still flexible and full of life, making it more receptive to rooting. You can also have success with cuttings taken in the fall, but spring is my go-to for the highest success rates.
Your Propagation Toolkit
Let’s get you prepped with the essentials. Having everything ready before you start makes the whole process so much smoother.
- Sharp pruning shears or a clean, sharp knife: For making clean cuts. Dull tools can crush stems.
- Rooting hormone powder or gel: This isn’t strictly mandatory for elderberries, but it gives your cuttings a significant boost.
- Small pots or trays with drainage holes: For your cuttings to grow in. Yogurt cups with holes poked in the bottom work in a pinch!
- A good quality potting mix: I like a blend of peat moss, perlite, and compost. You want something that drains well but also holds a little moisture. A seedling-starting mix is perfect.
- A watering can with a fine rose: To water gently without displacing your cuttings.
- Optional: A clear plastic bag or propagation dome: to create a humid environment.
- Optional: Bottom heat mat: For extra encouragement, especially if your propagation space is a bit cool.
Let’s Get Growing: Stem Cuttings
This is my favorite method for Sambucus australis, as it’s straightforward and yields great results.
- Select Your Cuttings: Choose healthy, non-flowering stems from your mature Sambucus australis. Look for stems that are about the thickness of a pencil and roughly 6-8 inches long. The ideal place to cut is just below a leaf node (where a leaf attaches to the stem).
- Prepare the Cuttings: Using your sharp shears, make a clean cut at that leaf node. Remove the lower leaves, leaving just two or three leaves at the very top of the stem. This reduces water loss.
- Apply Rooting Hormone: If you’re using rooting hormone, dip the cut end of the stem into the powder or gel. Tap off any excess.
- Plant Them Up: Gently insert the treated end of the cutting into your prepared potting mix. Make a small hole with a pencil or your finger first to avoid rubbing off all the hormone. Push the cutting in about an inch or two, ensuring it’s firm.
- Water Gently: Water the potting mix thoroughly until water drains from the bottom. You want the soil to be moist but not waterlogged.
- Create a Humid Environment: Cover your pots with a clear plastic bag or place them on a tray inside a propagation dome. This traps humidity, which is crucial for cuttings. Make sure the leaves aren’t touching the sides of the bag if possible. If you’re not using a dome, you can just mist the cuttings occasionally.
The “Secret Sauce”: My Insider Tips
Over the years, I’ve learned a few tricks that seem to make all the difference. Here are my top picks for elderberry propagation:
- Don’t Be Afraid to Prune Your Cuttings: I know it seems counterintuitive to cut up a healthy stem, but sometimes making a secondary cut about halfway up the stem can encourage root development. Just a light slit, about half an inch long. I find it really does help.
- Bottom Heat is Your Friend: If you have a propagation space that’s a bit on the cool side, using a bottom heat mat can dramatically speed up rooting. Elderberries appreciate a little warmth from below, especially in spring. Just place your pots on top of the mat.
- Cleanliness is King (or Queen!): This might sound obvious, but always use clean tools and pots. Any lingering bacteria or fungi can spell disaster for your delicate cuttings. A quick wash with soap and water is usually enough.
Aftercare and Troubleshooting
Once your cuttings are planted, the waiting game begins! Keep them in a bright spot, but out of direct, scorching sunlight.
- Check for Roots: After a few weeks to a couple of months, you can gently tug on a cutting. If you feel resistance, congratulations, you have roots! You can also look for new leaf growth as a sign.
- Transplanting: Once your cuttings have a good root system, it’s time to pot them up into slightly larger individual pots. Use a good, general-purpose potting mix.
- Watch for Rot: The most common issue you’ll see is rot. This usually happens because the soil is too wet and there isn’t enough air circulation. If you see a cutting turning black and mushy, unfortunately, it’s usually a goner. Make sure your soil drains well and don’t overwater. If you’re using a plastic bag, air it out for a few minutes each day to prevent fungal growth.
Happy Growing!
Propagating Sambucus australis is such a wonderful way to expand your garden and share the beauty of this plant. Be patient with yourself and your cuttings. Nature has its own timetable, but with a little care and these tips, I have no doubt you’ll be successful. Enjoy the magic of growing something new!
Resource:
https://identify.plantnet.org/k-world-flora/species/Sambucus%20australis%20Cham.%20&%20Schltdl./data