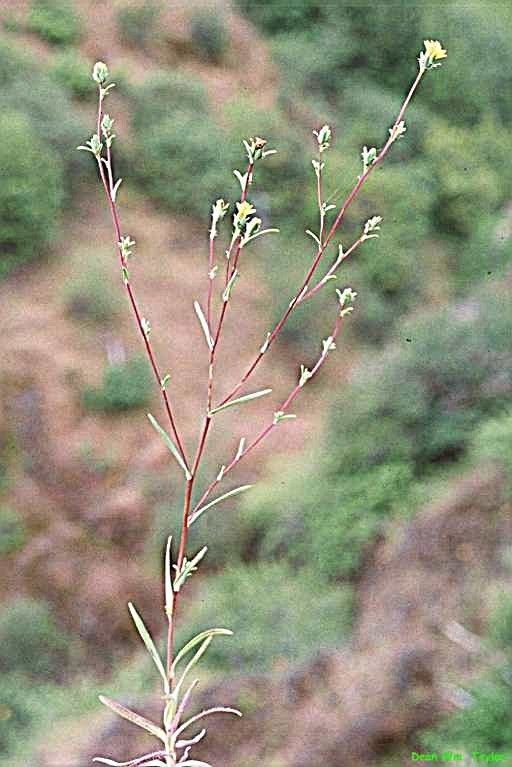
Hello fellow garden enthusiasts! If you’ve ever been captivated by the delicate charm of Lagophylla ramosissima, you’re in for a treat. This delightful plant, with its graceful, rambling stems and lovely little flowers, brings a touch of wild beauty to any space. And the great news? You can easily multiply that beauty for yourself! Propagating Lagophylla ramosissima is a wonderfully rewarding process, giving you more of this joy to share or enjoy more widely. For beginners, I’d say it’s moderately easy – with a little patience and the right approach, you’ll be successful.
The Best Time to Start
For the highest success rate, the sweet spot for propagating Lagophylla ramosissima is unmistakably late spring to early summer. This is when the plant is actively growing and has plenty of energy to put into developing new roots. You want to be snipping off pieces that are actively producing fresh, vibrant growth, not woody, old stems.
Supplies You’ll Need
Gathering your supplies beforehand makes the whole process so much smoother. Here’s what I always have on hand:
- Sharp, clean pruning shears or a razor blade: Essential for making clean cuts that heal well.
- Rooting hormone (optional but recommended): This can give your cuttings a vital boost.
- Small pots or seedling trays: For starting your new plants.
- Well-draining potting mix: A good blend of peat moss or coco coir, perlite, and a bit of compost works beautifully. You want it airy!
- Watering can with a fine rose: To water gently without disturbing your cuttings.
- Plastic bags or a propagation dome: To maintain humidity.
- Labels and a marker: You’ll thank yourself later!
Propagation Methods
Let’s get our hands dirty! Here are my go-to methods for multiplying Lagophylla ramosissima.
Stem Cuttings – My Favorite!
This is usually the most straightforward way to go.
- Take Your Cuttings: Select healthy, non-flowering stems. Look for stems that are somewhat firm but still flexible – not fully woody, but not brand-new, floppy growth either. Cut pieces about 4-6 inches long, just below a leaf node (where a leaf attaches to the stem).
- Prepare the Cuttings: Gently remove the lower leaves from the cutting, leaving just a few at the top. This prevents them from rotting when buried.
- Apply Rooting Hormone (If Using): Dip the cut end of the stem into your rooting hormone powder or gel. Tap off any excess.
- Pot Them Up: Fill your small pots with your prepared potting mix. Use your finger or a pencil to create a small hole in the center of each pot.
- Insert and Water: Place the cutting into the hole, ensuring the leaf nodes you exposed are below the soil line. Gently firm the soil around the stem. Water thoroughly until you see water drain from the bottom of the pot.
- Create a Humid Environment: Cover the pot with a clear plastic bag, securing it with a rubber band, or place it under a propagation dome. This keeps the humidity high, which is crucial for cuttings to root. Place in a bright spot out of direct sunlight.
Water Propagation – A Visual Treat
This method is wonderfully satisfying as you can watch the roots grow!
- Take Cuttings: Follow the same steps as for stem cuttings, focusing on healthy, 4-6 inch pieces with a few leaves at the top.
- Place in Water: Fill a clean jar or glass with room-temperature water. Submerge the bottom few inches of your cuttings, ensuring that no leaves will be below the water line.
- Change the Water Regularly: This is key! Change the water every 2-3 days to keep it fresh and prevent bacterial growth.
- Provide Light: Place the jar in a bright location, but again, avoid direct sun. Once you see sturdy roots forming (about an inch or two long), you can carefully pot them up into your well-draining soil mix.
The “Secret Sauce” (Pro Tips)
After years of fiddling and experimenting, here are a few things that have really made a difference for me:
- Don’t Let Leaves Touch the Water (in Water Propagation): This is a big one! Any leaves submerged in water are a prime spot for rot to set in. Pinch them off or ensure your setup keeps them high and dry. It’s a simple step that prevents a lot of disappointment.
- Bottom Heat is Your Friend: If you’re serious about propagation, consider a heating mat. Placing your pots on a gentle heat mat can significantly speed up the rooting process. It mimics the warmth of spring soil, giving those roots the perfect encouragement to grow.
- Watch for the Slightest Signs of Growth: Before you see roots emerging from the bottom of the pot, you might notice the cutting looking a bit perkier, or even a tiny new leaf unfurling at the tip. These are all good indicators that rooting is happening!
Aftercare & Troubleshooting
Once your cuttings have developed a good root system (you’ll see roots peeking out the bottom of the pot or feel resistance when you gently tug), it’s time for a little more involved care.
- Transitioning: Gradually acclimate your new plants to normal room humidity by opening the plastic bag a little more each day for a week before removing it completely.
- Watering: Water them well after transplanting, then allow the top inch of soil to dry out between waterings. They’re still delicate, so don’t overdo it.
- Light: Continue to keep them in bright, indirect light.
- Troubleshooting: The most common issue you’ll face is rot. This usually happens from too much moisture, poor drainage, or bacteria in the water. If a cutting turns mushy, black, or smells foul, sadly, it’s time to discard it and try again with fresh material and a cleaner approach. Yellowing leaves can indicate too much direct sun or not enough water, but start by checking the soil moisture first.
A Bit of Patience Goes a Long Way
Propagating plants is a lesson in patience and observation. Some cuttings will take off immediately, while others will seem to take their sweet time. Don’t get discouraged if your first few attempts aren’t perfect. Each try is a learning experience. Enjoy the process, marvel at the incredible ability of plants to reproduce, and soon you’ll have a whole new collection of Lagophylla ramosissima to brighten your home or gift to friends. Happy gardening!
Resource:
https://identify.plantnet.org/k-world-flora/species/Lagophylla%20ramosissima%20Nutt./data