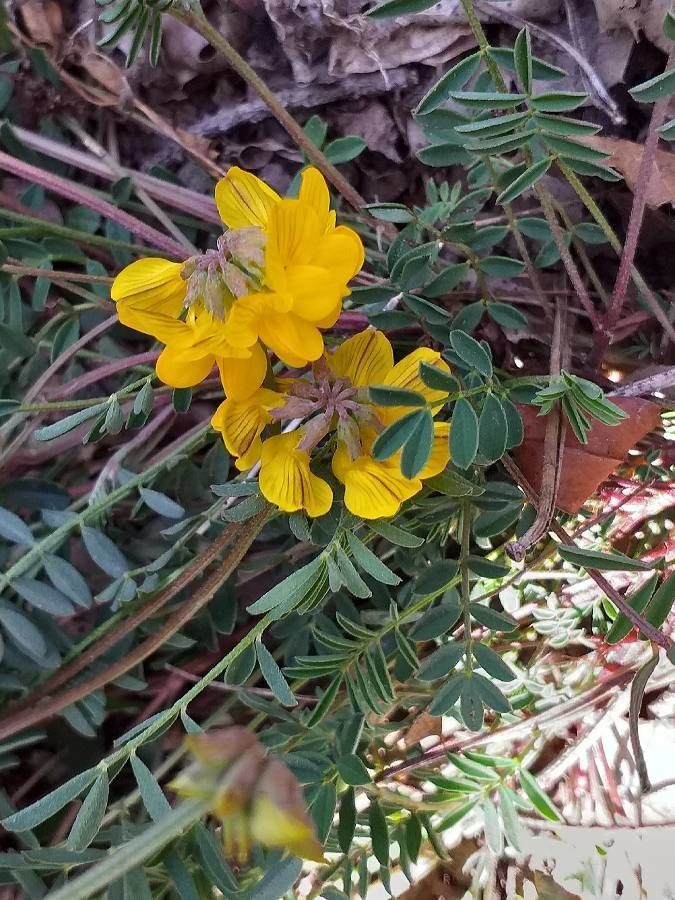
Hello lovely gardeners! I’m so glad you’ve stopped by for a chat. Today, we’re diving into the wonderful world of Hippocrepis comosa, also known as Horseshoe Vetch. This charming native plant is a real gem in any garden, offering delicate, pea-like yellow flowers that bring a lovely splash of sunshine. What’s more, it’s a champion for our pollinators!
One of the most satisfying parts of gardening, for me, is bringing more of these beauties into existence. Propagating Hippocrepis comosa is a fabulous way to expand your collection or share these cheerful blooms with friends. And I have good news for you: it’s a remarkably easy plant to propagate, even for those of you just dipping your toes into the world of perennials.
The Best Time to Start
For the highest success rate with Hippocrepis comosa, I always reach for my secateurs in late spring or early summer. This is when the plant is in active growth, and you can usually find plenty of young, vigorous stems that are perfect for taking cuttings. Aim for stems that have started to firm up a bit but aren’t yet woody.
Supplies You’ll Need
Before we get our hands dirty, let’s gather our trusty tools. You won’t need anything too fancy, just the basics:
- Sharp pruning shears or a clean knife: For making clean cuts.
- Rooting hormone (optional but recommended): A little boost can go a long way!
- Seedling trays or small pots: Clean ones are best to avoid disease.
- A good quality, well-draining potting mix: I like a blend of seed-starting mix and perlite for excellent aeration. About a 50/50 ratio works wonders.
- Watering can with a fine rose: For gentle watering.
- Plastic bags or a propagator with a lid: To create a humid environment for your cuttings.
Propagation Methods
There are a couple of ways to go about multiplying your Hippocrepis comosa, but my favorite and most reliable method is by stem cuttings.
Stem Cuttings:
- Select your cutting: Look for healthy, non-flowering shoots. You want pieces that are about 4-6 inches long.
- Make the cut: Using your sharp shears or knife, take a clean cut just below a leaf node (where a leaf attaches to the stem). This node is where the magic happens – it’s packed with the plant’s growth potential.
- Prepare the cutting: Gently remove the lower leaves from the bottom half of the stem. If there are any flowers or buds, snip them off too. This encourages the plant to focus its energy on root development, not flowering.
- Apply rooting hormone: If you’re using rooting hormone, dip the cut end of the stem into the powder or gel. Tap off any excess.
- Plant the cuttings: Fill your pots or trays with your prepared potting mix. Make a small hole with your finger or a pencil and insert the cut end of the stem. Gently firm the soil around the base of the cutting to ensure good contact.
- Water them in: Give your cuttings a gentle watering, making sure the soil is moist but not waterlogged.
- Create a humid environment: Cover the pots or trays with a plastic bag or place them in a propagator. This humidity is crucial for helping the cuttings take.
The “Secret Sauce” (Pro Tips)
Now, for a couple of little tricks I’ve picked up over the years that can really boost your success:
- Don’t let the leaves touch the water! If you opt for water propagation (though I find cuttings are more robust), make sure the leaves are well above the waterline. Any submerged foliage can rot and introduce disease to your cutting before it even has a chance to root.
- Bottom heat is your friend. While not strictly essential for Hippocrepis comosa, a little warmth from below can significantly speed up rooting. A heat mat, designed for seedlings, can be placed under your trays. It mimics the warmth of spring soil and encourages those roots to form faster.
Aftercare & Troubleshooting
Once your cuttings are planted, place them in a bright spot out of direct sunlight. Keep the soil consistently moist, but again, avoid soggy conditions. Roots usually start to form within 4-6 weeks. You can gently tug on a cutting to feel for resistance, or look for new leaf growth, which is a sure sign they’ve taken!
Once you see good root development, you can begin to gradually acclimatize them to less humid conditions by opening up the propagator or removing the plastic bag bit by bit. Small leaves starting to droop or turn yellow can sometimes be a sign of stress, but don’t panic! Often, a slight adjustment in watering or light can perk them right up. Rot is the main thing to watch out for – if you see mushy, brown stems, sadly, that cutting hasn’t made it. It’s usually a sign of too much moisture and poor air circulation.
A Word of Encouragement
Propagating plants is a journey, and like any good garden task, it requires a little patience. Don’t be disheartened if not every cutting thrives. Each attempt is a learning experience! Enjoy the process of nurturing these tiny new lives, and soon you’ll be rewarded with an abundance of cheerful Hippocrepis comosa to enjoy in your own garden or to share with fellow plant lovers. Happy propagating!
Resource:
https://identify.plantnet.org/k-world-flora/species/Hippocrepis%20comosa%20L./data