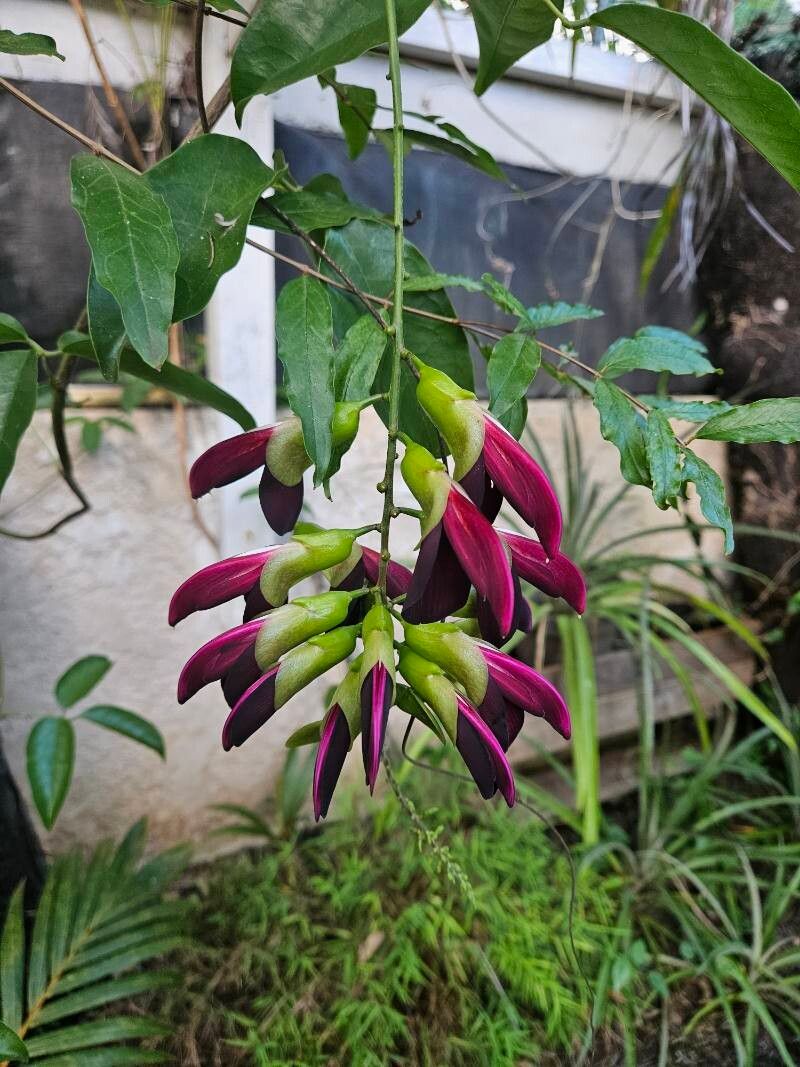
Hello fellow plant lovers! Today, we’re diving into the wonderful world of propagating Canavalia favieri. If you’re not familiar with this gem, imagine glossy, dark green leaves forming a lush carpet, often adorned with delicate, pea-like flowers. It’s a real showstopper in the garden, bringing a touch of the tropics right to your doorstep. The satisfaction of taking a piece of your beloved plant and coaxing it into a whole new life? It’s simply unparalleled, and I’m thrilled to guide you through it for Canavalia favieri. Good news for beginners: this one’s quite forgiving, making it a fantastic plant to get your propagation journey started with!
The Best Time to Start
Timing is everything in gardening, and for Canavalia favieri, the sweet spot is during its active growing season. Think late spring through early summer. The plant is brimming with energy then, making it much more receptive to taking root. You’ll also have the best luck if you select healthy, vigorous stems that aren’t flowering or fruiting – save those for admiring!
Supplies You’ll Need
Gathering your tools before you begin makes the whole process much smoother. Here’s what you’ll want to have on hand:
- Sharp, clean pruning shears or a sharp knife: Essential for making clean cuts.
- Small pots or propagation trays: About 4-6 inches in size.
- Well-draining potting mix: A good blend of peat moss, perlite, and a bit of compost works beautifully. You can also buy pre-made “propagation mix.”
- Rooting hormone (optional but recommended): Liquid or powder forms both work well.
- Plastic bags or a propagation dome: To create a humid environment.
- Watering can or spray bottle: For gentle watering.
Propagation Methods
Canavalia favieri is wonderfully amenable to propagation from stem cuttings. It’s my go-to method for this plant because it’s straightforward and yields great results.
- Select Your Cuttings: Look for healthy, mature stems that are at least 4-6 inches long. They should have several sets of leaves. Avoid any woody or very soft, new growth.
- Make the Cut: Using your sharp pruning shears or knife, make a clean cut just below a leaf node (where a leaf attaches to the stem). This is where new roots are most likely to form.
- Prepare the Cutting: Gently remove the lower leaves from the bottom half of the cutting. This prevents them from rotting in the soil. Leave 2-3 sets of leaves at the top.
- Apply Rooting Hormone (Optional): If you’re using rooting hormone, dip the cut end into the powder or liquid. Tap off any excess.
- Plant Your Cuttings: Fill your pots or trays with your prepared potting mix. Use your finger or a pencil to create a small hole in the center, then insert the cutting, making sure the nodes where you removed leaves are buried. Gently firm the soil around the cutting to ensure good contact.
- Water Gently: Water the potting mix thoroughly but gently, so you don’t dislodge the cuttings. A light misting is also a good idea.
The “Secret Sauce” (Pro Tips)
These are a few little tricks I’ve picked up over the years that can really boost your success rate:
- Bottom Heat is Your Friend: Canavalia favieri loves a bit of warmth to encourage roots. If you have a heat mat designed for plants, placing your pots on it can significantly speed up the rooting process. Don’t let it get too hot, though – just a gentle warmth.
- Humidity is Key, But Avoid Rot: While we want to keep the cuttings moist, directly submerging leaves in water can lead to rot. When you create that humid microclimate with your plastic bag or dome, make sure the leaves themselves aren’t touching the sides or the soil surface if possible. This air circulation is crucial.
- Be Patient with the Water Test: If you’re tempted to check for roots by gently tugging (don’t do this too often!), you’ll find that they can take their sweet time developing. Resist the urge to pull them up too early. Instead, look for signs of new growth, like tiny leaves emerging.
Aftercare & Troubleshooting
Once your cuttings have rooted (which can take anywhere from 3 to 8 weeks), it’s time for them to become independent!
- Gradual Acclimation: Slowly introduce your new plants to less humid conditions by gradually opening the plastic bag or lifting off the dome for longer periods over a week.
- Light and Water: Once they are acclimatized, they’ll need bright, indirect light and consistent moisture. Water when the top inch of soil feels dry to the touch.
- Troubleshooting: The most common issue you’ll encounter is rot, usually from overwatering or poor air circulation. If a cutting turns black and mushy, sadly, it’s likely beyond saving. On the flip side, a cutting that just refuses to root might be a sign that it didn’t get enough warmth or humidity, or it wasn’t the healthiest piece to begin with. Don’t be discouraged if a few don’t make it; it’s all part of learning!
So there you have it! Propagating Canavalia favieri is a rewarding and achievable goal. Remember to be patient with your little green babies – they’re working hard to establish themselves. Enjoy the process, celebrate each new root, and soon you’ll have even more of this beautiful plant to share or enjoy! Happy growing!
Resource:
https://identify.plantnet.org/k-world-flora/species/Canavalia%20favieri%20I.C.Nielsen/data