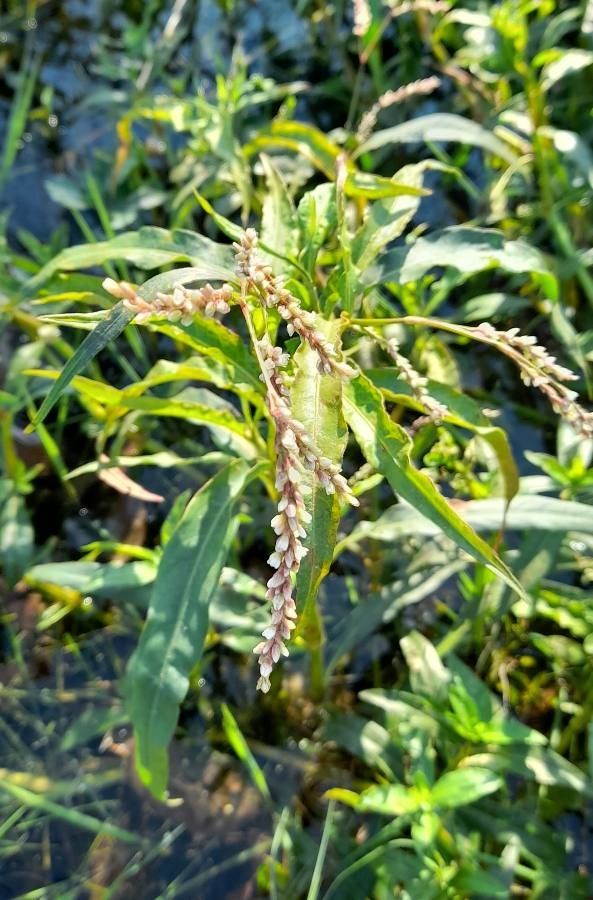
Ah, Persicaria hydropiperoides, also known as Water Pepper or, more poetically, Brook Mint. Isn’t she a beauty? I’ve always been drawn to her graceful, arching stems and those lovely spikes of delicate white flowers that appear in late summer. She brings such a lovely, naturalistic feel to any water feature or damp corner of the garden. And the best part? She’s remarkably easy to share! If you’ve ever admired your neighbor’s patch or simply want to fill out a space, propagating this lovely fellow is incredibly rewarding. For beginners, I’d say Persicaria hydropiperoides is a fantastic starting point for propagation. You’ll be surprised at how readily she takes!
The Best Time to Start
My absolute favorite time to get going with Persicaria hydropiperoides is in late spring to early summer. Once the danger of frost has passed and the plant is actively putting on new growth, you’ll find she’s most eager to root. Look for stems that are just starting to get a bit firm, not the super soft, floppy new shoots, but not the old, woody bits either. That sweet spot in the middle is where the magic happens.
Supplies You’ll Need
Gathering your tools beforehand makes the whole process so much smoother. Here’s what I usually have on hand:
- Clean, sharp pruning shears or a sharp knife: Crucial for making clean cuts that heal well.
- A good quality potting mix or propagation mix: Something that drains well is key. I often mix equal parts peat moss or coco coir with perlite or coarse sand.
- Small pots or propagation trays: Clean ones, please!
- Rooting hormone (optional but helpful): While Persicaria is often easy, a little dip in rooting hormone can speed things up.
- A spray bottle: For misting your cuttings.
- A plastic bag or clear lid: To create a humid environment.
- A small watering can: For gentle watering.
Propagation Methods
Persicaria hydropiperoides is wonderfully versatile, but for me, stem cuttings are the go-to.
Stem Cuttings
- Take your cuttings: Using your clean shears or knife, select a healthy stem and make a cut just below a leaf node – that’s where a leaf attaches to the stem. You want cuttings that are about 4-6 inches long. Remove the lower leaves, leaving just a couple at the very top.
- Prepare your cuttings: If you’re using rooting hormone, dip the cut end into the powder or gel. Tap off any excess.
- Plant your cuttings: Fill your small pots or trays with your well-draining potting mix. Make a small hole in the center with a pencil or your finger. Gently insert the cut end of your Persicaria cutting into the hole, ensuring the leaf nodes are below the surface of the soil. Firm the soil gently around the stem.
- Water them in: Give the soil a good, gentle watering. You want it moist, but not waterlogged.
- Create humidity: Cover the pots with a plastic bag or place them under a clear propagation lid. This traps moisture and keeps those cuttings from drying out. Place them in a bright spot, but out of direct sunlight.
Water Propagation (My Naughty Little Secret!)
Sometimes, I just can’t wait! For an even quicker success, I’ll pop cuttings straight into a jar of water. It’s almost foolproof.
- Prepare your cuttings: Just like for soil propagation, take 4-6 inch cuttings from healthy stems, removing the lower leaves.
- Place in water: Find a clean jar or glass and fill it with fresh water. Submerge the lower portion of the cuttings, making sure no more than one leaf is below the water line. Any leaves submerged will likely rot.
- Change the water regularly: Every few days, change out the water to keep it fresh. You’ll be amazed at how quickly you start to see little white root nubs forming.
- Plant them out: Once the roots are about an inch long, you can carefully transplant them into pots filled with your propagation mix.
The “Secret Sauce” (Pro Tips)
Here are a couple of little tricks I’ve picked up over the years that really make a difference:
- Bottom Heat is Your Friend: If you’re serious about speed, especially early in the season, popping your pots onto a heat mat designed for propagation can work wonders. It encourages root development from below without drying out the top.
- Don’t Be Afraid to Be Ruthless: Sometimes, the longer stems just aren’t as keen to root. If you have a cutting that’s looking a little sad or not developing roots after a few weeks, don’t hesitate to try again with fresh cuttings. It’s not a sign of failure, just a learning opportunity!
Aftercare & Troubleshooting
Once you see those little roots peeking out the bottom of your pots (or you’ve got a good inch of growth in water), it’s time to transition.
- Gradual Acclimation: If you’ve been using a humidity dome or plastic bag, start by removing it for short periods each day. Gradually increase the time until the young plants are used to ambient humidity.
- Watering: Keep the soil consistently moist, but not soggy. As they grow, you can start to water them like a mature plant, but always err on the side of slightly more watering for young ones.
- Light: Continue to provide bright, indirect light. As they get stronger, you can introduce them to more direct sun, but always do it gradually to prevent scorching.
The most common issue you’ll encounter is rot. This usually happens if the soil is too wet, there’s too little air circulation, or if leaves are sitting in water. You’ll see the stem turn mushy and black. If this happens, sadly, that cutting is a goner. Remove it immediately to prevent spread, and reassess your watering and humidity levels.
A Encouraging Closing
Propagating Persicaria hydropiperoides is a joy. It’s a process that connects you deeply with the rhythm of the garden. Be patient with yourself and with your new little plants. Watch them grow, celebrate every new root, and soon you’ll have a whole colony of these delightful plants to share. Happy propagating!
Resource: