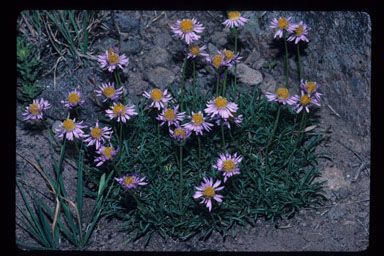
Oh, hello there! Grab a mug of your favorite brew, and let’s chat about one of my garden obsessions: Erigeron barbellulatus. If you’ve ever seen these delightful little daisies dotting a meadow or spilling over a rock garden, you know exactly why I’m so smitten. They bring such a cheerful, almost wild beauty to any space. And the best part? They are surprisingly easy to multiply! This isn’t a fussy plant that requires a degree in botany to propagate; it’s a fantastic choice for even the newest gardener looking to expand their collection.
The Best Time to Start
For Erigeron barbellulatus, I find the sweet spot is late spring to early summer. This is when the plant is actively growing and has a good amount of fresh, healthy stems to work with. Waiting until after the initial flush of spring blooms has passed also means you’re not sacrificing too much of its attractive flowering display. You can also have success with fall divisions, but spring cuttings tend to root with a bit more vigor.
Supplies You’ll Need
Before we get our hands dirty, let’s gather our tools:
- Sharp pruning shears or clean scissors: For making precise cuts.
- Rooting hormone powder or gel: This is optional but can give your cuttings a helpful boost.
- Light, well-draining potting mix: I like a blend of equal parts peat moss or coco coir and perlite or coarse sand.
- Small pots or seed trays: Make sure they have drainage holes!
- Watering can or misting bottle: For gentle watering.
- Plastic bags or a propagator: To create a humid environment.
- Labels and a permanent marker: To keep track of your plant babies!
Propagation Methods
Erigeron barbellulatus is a champ at busily spreading itself, and we can encourage that with a couple of simple methods.
Stem Cuttings: My Go-To
This is my preferred method because it’s so effective and allows you to create many new plants from just one.
- Select your stems: Look for healthy, non-flowering stems that are about 4-6 inches long. Gently bend a stem; if it snaps cleanly, it’s likely ready. If it just bends, wait for it to mature a bit more.
- Make the cut: Using your sharp pruning shears, make a clean cut just below a leaf node (where a leaf attaches to the stem).
- Prepare the cuttings: Strip off the lower leaves, leaving only the top 2-3 sets. This prevents them from rotting in the soil. If you’re using rooting hormone, dip the cut end into the powder or gel now.
- Plant your cuttings: Fill your small pots with the prepared potting mix. Make a smallish hole with your finger or a pencil and gently insert the cutting. Firm the soil around it.
- Water and cover: Water the soil gently until it’s moist but not soggy. Place the pots inside a plastic bag or propagator, creating a mini-greenhouse. This humidity is key to success!
Division: When Your Plant is Already a Clump
If your Erigeron is already looking a bit crowded in its pot or in the garden bed, it’s the perfect time to divide it.
- Gently lift the plant: Carefully dig around the base of the plant and lift the entire clump from the soil.
- Inspect the roots: Gently shake off excess soil to expose the root system. You’ll likely see distinct sections of the plant that are already separated by their root structure.
- Separate the divisions: Using your hands or a clean trowel, gently pull apart the plant into smaller sections. Each section should have a healthy root system and at least a few stems. If the roots are very tangled, you can use a clean knife or your shears to help separate them.
- Replant immediately: Give each division its own spot in a well-prepared garden bed or a pot with fresh potting mix. Water thoroughly.
The “Secret Sauce” (Pro Tips)
Here are a few little tricks I’ve picked up over the years that really help boost my success rates:
- Don’t let the leaves touch the water (in water propagation): While some plants root easily in water, Erigeron can get a bit soggy. If you try water propagation, make sure only the cut stem is submerged, not the leaves. They’ll rot right off.
- Bottom heat is your friend: If you can, place your pots on a heated propagator mat. This gentle warmth from below signals the plant to start producing roots much faster. It’s like a cozy little foot massage for your cuttings!
- Mist, mist, mist! Especially in those first few weeks, consistently keeping the leaves of your cuttings moist is crucial. A light misting a couple of times a day helps prevent them from drying out while they’re searching for roots.
Aftercare & Troubleshooting
Once you see new growth or feel a gentle tug when you lightly pull on a cutting, it’s a sign that roots have formed!
- Acclimatize: Gradually expose your new plants to open air by opening the plastic bag or propagator for longer periods over a week.
- Start feeding: Once they’re established, you can begin a very diluted liquid fertilizer.
- Watering: Water when the top inch of soil feels dry. It’s better to water deeply and less often than to keep the soil constantly wet.
The most common problem you’ll encounter is rot. This usually happens if the soil is too wet or the humidity is too high with poor air circulation. If you see leaves turning yellow and mushy, or the stem at the soil line looks dark and soft, it’s usually a sign of rot. Sadly, this means that cutting is likely lost, but don’t despair – just try again and adjust your watering or ventilation.
A Encouraging Closing
Propagating Erigeron barbellulatus is a truly satisfying way to fill your garden with these charming flowers. Be patient with your new plant babies, enjoy the process of nurturing them, and before you know it, you’ll have a whole patch of these delightful daisies to admire! Happy gardening!
Resource:
https://identify.plantnet.org/k-world-flora/species/Erigeron%20barbellulatus%20Greene/data