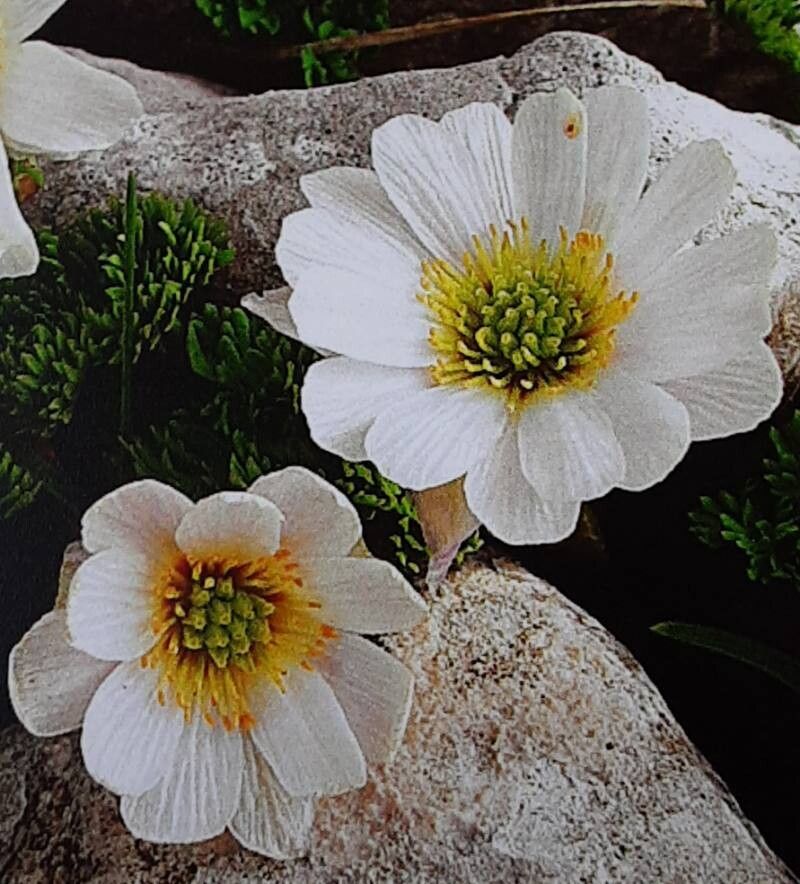
Hello fellow garden enthusiasts! Today, we’re diving into the delightful world of Callianthemum kernerianum, a truly charming little woodland plant. If you’re drawn to delicate, starry flowers that pepper the shady corners of your garden, you’re going to love this one. Propagating Callianthemum kernerianum might sound like a challenge, but I promise, with a little patience, you’ll be rewarded with beautiful new specimens to share or expand your own collection. It’s not exactly a beginner’s “throw it in the ground and forget it” plant, but it’s certainly achievable with the right approach.
The Best Time to Start
For Callianthemum kernerianum, the sweet spot for propagation is late spring to early summer. This is when the plant is actively growing and has plenty of energy to channel into developing new roots. Waiting until after it has finished flowering is also a good bet, as you won’t be sacrificing blooms for propagation efforts. Look for a young, healthy shoot that’s not yet woody.
Supplies You’ll Need
Gathering your tools beforehand makes the process so much smoother. Here’s what I usually have on hand:
- Sharp, clean pruning shears or a razor blade: For precise cuts.
- Rooting hormone (powder or gel): This is a great insurance policy, especially for trickier cuttings. I find a powder works well.
- Well-draining potting mix: A mix of equal parts peat moss, perlite, and a bit of compost is usually perfect. You can also use a dedicated seed-starting or propagation mix.
- Small pots or propagation trays: Clean ones are essential to prevent disease.
- Watering can with a fine rose or misting bottle: For gentle watering.
- Plastic bags or a propagation dome: To create a mini-greenhouse effect.
- Optional: Heating mat: For bottom heat, which can speed up root development.
Propagation Methods
While Callianthemum kernerianum can be grown from seed, division is often the most straightforward and successful method for home gardeners. Let’s focus on that.
Division
This is the most reliable way to propagate Callianthemum kernerianum.
- Prepare the parent plant: Gently water the parent plant thoroughly a day or two before you plan to divide it. This helps the root ball stay intact.
- Excavate carefully: Dig around the base of the plant, being careful not to damage the roots. Lift the entire clump out of the soil. You might need a trowel or even your hands to loosen it from the ground.
- Identify natural divisions: Look for sections of the plant that have their own set of roots and shoots. The root system is often quite fibrous.
- Gently pull or cut apart: You can often gently pull the clumps apart with your hands. If it’s a bit stubborn, use your clean pruning shears or a sharp knife to cut through the root ball. Aim for divisions that have at least two or three healthy shoots and a good portion of roots.
- Replant immediately: As soon as you have your divisions, plant them into prepared pots filled with your well-draining potting mix. Make sure the crown (where the leaves emerge from the roots) is at soil level.
- Water gently: Water each new division gently but thoroughly.
The “Secret Sauce” (Pro Tips)
Here are a few things I’ve learned over the years that make a real difference:
- Don’t overwater the divisions right away. While they need moisture, overly soggy soil is their enemy. Let the surface of the soil dry slightly between waterings. The goal is consistently moist, not wet.
- After planting your divisions, I find it incredibly helpful to cover them with a clear plastic bag or place the pots into a tray with a clear lid. This maintains humidity, which is crucial when the plant’s roots are still establishing and can’t absorb as much water. Just make sure there’s some airflow – poke a few holes if needed, or lift the lid daily for a few minutes.
- If you’re using a heating mat, place your pots on it for bottom heat. Callianthemum kernerianum really appreciates a little warmth to encourage root formation, especially if you’re propagating during a cooler spell.
Aftercare & Troubleshooting
Once your divisions are potted up, keep them in a cool, bright spot, but out of direct sunlight. The goal is to encourage root growth without stressing the leaves.
Watch out for signs of rot. This is usually the biggest culprit when things go wrong. If you see leaves turning yellow and mushy, or the base of the stem becoming soft and dark, it’s likely due to too much moisture. Lift the plant and check the roots. If they’re mushy and brown, try to carefully trim away any rotted parts and repot in fresh, drier soil. Ensure good air circulation.
Be patient! It can take several weeks, sometimes even a couple of months, for divisions to show signs of serious new growth, indicating they’ve established a good root system.
A Little Goes a Long Way
There you have it! Propagating Callianthemum kernerianum through division is a truly rewarding process. Don’t be discouraged if your first attempt isn’t perfect. Gardening is a journey of learning and observation. Enjoy the process, celebrate each tiny new leaf, and soon you’ll have a garden brimming with these sweet, starry blooms. Happy propagating!
Resource: