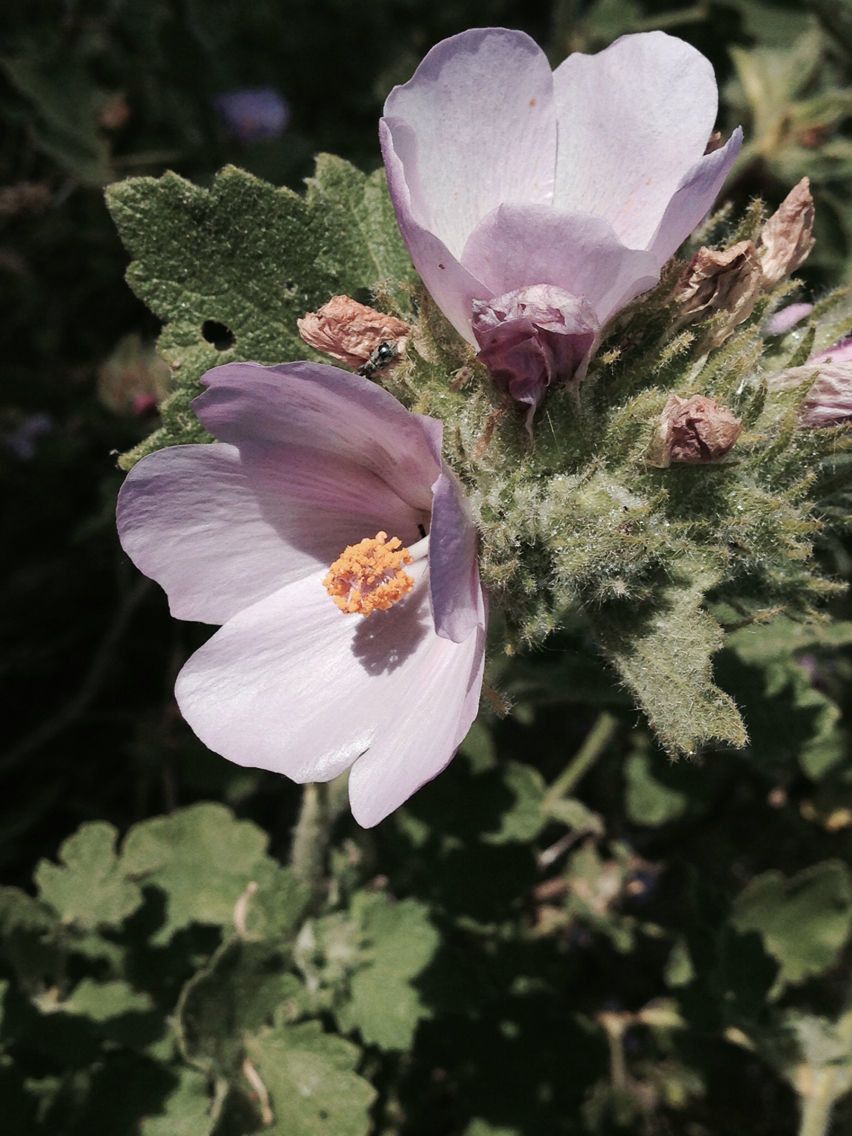
Hello fellow plant enthusiasts! Today, I want to chat about a California native that’s really captured my heart: Malacothamnus palmeri, or Palmer’s Bush Mallow. If you love plants that are tough, beautiful, and bring a splash of California sunshine into your garden, you’re going to adore this one. Its delicate, dusky-rose blooms are truly a sight to behold, especially when they flutter in a gentle breeze.
Propagating Malacothamnus palmeri is a fantastic way to share its beauty or simply expand your own collection. While it might not be the absolute easiest plant for a complete beginner, with a little care and attention, you’ll be successful. It’s a deeply rewarding process, watching a tiny piece of a plant transform into a new, thriving individual.
The Best Time to Start
For Palmer’s Bush Mallow, the sweet spot for propagation is generally late spring through early summer. This is when the plant is actively growing, and you’ll find plenty of good, healthy softwood or semi-hardwood stems to work with. Waiting until the plant has finished its main flush of growth means your cuttings will have the energy and vigor they need to establish roots.
Supplies You’ll Need
Here’s a little toolkit to get you started. Don’t worry, it’s nothing too fancy!
- Sharp Pruning Shears or a Knife: Clean cuts are crucial for preventing disease.
- Rooting Hormone: A powder or liquid will significantly increase your success rate.
- Well-Draining Potting Mix: I like to use a blend of equal parts perlite and coco coir or peat moss. A Cacti & Succulent mix works well too.
- Small Pots or a Propagation Tray: About 4-inch pots are perfect to start. Make sure they have drainage holes!
- Plastic Bag or Dome: This creates a humid environment for your cuttings.
- Watering Can with a Fine Rose: Gentle watering is key.
- Labels and a Marker: You’ll want to know what you planted and when!
Propagation Methods: Stem Cuttings
This is my go-to method for Malacothamnus palmeri because it’s so effective.
- Take Cuttings: In late spring or early summer, select healthy, current season’s growth. Look for stems that are supple but not floppy – they should snap cleanly when bent. Aim for cuttings that are about 4-6 inches long.
- Prepare Your Cuttings: Remove the lower leaves from the cutting, leaving just a few at the top. This prevents them from rotting in the soil. If you have very large leaves, you can even cut them in half horizontally to reduce water loss.
- Apply Rooting Hormone: Dip the cut end of each prepared cutting into your rooting hormone. Gently tap off any excess.
- Plant Your Cuttings: Fill your pots with your well-draining mix. Make a small hole in the center with your finger or a pencil, and gently insert the cutting. Firm the soil gently around the base to ensure good contact.
- Water Gently: Water your newly planted cuttings thoroughly but gently, allowing excess water to drain away.
- Create Humidity: Cover the pots loosely with a plastic bag or place them in a propagation tray with a dome. This traps moisture and keeps the cuttings from drying out.
The “Secret Sauce” (Pro Tips)
Here are a few little things I’ve learned that can make a big difference:
- Don’t Let the Leaves Touch the Soil: I can’t stress this enough! Any leaves that dip into the soil are prime candidates for rot. It’s better to have fewer leaves at the top than to risk losing the whole cutting to fungus.
- Consider Bottom Heat: If you have a propagation mat, placing your tray on it can be a game-changer. A little warmth from below encourages root development beautifully, especially if your house is a bit cool.
- Patience is a Virtue (and the Best Fertilizer): Malacothamnus can be a bit slow to root. Don’t despair if you don’t see signs of life immediately. Check gently for roots after 4-6 weeks by giving the cutting a very light tug. If there’s resistance, you’re on your way!
Aftercare & Troubleshooting
Once you start to see new growth peeking out from the top, or feel that gentle resistance when you test for roots, you’re in business!
- Acclimatize: Gradually remove the plastic bag or dome over a few days to help your new plants adjust to normal humidity.
- Watering: Continue to water when the top inch of soil feels dry. Avoid let them sit in soggy conditions, as this will encourage rot.
- Light: Provide bright, indirect light. Once they’re a bit more established, you can slowly introduce them to more direct sunlight, mimicking their natural habitat.
- Troubleshooting: The most common issue is rot. If your cutting turns mushy and black, it’s likely succumbed to fungal disease. This usually happens due to too much moisture and not enough drainage. If you see this, unfortunately, it’s best to discard the affected cutting and start fresh.
A Green-Thumbed Encouragement
Propagating Malacothamnus palmeri is a wonderful way to connect with nature and enjoy the magic of creating new life. Don’t be discouraged if your first attempt isn’t perfect. Every gardener has had their share of cuttings that didn’t make it. Just learn from it, adjust your approach, and try again. The joy of seeing those tiny roots form and a new plant unfurl its leaves is absolutely worth the effort. Happy propagating!
Resource: