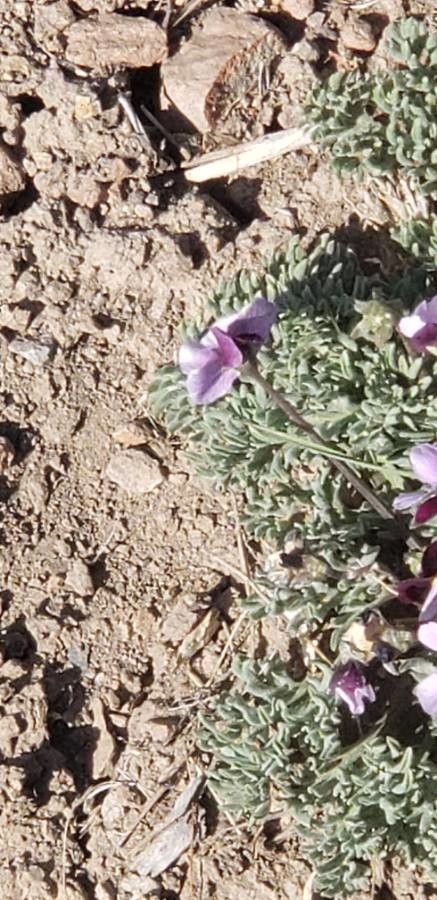
Hello, fellow garden lovers! It’s so nice to have you here. Today, we’re going to talk about a real gem: Viola beckwithii, also known as Beckwith’s Violet. If you love delicate, charming flowers that bring a splash of color to shaded spots, you’ll adore this little beauty. And the absolute best part? You can easily bring more of these darlings into your garden by propagating them yourself! It’s a deeply satisfying way to expand your plant collection and share the gardening joy. Now, honestly, Beckwith’s Violet is moderately easy to propagate, making it a lovely project for those who’ve dabbled a bit and are ready for a touch more challenge.
The Best Time to Start
For the highest success rate with Viola beckwithii, I find the late spring, just as the plant is finishing its main bloom and is in a strong growth phase, to be the prime time. You want to catch it when it’s full of vigor, ready to put its energy into making new roots. Early summer can also work, but avoid propagating when it’s extremely hot and dry, as this adds unnecessary stress to your cuttings.
Supplies You’ll Need
To get your Viola beckwithii propagation off to a great start, here’s what I always have on hand:
- Sharp pruning shears or a clean, sharp knife: For making clean cuts.
- Rooting hormone (optional but recommended): A powder or gel to encourage root development.
- A light, well-draining potting mix: I usually use a blend of peat moss or coco coir, perlite, and a touch of compost.
- Small pots or seedling trays: About 3-4 inches in diameter is perfect.
- A spray bottle: For keeping things consistently moist.
- Plastic bags or a clear dome: To create a humid environment.
- Labels and a permanent marker: To keep track of what’s what!
Propagation Methods
Beckwith’s Violet can be propagated very successfully using stem cuttings and, if your plant is mature, division.
Stem Cuttings
This is my go-to method for Viola beckwithii because it’s efficient and generally yields great results.
- Select your cuttings: Look for healthy, non-flowering shoots that are about 3-4 inches long. Gently bend one to see if it snaps cleanly – if it does, it’s ready.
- Make the cut: Using your sharp shears or knife, make a clean cut just below a leaf node. A leaf node is where a leaf grows from the stem.
- Prepare the cutting: If there are any leaves on the lower half of the stem, gently remove them. This prevents them from rotting when buried. You can leave the top 2-3 leaves, trimming them in half if they are very large to reduce water loss.
- Apply rooting hormone (optional): Dip the cut end of the stem into rooting hormone, tapping off any excess.
- Plant your cuttings: Fill your small pots with your well-draining mix. Make a small hole with a pencil or your finger, then insert about an inch of the cutting into the soil. Gently firm the soil around the stem.
- Water and cover: Water the soil lightly but thoroughly. Then, cover the pot with a clear plastic bag or a propagation dome. This creates a mini-greenhouse.
Division
If you have a mature, clump-forming Viola beckwithii, division is super simple!
- Dig up the plant: In the spring or fall, carefully dig up the entire plant.
- Separate the clumps: Gently tease apart the root ball into sections, making sure each section has healthy roots and at least one or two shoots. You can use your fingers or a clean trowel for this.
- Replant immediately: Plant the divisions back into the garden or into pots with fresh soil, watering them in well.
The “Secret Sauce” (Pro Tips)
Here are a few little tricks I’ve picked up over the years that can really boost your propagation success:
- Don’t let the leaves touch the water (or the soil surface unnecessarily): When you water your cuttings, make sure any remaining leaves aren’t sitting in puddles. If you’re misting, don’t oversaturate to the point where lower leaves are constantly wet. This is a fast track to rot.
- Bottom heat is your friend: While Viola beckwithii can root without it, placing your pots on a gentle seedling heat mat can significantly speed up root development. It mimics the warmth of spring soil.
- Fresh is best: Try to get your cuttings into the soil as soon as possible after taking them. Don’t leave them sitting around for too long, as they’ll start to dehydrate.
Aftercare & Troubleshooting
Once your cuttings are planted, the key is to keep the soil consistently moist but not waterlogged. Mist them regularly, especially if you don’t have a dome. You’ll know they’re rooting when you see new leaf growth and feel a slight resistance when you gently tug on the stem. This usually takes 3-6 weeks.
The most common issue you’ll encounter is rot, which shows up as blackened, mushy stems. This is usually due to overwatering or poor air circulation. If you see rot, try to remove the affected cutting immediately and ensure better drainage and air flow for the others. Another sign of failure is wilting that doesn’t perk up after watering – this often means the cutting simply didn’t root and has dried out. Don’t be discouraged!
A Encouraging Closing
Propagating Viola beckwithii is such a rewarding endeavor. It’s a wonderful way to deepen your connection with your garden and watch new life emerge from a simple stem. Be patient with the process, trust your instincts, and celebrate every success, no matter how small. Happy gardening!
Resource:
https://identify.plantnet.org/k-world-flora/species/Viola%20beckwithii%20Torr.%20&%20A.Gray/data