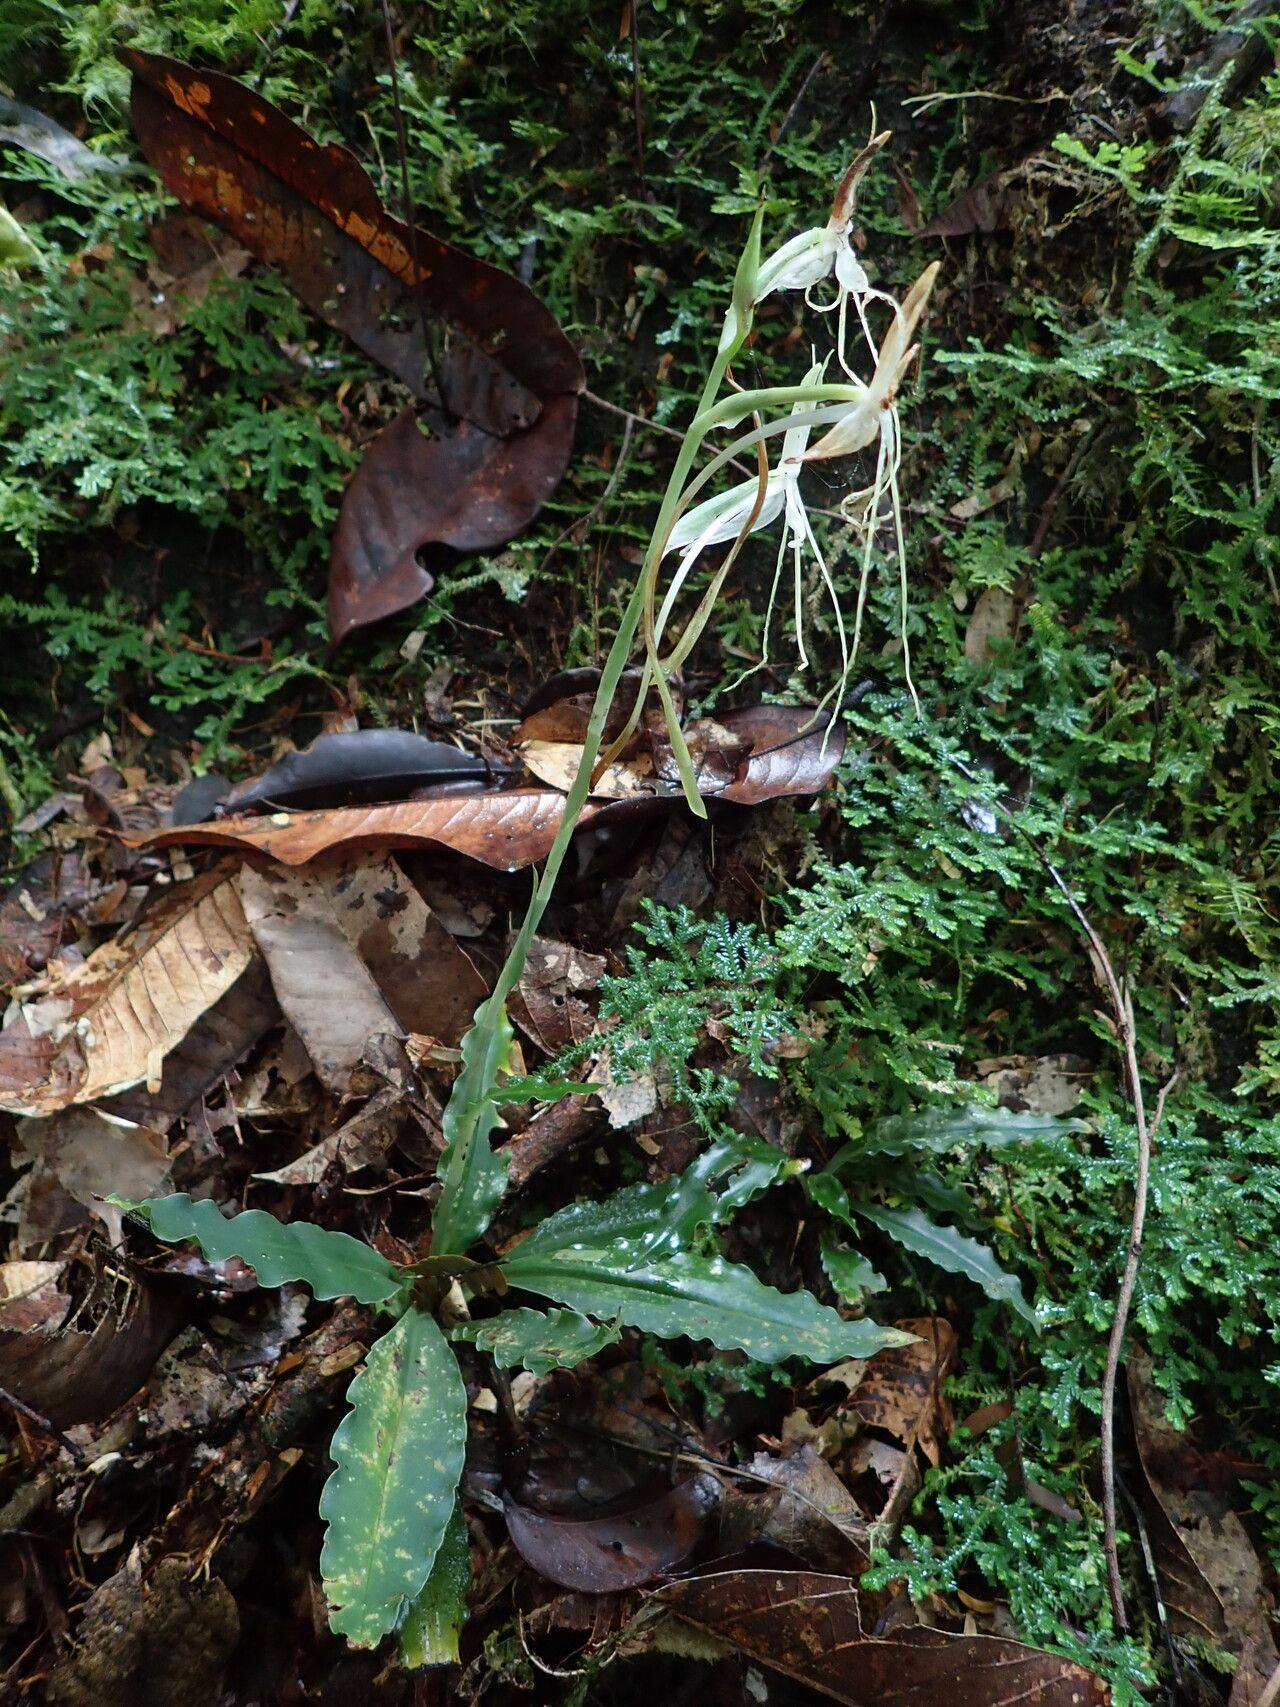
Hello fellow plant lovers! Today, we’re diving into a truly special topic: propagating Habenaria macrandra. If you’ve ever seen this exquisite orchid, you know its delicate beauty. Those ethereal blooms, often in shades of pure white or soft pastels, are a sight to behold. Growing new ones from the parent plant feels like unlocking a little bit of botanical magic. While Habenaria macrandra isn’t exactly a beginner’s “chuck it in the ground and forget it” plant, propagating it is absolutely achievable with a little care and understanding. It’s a rewarding journey, so let’s get started!
The Best Time to Start
For Habenaria macrandra, the absolute best time to think about propagation is during its active growing season. This is typically after the plant has bloomed and is pushing out new growth, usually in late spring or early summer. You’ll see new shoots emerging from the base, or perhaps even new tubers forming. This is when the plant has the most energy and resources to dedicate to creating new life. Trying to propagate during its dormant period is like asking someone to run a marathon after a feast – they just won’t have the pep!
Supplies You’ll Need
Before we get our hands dirty, let’s make sure we have everything ready. Having your supplies organized beforehand makes the whole process smoother.
- Sharp, sterile pruning shears or a clean knife: For making precise cuts.
- A well-draining potting mix: I personally love a mix of orchid bark, perlite, and a little bit of peat moss. You want something that allows for plenty of air circulation and doesn’t hold too much moisture.
- Small pots or trays: Clean, with drainage holes, of course!
- Rooting hormone (optional but recommended): Especially if you’re working with specific sections. Look for powdered or liquid forms.
- Water spray bottle: For providing gentle humidity.
- Labels: To keep track of what you’ve done and when.
- Gloves (optional): If you prefer to keep your hands clean!
Propagation Methods
Habenaria macrandra is primarily propagated through division, which is my favorite and most successful method. This plant forms tubers, and these tubers can be gently separated to create new individuals.
Division
This is really the star of the show for Habenaria macrandra.
- Wait for the right moment: As mentioned, active growth is key. You’ll want to do this when the plant is not in bloom and showing signs of new life.
- Gently remove from the pot: Carefully slide the plant and its root ball out of its current container. If it’s stuck, a gentle tap on the pot or a bit of loosening around the edges should do the trick.
- Inspect the tubers: Gently tease away some of the old potting mix to get a good look at the tuber system. You’re looking for distinct, healthy tubers that are attached to the main plant, but can be cleanly separated. Sometimes they grow off in their own little clusters.
- Make the cut: Using your sterile pruning shears or knife, carefully cut between the tubers. You want each new division to have at least one healthy tuber and some attached roots. Don’t be afraid to make the cut; the plant is tough! If there are any damaged or mushy parts, trim those away.
- Pot them up: Take your new divisions and plant them in their own small pots, using your well-draining potting mix. Bury the tuber just barely under the surface of the mix, or let it sit right on top with roots going down. Lightly water them in.
The “Secret Sauce” (Pro Tips)
Over the years, I’ve learned a few little tricks that have really made a difference.
- Let cut surfaces “heal”: After division, I like to let the cut ends of the tubers and any exposed roots air dry for a few hours, or even overnight, in a shady spot before repotting. This helps prevent rot by allowing a callus to form.
- Patience with watering: When you first pot up your divisions, be very conservative with watering. You want the potting mix to be barely moist, not wet. Overwatering at this stage is the quickest way to lose your new plant. I often let mine sit for a day or two before the first light watering.
- A touch of warmth is golden: Habenaria macrandra loves a bit of warmth to encourage root development. Placing your newly potted divisions on a propagation mat or in a warm spot in your greenhouse or home can significantly speed up the rooting process. Aim for around 70-75°F (21-24°C).
Aftercare & Troubleshooting
Once your divisions are potted, the next phase is all about encouraging them to root and grow.
- Keep them just moist: Continue to water sparingly. The goal is to keep the potting mix slightly damp, not soggy. You can use your spray bottle to lightly mist the surface if it looks too dry.
- Provide bright, indirect light: Place your new plants in a location that receives plenty of bright, indirect sunlight. Avoid harsh, direct sun, which can scorch delicate new growth.
- Watch for rot: The most common sign of trouble is rot. If you see any mushy, brown, or black sections on your tubers or new shoots, it’s usually a sign of too much moisture. If you catch it early, you might be able to salvage the plant by cutting away the rotted parts and letting the healthy bit dry out completely before repotting in fresh, dry mix.
- Signs of success: The best indicator that your propagation is taking is when you see new shoots emerging from the tubers, or when the roots start to fill the pot. This can take anywhere from a few weeks to a couple of months, so don’t lose hope!
A Encouraging Closing
Propagating Habenaria macrandra is a beautiful process that connects you more deeply with these amazing plants. It takes a little observation, a gentle touch, and a healthy dose of patience. Don’t be discouraged if your first attempt isn’t perfect; every gardener has had their share of plant casualties. Just remember to enjoy the journey, learn from each step, and celebrate every tiny new shoot that appears. Happy propagating!
Resource:
https://identify.plantnet.org/k-world-flora/species/Habenaria%20macrandra%20Lindl./data