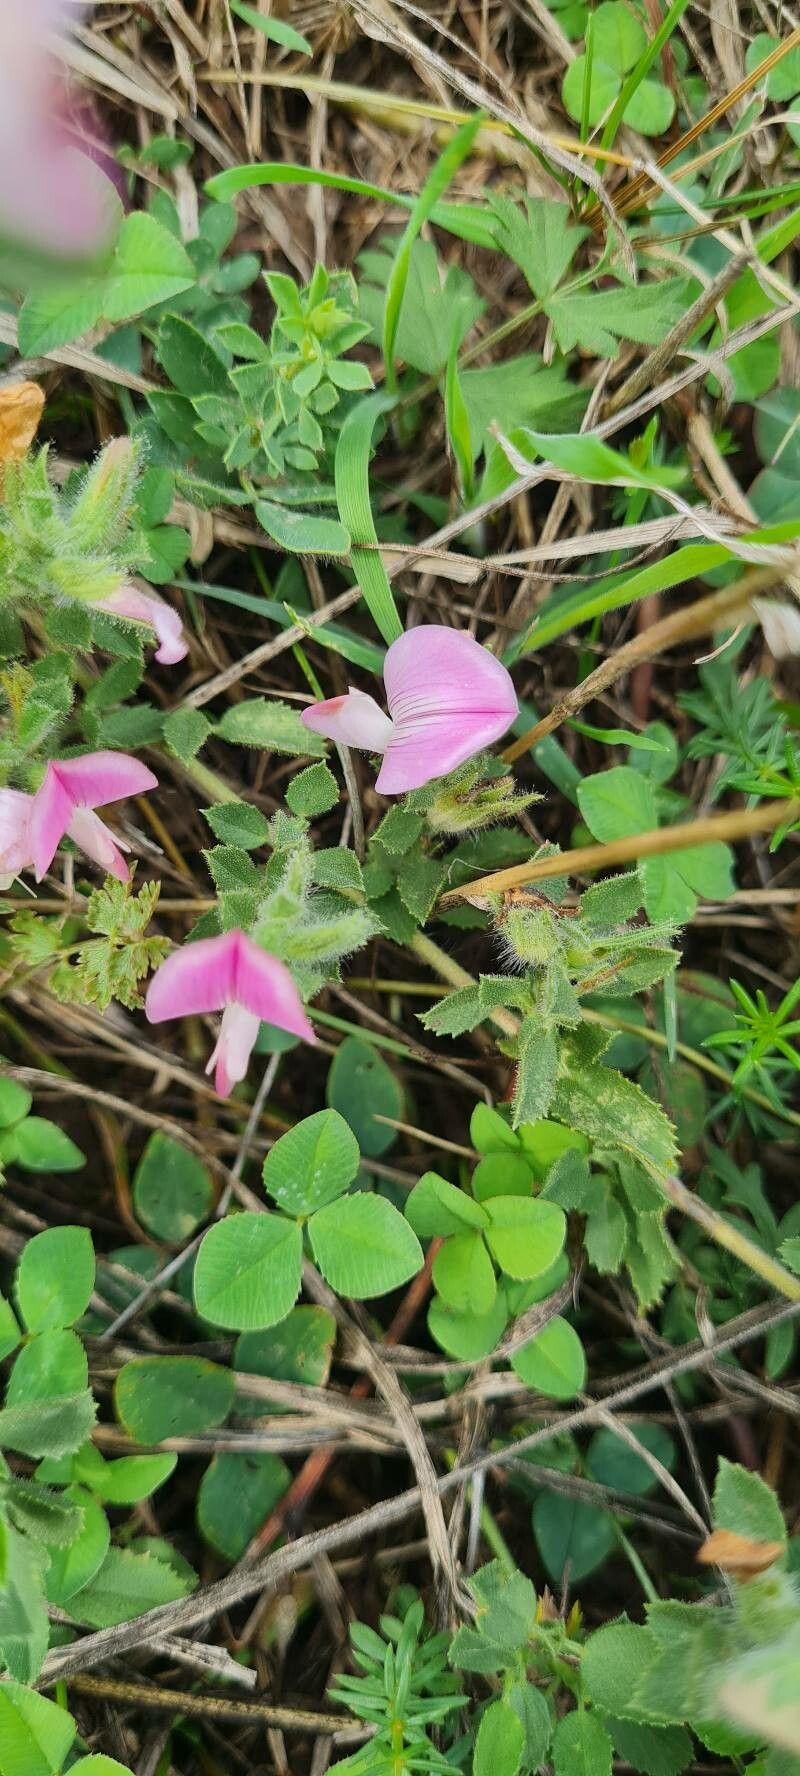
Oh, hello there! I’m so glad you’ve fallen for Ononis pendula, or as it’s often affectionately called, the hanging restharrow. Its delicate, airy blooms and trailing habit are just pure magic, aren’t they? Bringing more of this beauty into your garden, or perhaps sharing it with friends, is a truly rewarding endeavor. And the good news? While it might have a bit of a reputation, I’ve found that with a few key pointers, propagating Ononis pendula can be quite accessible, even for those newer to the plant parent game. Let’s get our hands dirty!
The Best Time to Start
For the highest success rates with Ononis pendula, I find late spring to early summer is your golden window. This is when the plant is in its active growth phase, producing plenty of energy for rooting. You’re looking for stems that are “semi-ripe” – not so soft and floppy that they wilt easily, but not woody and old either. Think of them as having a bit of give but holding their shape.
Supplies You’ll Need
Gathering your tools beforehand will make the whole process so much smoother. Here’s what I always have on hand:
- Sharp pruning shears or a clean, sharp knife: Essential for making clean cuts.
- A good quality rooting hormone powder or gel: This is like a little boost of confidence for your cuttings.
- Propagating pots or a seed tray with good drainage: Small pots are perfect for individual cuttings.
- A light, well-draining potting mix: I often use a 50/50 mix of perlite and seed-starting compost. You could also use a gritty mix specifically designed for cuttings.
- A plastic bag or propagator lid: This helps maintain humidity around your cuttings.
- Optional: A heat mat: This can significantly speed up rooting, especially if your house is on the cooler side.
Propagation Methods
The most reliable way I’ve found to propagate Ononis pendula is through stem cuttings. It’s straightforward and yields great results.
- Take Your Cuttings: In late spring or early summer, select healthy, non-flowering shoots. Using your sharp pruning shears, cut lengths of about 4-6 inches. Make the cut just below a leaf node (where the leaves attach to the stem).
- Prepare the Cuttings: Gently strip off the lower leaves from the bottom half of each cutting. You want to expose at least one or two leaf nodes below the soil line; this is where the roots will emerge. If your cuttings have flowers or flower buds, it’s best to pinch them off as they drain precious energy from root development.
- Apply Rooting Hormone: Dip the cut end of each stem into your chosen rooting hormone, tapping off any excess. This little step really does make a difference!
- Potting Up: Fill your pots or seed tray with your prepared potting mix. Make a small hole in the center of the mix with a pencil or your finger.
- Insert the Cuttings: Place the prepared end of each cutting into the hole, ensuring at least one or two leaf nodes are buried. Firm the compost gently around the stem to anchor it.
- Water Gently: Water thoroughly but gently, making sure the compost is evenly moist.
- Create a Humid Environment: Place a clear plastic bag over the pot or close the lid of your propagator. This traps moisture and creates the humid environment your cuttings need to thrive without drying out. Pop it in a bright spot, but avoid direct, scorching sunlight, which can cook your tender cuttings.
The “Secret Sauce” (Pro Tips)
Here are a few tricks I’ve picked up over the years that can give you an extra edge:
- Don’t overcrowd: I know it’s tempting to fill every pot, but give your cuttings a bit of breathing room. This improves air circulation and reduces the risk of fungal diseases. A good rule of thumb is to leave at least an inch or two between each cutting.
- Bottom heat is your friend: If you have the space, popping your tray onto a gentle heat mat can really speed up the rooting process. Ononis pendula loves a bit of warmth from below, mimicking the conditions of early summer. You’ll see roots developing much faster.
- Give them a gentle tug: Once you think your cuttings might have rooted (usually after 4-6 weeks), give a very gentle tug on a stem. If you feel a slight resistance, congratulations – you have roots! If it pulls out easily, it’s not ready or hasn’t taken.
Aftercare & Troubleshooting
Once your cuttings have developed a good root system, you’ll notice fresh, new growth appearing at the top. This is a fantastic sign!
- Acclimatize them: Gradually remove the plastic bag or open the propagator lid a little each day over a week. This allows them to adjust to the ambient humidity.
- Potting On: Once they’re ready, carefully pot them into their own small pots using a good quality, free-draining compost.
- Watering: Keep them consistently moist but not waterlogged. If you see leaves wilting, it usually means they need a drink.
- Common Problems: The biggest culprit for failure is rot. This usually happens from overwatering or poor air circulation. If a cutting turns mushy and black, sadly, it’s past saving. Don’t despair, just try again! Another sign of trouble is if the leaves start to yellow and drop excessively without any sign of rooting. This can indicate they’re drying out or are getting too much direct sun.
A Warm Farewell
Propagating plants is such a beautiful way to connect with nature, and each success feels like a small victory. Be patient with your Ononis pendula cuttings – they have their own timeline. Enjoy the process, learn from each attempt, and before you know it, you’ll be surrounded by even more of these lovely hanging blooms. Happy gardening!
Resource:
https://identify.plantnet.org/k-world-flora/species/Ononis%20pendula%20Desf./data