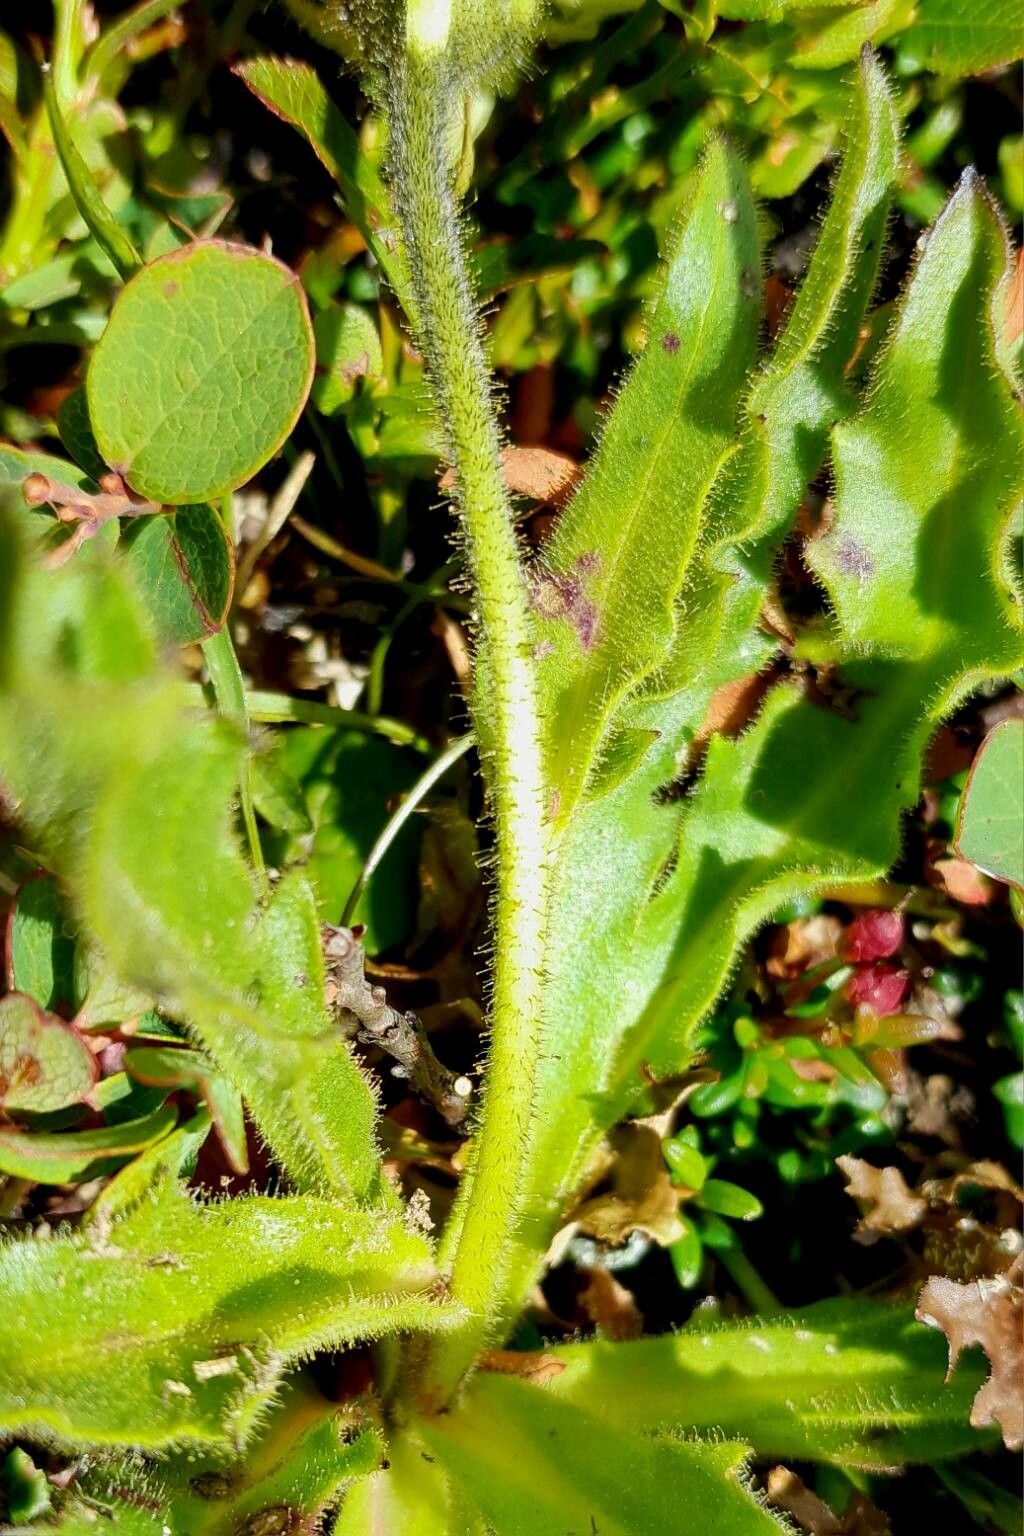
Hello there, fellow garden enthusiasts! You know, I’m always on the lookout for those special plants that truly sing in the garden, and Schlagintweitia intybacea is one of them. Its delicate, often blue-tinged foliage and charming little flower spikes bring a touch of wild beauty that’s just irresistible. Propagating it feels like unlocking a little bit of garden magic, and it’s a wonderful way to share its loveliness with friends or simply fill your own space with more of it. For those just dipping their toes into the world of propagation, I’d say Schlagintweitia intybacea is moderately easy. A little care goes a long way, and I’m here to walk you through it.
The Best Time to Start
The sweet spot for propagating Schlagintweitia intybacea is generally late spring to early summer. This is when the plant is in active growth after the chill of winter has passed, and new, vigorous shoots are emerging. Starting around this time gives your new cuttings plenty of time to root and establish before the cooler autumn weather arrives.
Supplies You’ll Need
Here’s what you’ll want to have on hand for a successful propagation session:
- Sharp, clean pruning shears or a sharp knife: For taking clean cuts.
- Rooting hormone (optional but recommended for stem cuttings): Look for one specifically for stem cuttings.
- A well-draining potting mix: I like a blend of equal parts peat moss or coco coir, perlite, and a bit of compost.
- Small pots or containers: With drainage holes, of course!
- A mister or spray bottle: For keeping things humid.
- A plastic bag or propagation dome: To create a mini greenhouse effect.
- Labels and a marker: To keep track of what you’ve planted.
Propagation Methods
While Schlagintweitia intybacea can also be divided, I find stem cuttings to be a very reliable and effective method for increasing your plant stock.
-
Taking the Cuttings: On a cool, overcast morning is best, gently select a healthy, non-flowering stem. Look for new growth that’s about 4-6 inches long and still a little flexible, not woody and hard. Using your clean shears or knife, make a clean cut just below a leaf node (where a leaf attaches to the stem). Remove the leaves from the lower half of the cutting, leaving just two or three at the very top.
-
Applying Rooting Hormone (Optional): If you’re using rooting hormone, dip the cut end of the stem into the powder or gel, tapping off any excess. This can give your cutting a little boost in forming roots.
-
Planting the Cuttings: Fill your small pots with your prepared potting mix. Make a hole in the center with your finger or a pencil. Gently insert the prepared cutting into the hole, ensuring the leaf nodes you removed are below the soil surface. Firm the soil gently around the base of the cutting.
-
Creating a Humid Environment: Water the soil lightly. Then, carefully place the pot into a clear plastic bag and seal it, or cover it with a propagation dome. This traps humidity, which is crucial for preventing the cuttings from drying out while they develop roots.
The “Secret Sauce” (Pro Tips)
Now, for a couple of things I’ve learned over the years that can really make a difference:
- Bottom Heat is Your Friend: If you have the option, placing your pots on a gentle heating mat can significantly speed up root formation. Schlagintweitia intybacea loves a bit of warmth from below to encourage root development. Just make sure the heat isn’t too intense; think cozy, not scorching!
- Air Circulation is Key: While you want to maintain humidity, don’t let those cuttings sit in stagnant, overly wet air for too long. Once a week, even if briefly, lift the plastic bag or open the dome to allow for a bit of air exchange. This helps prevent fungal issues that love damp, closed environments.
Aftercare & Troubleshooting
Once your cuttings have started to show signs of rooting – you might see new leaf growth or feel a gentle tug when you carefully try to lift them – it’s time to slowly acclimate them to the outside world. Gradually reduce the humidity by opening the bag or dome a little more each day over a week. Continue to water when the top inch of soil feels dry, but avoid letting them sit in soggy conditions.
The most common issue you might encounter is rot, which usually happens due to overwatering or poor drainage. If you see a cutting turning black or mushy, unfortunately, it’s likely too late. Don’t be discouraged! Just remove the affected cutting and assess your watering practices. Sometimes, a cutting just doesn’t take; it’s part of the gardening process.
A Encouraging Closing
Growing new plants from cuttings is such a deeply satisfying experience. It connects you to the natural cycle of things and allows you to multiply the beauty in your garden. Be patient with your Schlagintweitia intybacea cuttings. Some will be faster than others, and not every single one will make it, but the success you do have will be all the sweeter for it. Happy propagating!
Resource:
https://identify.plantnet.org/k-world-flora/species/Schlagintweitia%20intybacea%20Griseb./data