Oh, hello there! Pull up a chair and let’s dive into a little gardening chat. Today, we’re talking about Leucothoe davisiae, or as I affectionately call her, the mountain laurel relative.
Why Grow Leucothoe davisiae?
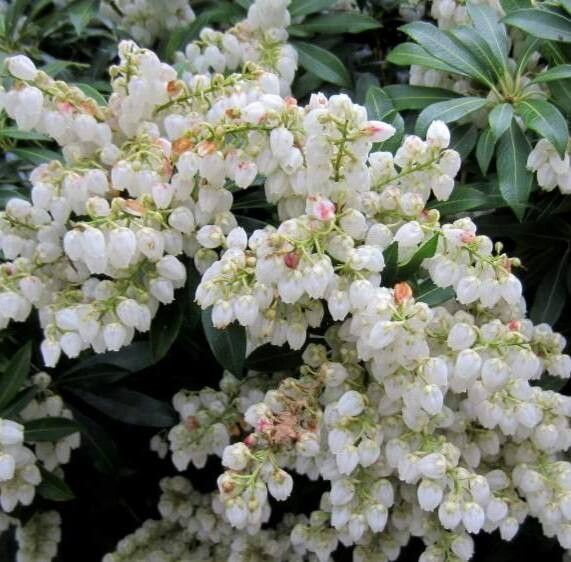
This evergreen beauty is a real gem, especially if you love a woodland feel. Her glossy, deep green leaves are stunning year-round, and in the spring, she offers delicate clusters of tiny, urn-shaped white flowers that remind me of little bells. She adds such lovely texture to shady corners of the garden.
Now, about propagating her? I find it quite rewarding. It’s like watching little miracles unfurl. For beginners, I’d say this one falls into the “moderately easy” category. With a bit of patience and the right approach, you’ll have new plants in no time.
When to Get Your Hands Dirty
The sweet spot for propagating Leucothoe davisiae is late spring to early summer. This is when the new growth, called softwood, is still flexible and hasn’t fully hardened. Trying it later in the season, when the stems are woody, can be a bit tougher. You want that lively, pliable material!
What You’ll Need for Success
Here’s a quick rundown of what I always have on hand:
- Sharp Pruning Shears or a Craft Knife: For clean cuts.
- Rooting Hormone: A powder or gel works great.
- Small Pots or Trays: With drainage holes, of course!
- Propagation Mix: I like a blend of perlite and peat moss or coco coir. It needs to be well-draining. You can buy a specific propagation mix or make your own!
- Plastic Bags or Domes: To create a humid environment.
- Patience! That’s the most crucial ingredient.
Let’s Propagate: Stem Cuttings
This is my go-to method for Leucothoe davisiae. It’s reliable and gives you a good chance of success.
- Select Your Cuttings: Look for healthy, non-flowering stems from your mature plant. You want pieces that are about 4-6 inches long. Gently bend a stem; if it snaps cleanly, it’s good softwood. If it just bends limply, it’s probably too soft.
- Prepare the Cuttings: Carefully remove the leaves from the bottom two-thirds of the cutting. This prevents them from rotting when buried and encourages root development. You can leave a few leaves at the very top to help with photosynthesis.
- Dip in Rooting Hormone: Moisten the cut end of the stem with a little water, then dip it into the rooting hormone, tapping off any excess.
- Plant Your Cuttings: Make a small hole in your propagation mix with a pencil or your finger. Insert the cutting, ensuring the nodes (where leaves were) are below the soil surface. Gently firm the soil around it.
- Water Gently: Water the pots thoroughly but gently, so you don’t dislodge the cuttings.
- Create Humidity: Cover the pots with a plastic bag or propagator lid. This traps moisture and keeps the leaves from drying out. Make sure the leaves don’t touch the plastic if possible – you can use stakes to prop it up.
- Light and Warmth: Place the pots in a bright spot out of direct sunlight.
My “Secret Sauce” for Leucothoe
Here are a couple of things I’ve learned over the years that really boost my success rates:
- Bottom Heat is Your Friend: If you have the option, placing your pots on a heat mat can make a world of difference. It encourages root development from below, speeding things up considerably. Think of it as giving the roots a warm hug to get them started!
- Don’t Overwater, But Keep it Consistently Moist: This is a delicate balance. The soil should feel like a wrung-out sponge – moist, but not soggy. Check the moisture level by gently pressing the soil. If it feels dry, give it a light watering. Overwatering is a fast track to rot, which is the enemy of happy cuttings.
Aftercare and What to Watch For
Once your cuttings have established roots – which can take anywhere from 4 to 8 weeks, or sometimes longer – you’ll start to see new growth appearing at the top. You can gently tug on a cutting; if there’s resistance, you’ve got roots!
At this point, you can gradually acclimate your new plants to normal humidity by opening the plastic bag or lid a little more each day for a week. Once they’re used to it, they’re ready to be moved into slightly larger individual pots with a good quality potting mix. Continue to keep them in bright, indirect light and water when the top inch of soil feels dry.
If you see your cuttings turning yellow and mushy, or developing black spots, that’s generally a sign of rot. This is usually due to too much moisture and poor air circulation. Unfortunately, rotten cuttings are usually beyond saving. That’s where patience comes in – not every cutting will make it, and that’s perfectly okay! Just try again.
Happy Rooting!
So there you have it! Propagating Leucothoe davisiae is a wonderful way to expand your collection or share these lovely plants with friends. Don’t be discouraged if your first attempt isn’t perfect. Gardening is a journey, and every plant you grow from a cutting teaches you something new. Be patient, enjoy the process, and happy propagating!
Resource:
https://identify.plantnet.org/k-world-flora/species/Leucothoe%20davisiae%20Torr./data